SQL Server Management Studio (SSMS)
Nội Dung Chính
SQL Server Management Studio (SSMS)
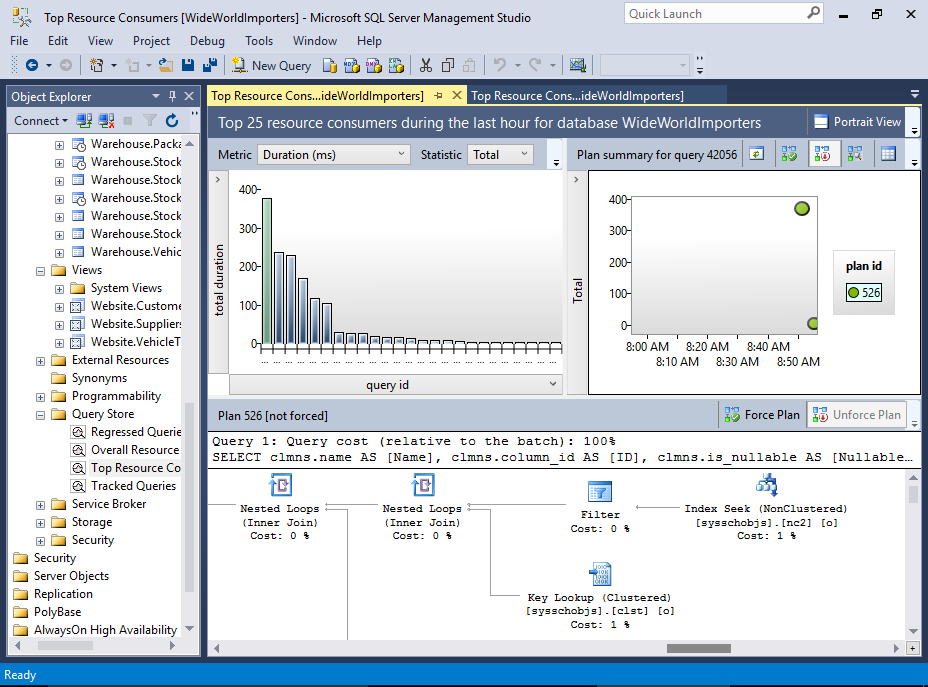
SQL Server Management Studio is the main administration console for SQL Server. It allows you to create and administer databases, security, replication, backups, and more.
There are many ways to connect to SQL Server. The method you use will depend on your environment, and where you’re connecting from. For example, you can connect via a web application, an online admin tool, via a command line utility, or via SQL Server Management Studio.
SQL Server Management Studio (SSMS) is a graphical admin tool that allows you to perform all sorts of tasks with SQL Server. You can create and manage databases, create user accounts, configure advanced security options, schedule regular backups, and more.
SSMS also provides Transact-SQL, MDX, DMX, and XML language editors for editing and debugging scripts.
Getting Started with SQL Server Management Studio
Despite the many steps involved in installing SQL Server, none of those steps involved installing SQL Server Management Studio.
In earlier versions of SQL Server, you could select SQL Server Management Studio (SSMS) as an option in the installation wizard, but this is not the case with SQL Server 2016. So we must install SSMS separately.
Here’s how to get started with SSMS.
-
Install SSMS
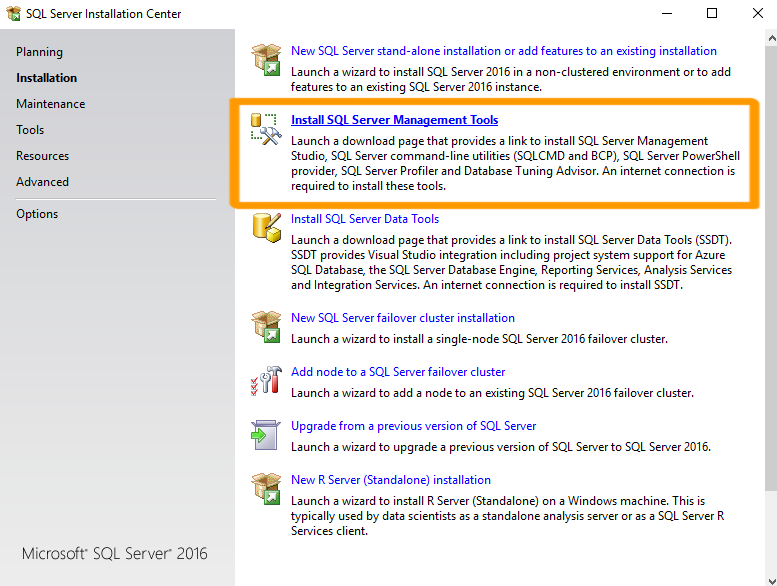
You can install SSMS from the same SQL Server Installation Center that you used to install SQL Server.
Ensuring that Installation is selected in the left menu, select Install SQL Server Management Tools and follow the prompts.
This actually downloads SSMS before installing it. So it can take some time.
Here are the screenshots if you need them.
You can also download SSMS from the Microsoft website if you need to.
-
Open SSMS
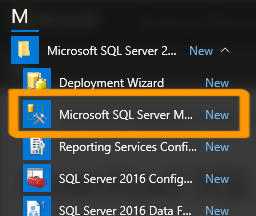
You can now open SQL Server Management Studio by finding it in your Windows apps list.
It is located under Microsoft SQL Server 2016.
Depending on your operating system, you could also type SSMS into the Start Page and it should pop up.
-
Connect to SQL Server
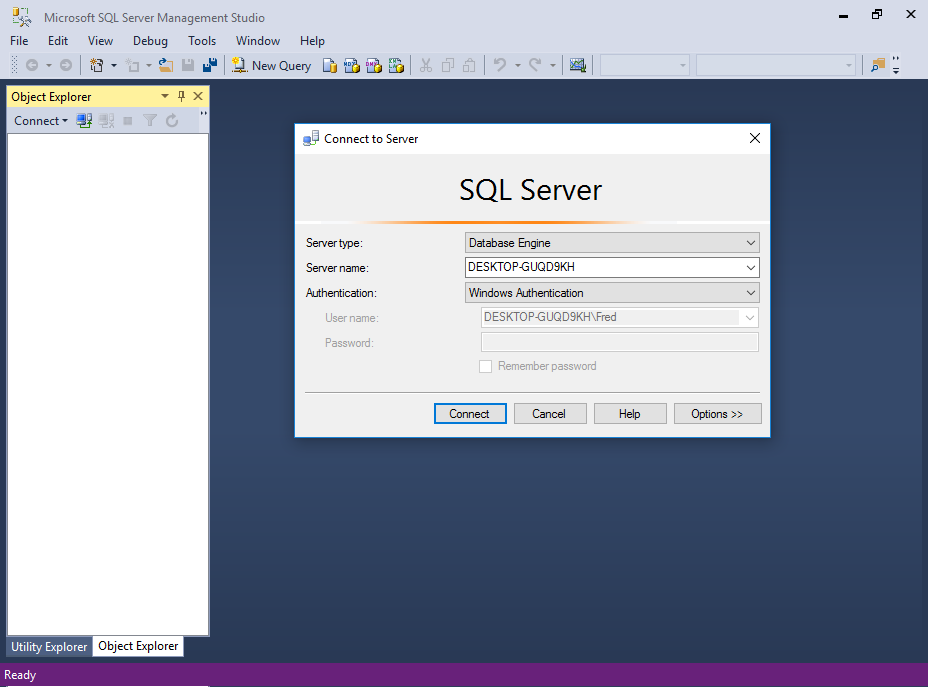
SSMS will prompt you to connect to SQL Server.
Select the server type, server name, and the authentication details and click Connect.
The SSMS Interface
Here’s a quick overview of the SQL Server Management Studio interface.
-
The Object Explorer
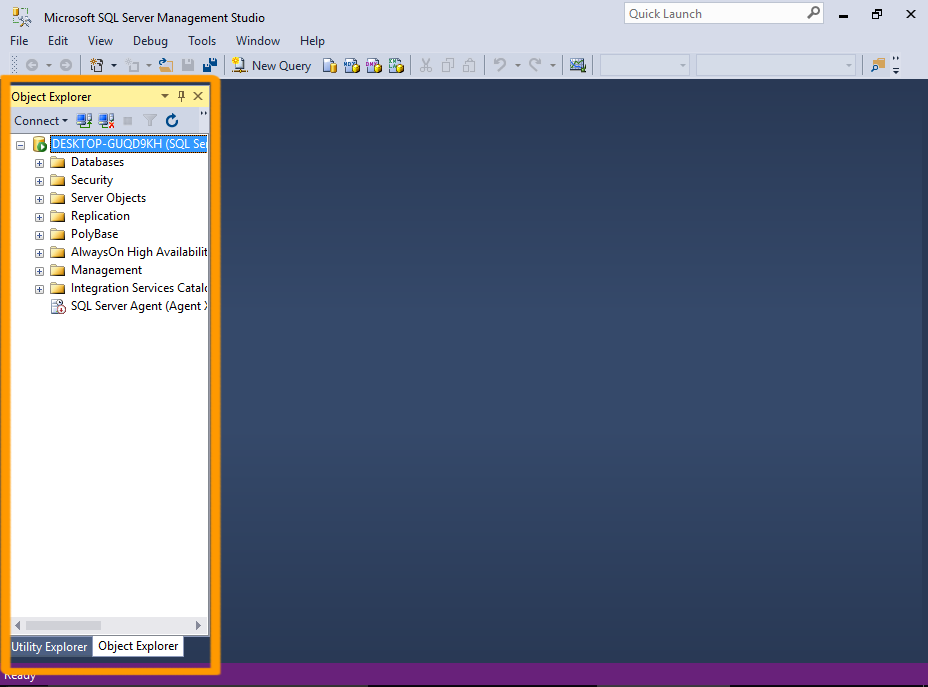
Once successfully connected to a server, you will see the server’s objects displayed in the Object Explorer on the left.
Object Explorer is a tree view of all the database objects in a server. This can include the databases of the SQL Server Database Engine, Analysis Services, Reporting Services, and Integration Services.
-
Document Windows
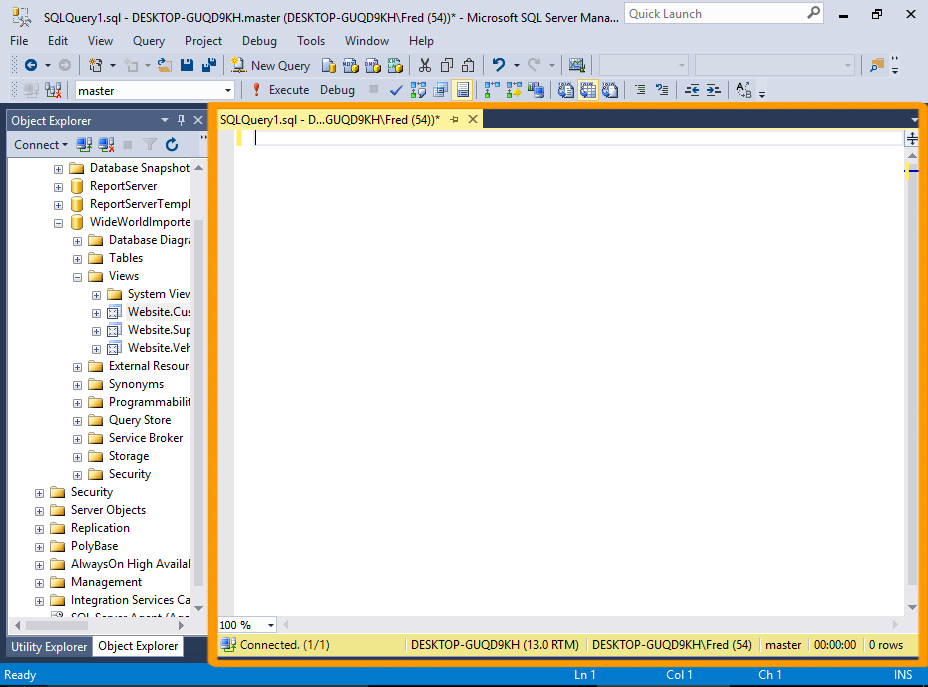
The large area to the right of the Object Explorer is allocated to document windows. This area can contain query editors and browser windows. Its contents depend on the current context.
For example, clicking on New Query in the toolbar will add a new query window, so that you can enter a query. Opening a table in Design view will display the table’s fields and their properties. And clicking View Help will open a browser window with SQL Server 2016 Technical Documentation from MSDN.
-
Other Windows
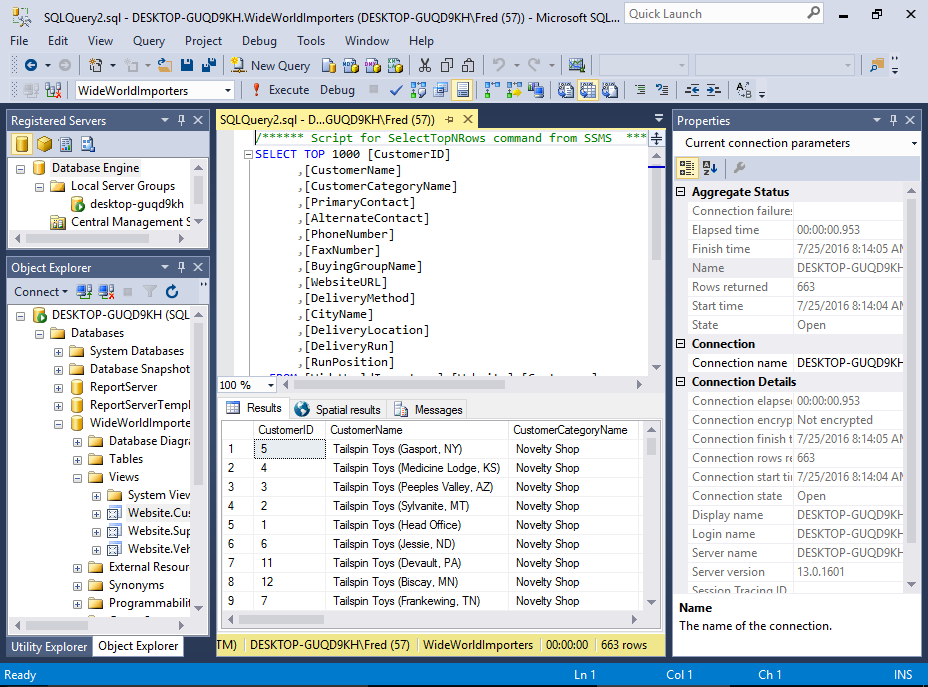
Various other windows and wizards are available in SSMS.
For example, the Registered Servers window lists the servers that you manage frequently.
The Properties window describes the state of an item in SQL Server Management Studio, such as a connection or a Showplan operator, and information about database objects such as tables, views, and designers.
Many properties are read-only in the Properties window but can be changed elsewhere in the Management Studio.
Servers and Databases
You can use SQL Server Management Studio to create as many databases as you like. You can also connect to as many databases on as many servers as you like. These all appear in the Object Explorer.
So you could run a query on your development environment, then switch to your test or production environment and run a query there. Because of this, you need to be careful that you don’t accidentally run a script against the wrong server.
Most of the tasks performed with SQL Server Management Studio are initiated either from the top menu, or by right-clicking on an icon/object.


