Rendering Static Files to the Browser with Express JS
This is the 2/5 series of the Building an Email Application using Node JS Express JS with Gmail and Nodemailer. You can check out the first series Here where we set up our project environment.
Let’s get started already 👇.
Yes, we cannot just access our HTML file directly from our browser, express must handle that for us and to this point, we can only access our application port 3000 on our terminal, let’s see how we can display our HTML files on our browser using Express JS.
Now that we have our server up and running with nodemon listening to our file changes, let design our application interface.
Create a new folder and name it
publicInside the
publicfolder create the following files
Nội Dung Chính
index.htmlindex.csssuccess.htmlsuccess.css
Copy the code below 👇 into the stated files respectively
index.html
<
html
lang
="en"
> <
head
> <
meta
charset
="UTF-8"
/> <
meta
http-equiv
="X-UA-Compatible"
content
="IE=edge"
/> <
meta
name
="viewport"
content
="width=device-width, initial-scale=1.0"
/> <
link
rel
="stylesheet"
href
="./index.css"
/> <
link
rel
="stylesheet"
href
="https://cdnjs.cloudflare.com/ajax/libs/font-awesome/4.7.0/css/font-awesome.min.css"
/> <
title
>e-Mail Sender Application</
title
> </
head
> <
body
> <
form
style
="max-width: 500px; margin: auto"
> <
h2
>e-Mail Sender Application</
h2
> <
div
class
="input-wrapper"
> <
i
class
="fa fa-user icon"
></
i
> <
input
class
="input-field"
type
="text"
placeholder
="To: i.e [email protected]"
name
="email"
autocomplete
="off"
required
/> </
div
> <
div
class
="input-wrapper"
> <
i
class
="fa fa-envelope icon"
></
i
> <
input
class
="input-field"
type
="text"
placeholder
="Subject"
name
="subject"
required
/> </
div
> <
div
class
="input-wrapper"
> <
textarea
id
="message"
name
="message"
placeholder
="Message body.."
style
="height: 200px; width: 100%"
required
></
textarea
> </
div
> <
div
class
="attachment-wrapper"
> <
label
for
="attachment"
>Attachment</
label
> <
input
id
="attachment"
name
="attachment"
type
="file"
required
/> </
div
> <
button
type
="submit"
class
="send-btn"
>Send Mail</
button
> </
form
> </
body
></
html
>index.css
@import
url("https://fonts.googleapis.com/css2?family=Poppins:ital,wght@0,300;0,400;0,500;0,600;0,700;0,800;0,900;1,300;1,400;1,500;1,600;1,700;1,800;1,900&display=swap"
);* { box-sizing
: border-box; font-family
: "Poppins"
;}h2
{ font-size
: 2rem
;}.input-wrapper
{ display
: -ms-flexbox; display
: flex; width
: 100%
; margin-bottom
: 15px
; font-family
: "Poppins"
;}.icon
{ padding
: 10px
; background
: #333333
; color
: white; min-width
: 50px
; text-align
: center; font-family
: "Poppins"
;}.input-field
{ width
: 100%
; padding
: 10px
; outline
: none; font-family
: "Poppins"
; border
: 2px
solid #333333
;}.input-field
:focus
{ box-shadow
: 0
0
10px
#333333
; border
: 2px
solid #333333
;}.input-wrapper
textarea
{ padding
: 1rem
; border
: 2px
solid #333333
;}.input-wrapper
textarea
:focus
{ outline
: none; box-shadow
: 0
0
10px
#333333
; border
: 2px
solid #333333
;}.attachment-wrapper
{ margin
: 15px
0
;}.attachment-wrapper
label
{ font-weight
: 600
;}.send-btn
{ background-color
: #333333
; color
: white; padding
: 15px
20px
; border
: none; cursor
: pointer; width
: 100%
; opacity
: 0.9
; font-size
: 16px
;}.send-btn
:hover
{ opacity
: 1
;}success.html
<
html
lang
="en"
> <
head
> <
meta
charset
="UTF-8"
/> <
meta
http-equiv
="X-UA-Compatible"
content
="IE=edge"
/> <
meta
name
="viewport"
content
="width=device-width, initial-scale=1.0"
/> <
link
rel
="stylesheet"
href
="./success.css"
/> <
link
rel
="stylesheet"
href
="https://cdnjs.cloudflare.com/ajax/libs/font-awesome/4.7.0/css/font-awesome.min.css"
/> <
title
>Mail Sent</
title
> </
head
> <
body
> <
i
class
="fa fa-paper-plane icon"
></
i
> <
h1
>Message Delivered!!!</
h1
> <
a
href
="./index.html"
>New message</
a
> </
body
></
html
>success.css
@import
url("https://fonts.googleapis.com/css2?family=Poppins:ital,wght@0,300;0,400;0,500;0,600;0,700;0,800;0,900;1,300;1,400;1,500;1,600;1,700;1,800;1,900&display=swap"
);body
{ font-family
: "Poppins"
; display
: flex; flex-direction
: column; justify-content
: center; align-items
: center; height
: 70vh
; color
: #333333
;}a
{ color
: blue;}a
:hover
{ opacity
: 0.8
;}body
.icon
{ font-size
: 3rem
;}Update the index.js with the following code
.... app.use(express.static("public"
)); app.get("/"
, (req, res) =
>
{ res.sendFile("/index.html"
);});...Explanation
1. app.use(express.static("public"));
- We are using the express js method called
useto chain a middleware calledstatic, which allows us to serve static files likehtml,css,js,image, and more.
The
publicfolder is defined inside thestaticmiddleware as our project root directory.
2. app.get
app.get()is a function that tells the server what to do when a get request at the given route is called.
3. ("/", (req, res)
The forward slash signifies the root directory of our route, just like
www.hashnode.comThe
reqargument stands for request from that particular route, while theresrepresents response, which is a means to send back a response to the route caller.
4. res.sendFile("/index.html");
- Remember the
resabove 👆 us used to send back a response? thereshas a method to send back a file to the route been called, and that is what we are doing here, we are returning theindex.htmlfile when the root route of the project is been hit.
Project UI Routing on a Browser with Express JS
Routing refers to how our application’s endpoints (URLs) respond to the client (browser) request through the req parameter, this is unique for a particular endpoint (URL).
www.hashnode.com will respond with the landing page while a request to www.hashnode.com/onboard will respond with a login page 😉.
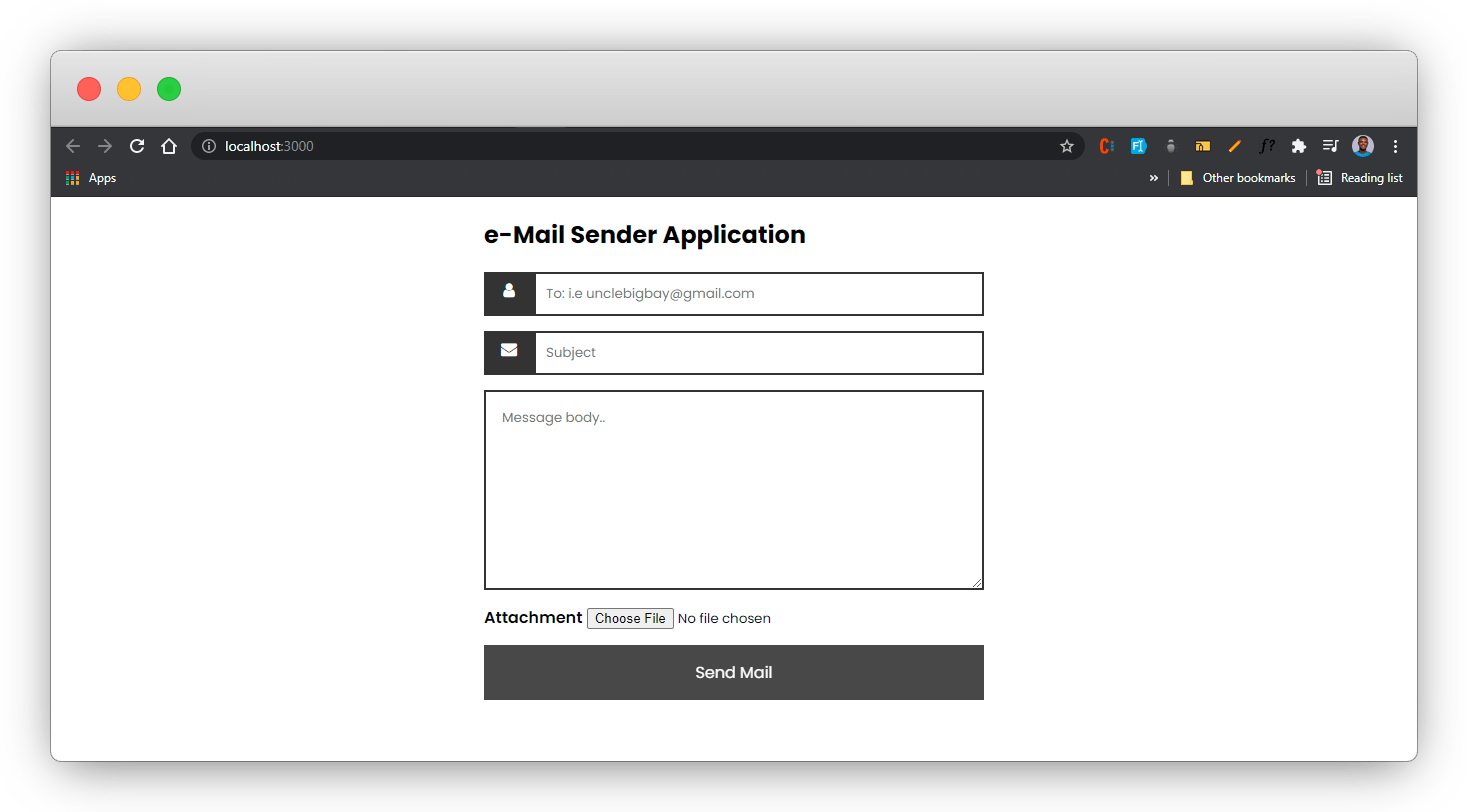
Since we have our route and static files setup, it’s time to visit our project port in our browser 💃
You can either copy-paste this route 👉 localhost:3000 to your browser address bar and hit enter or click this link localhost:3000.
If all goes well, you should have this 👇 displayed on your browser.
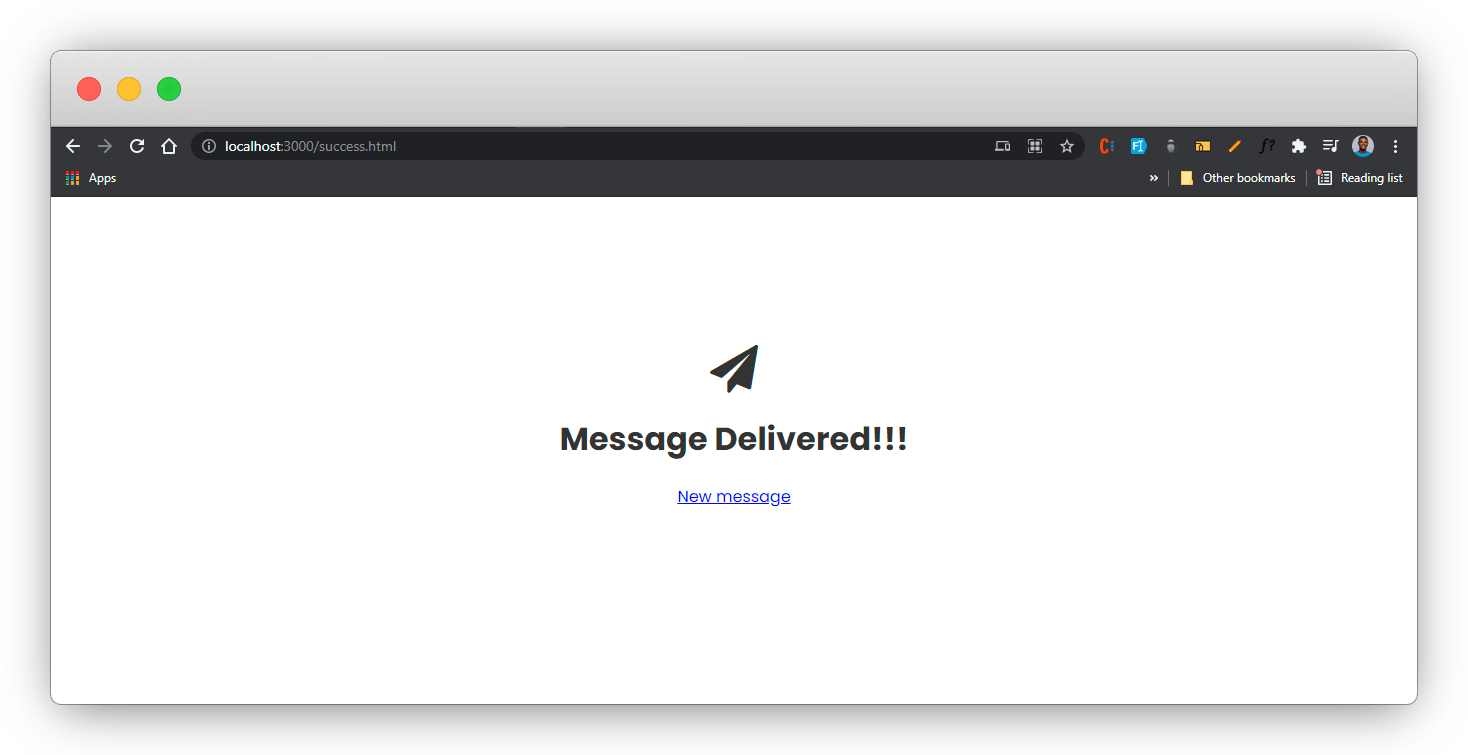
You can as well visit the success page using this link localhost:3000/success.html
Our success page should look something like below 👇.
If you made it this far let’s take a break, and celebrate 😍

Let’s drink up 👇

In the next article, we will be connecting our user interface with our Node JS Server.
Next 👇
Let me know in the comment section if you have any difficulties.


