How to configure free EC2 Instance on Amazon
Hello Friend, If you are planing to setup a website for your domain, you need not to worry. AWS provides a free micro-instance virtual private server for one year . You can use it free without any cost for 12 month than AWS will charge for this services. It is the great offer of AWS. If you want to setup your server for testing purpose before going live without any cost.
In this tutorial I will explain, how we can create a free micro-instance VPS for one year. I will also explain how we access vps server with SSH.
Create Amazon Web Services Account
For creating vps first we need to create a user account on AWS. To create a user account we go the “AWS FreeTier Web Page ” than click on “Sign up for AWS Account”. You can also use your existing account to log into it. Click on ” Create a free Account”.


Before going to crate account make sure you have correct mobile number and correct credit/debit card.
During user account creation it will ask you for mobile and credit/debit card detail. Mobile number will used for pin verification and credit/debit card will used for your account verification . Here you need not to worry only 2 rupees deduct from your account to verify your credit/debit card activation.
Now go ahead without any hesitation and follow the direction provided by AWS web site to create user account.
Create and setup a Free EC2 Instance
To create instance log into the “AWS Console Web Page”

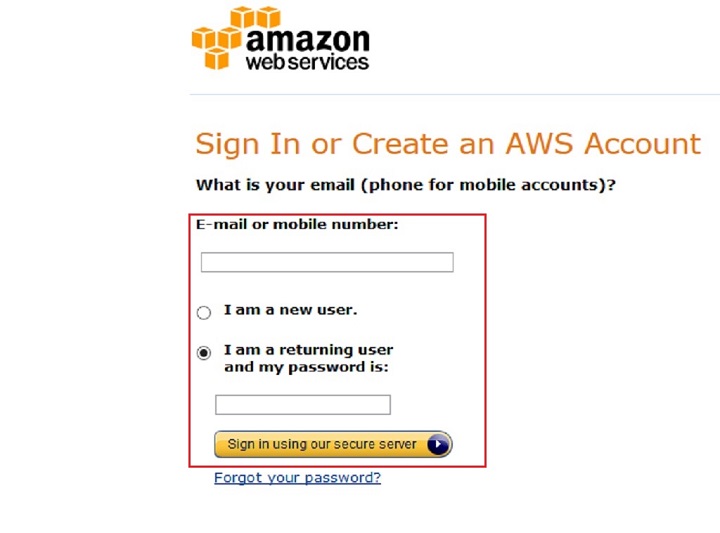
Here you can use your AWS User id and Password to login.
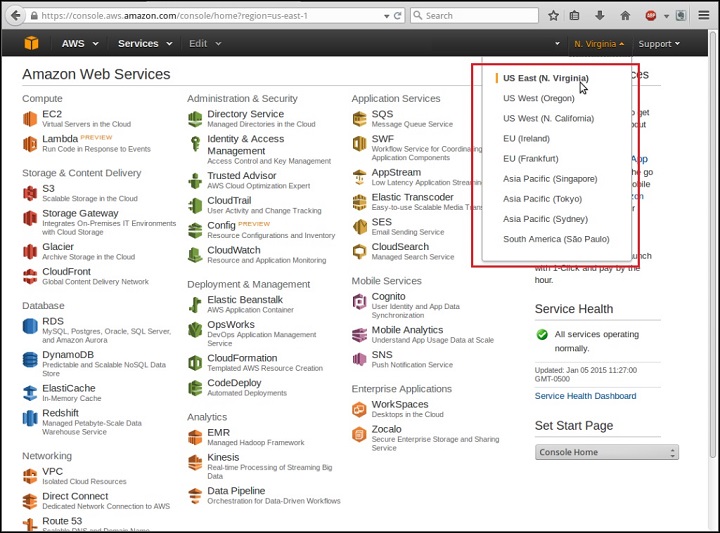
Datacenter Selection
After login select datacenter location where your instance will be created.

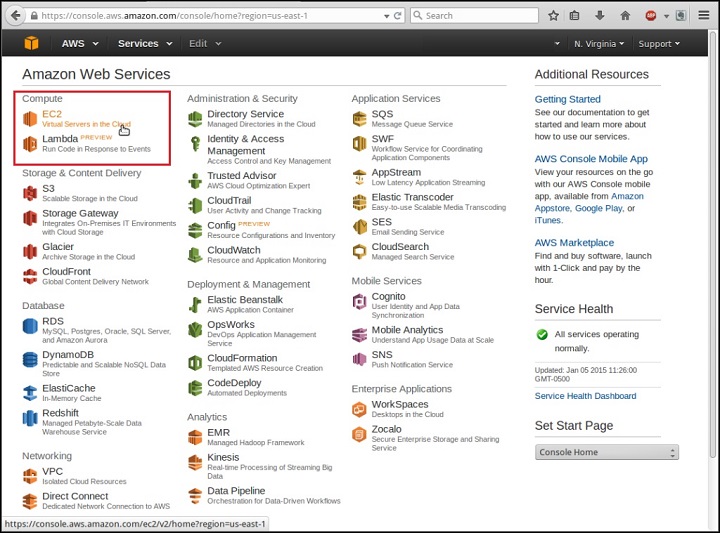
Select and Click the EC2 ( Elastic Compute ) service:
Upper –left corner you can see the EC2 on the AWS page.

Choosing Image
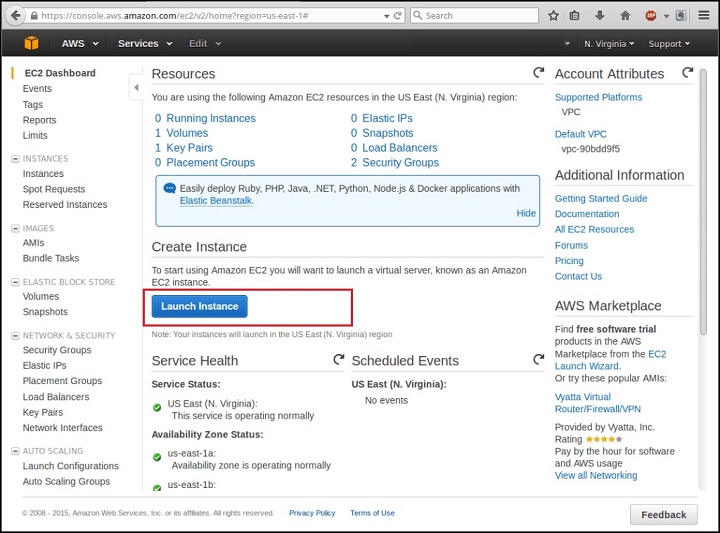
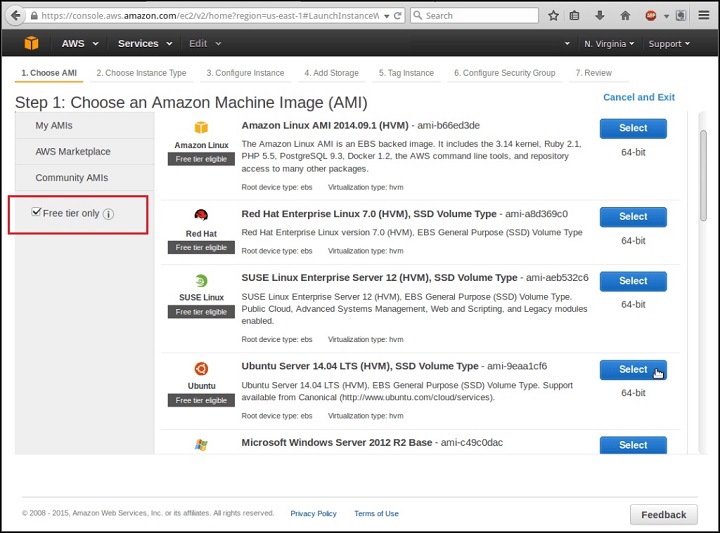
After clicking on EC2. Click on “Launch instance” button. Here you can see available image. You can also use your own image.

Select “free tier only” check box from left –side corner in page. It will show all micro instance image.

Selecting HVM or PV
During image selection please pay attention to whether it is an HVM or PV. You can see it between instance name. Select HVM because it is best for most user . To check difference between HVM or PV go to “AWS virtualisation type section ” of the AWS documentation.
Instance Type Selection
For free tier of service you will need to choose the default instance type ” t2.micro“. You can see it on left side on the page . Than click on the “ Next : Configure Instance Details”.

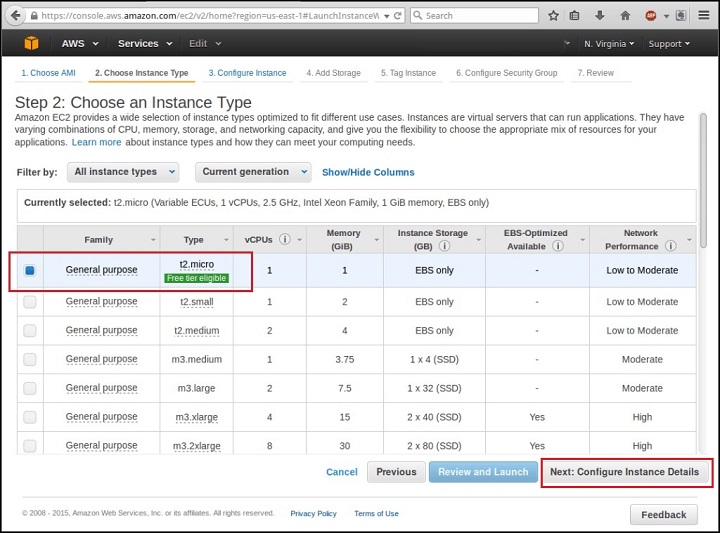
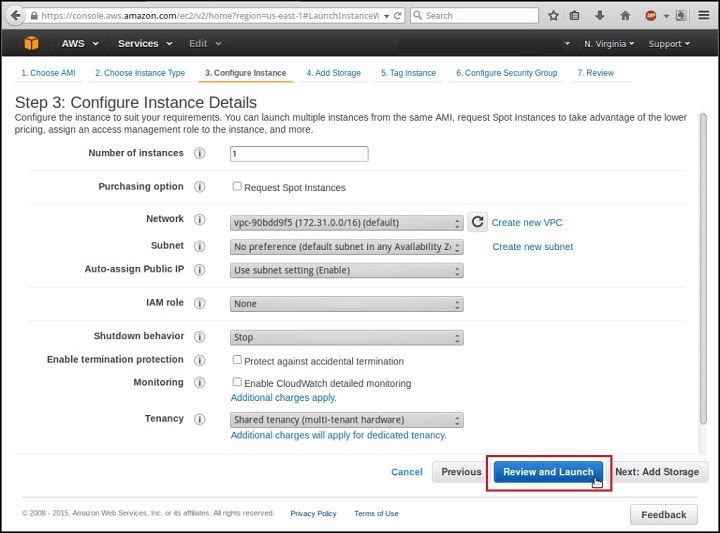
After clicking on the “Next: Configure Instance Details” . You can review configuration details. Here click on “ Review and Launch” button.

Instance Launching
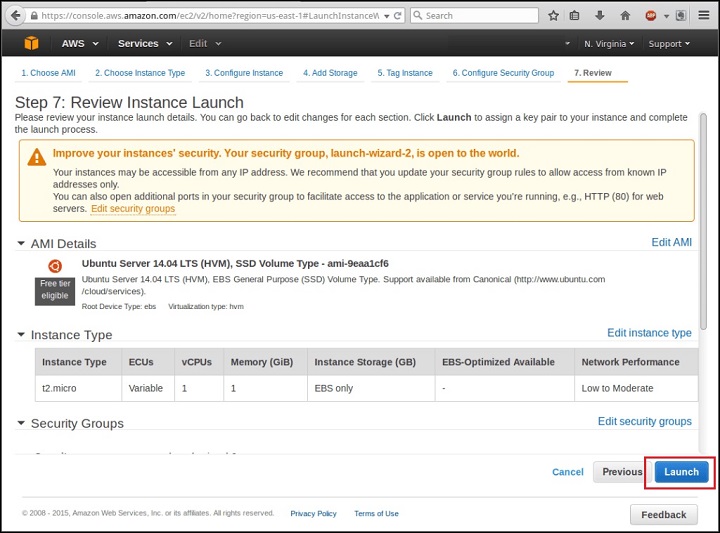
In this page you will see Security Warning. At this time we will ignore all security warning . We can set strong security setting latter. Right corner on the page you can see “Launch” button. Click on “Launch” button.

Downloading SSH Private Key
Here it will ask to select a SSH key pair which help to secure instance. When connecting to instance. Key pair consist of a public key and private key, public key store on AWS stores . Private key file you will need to download and save it into your local computer. Select “Create a new key pair” from drop down menu option. Than provide identical key pair name. Click on “Download Key Pair “ and save it to your computer hard disk.

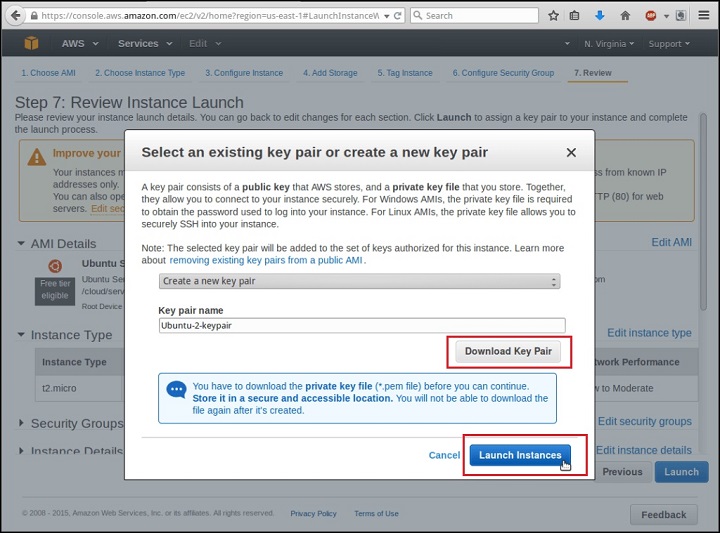
Keep in mind where you are saving key pair. You will need later when connecting to the server. I had saved it into my “/root/AWS-key/ “ location. Click on the “ Launch Instance” button finally.
Setting key file permission
You will not allow to use the ssh key pair unless the file permissions are secure.
# cd /root/AWS-key

# chmod 400 Ubuntu-2-keypair.pem
Instances Management
Now we can manage our instance after clicking on “ Launch Instances” button. To manage instances click on “View Instances” button.

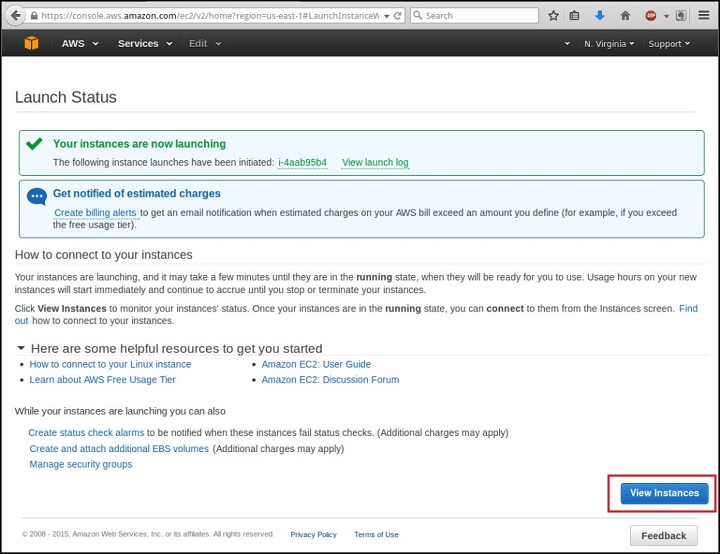
Here you can see created instances in AWS console.

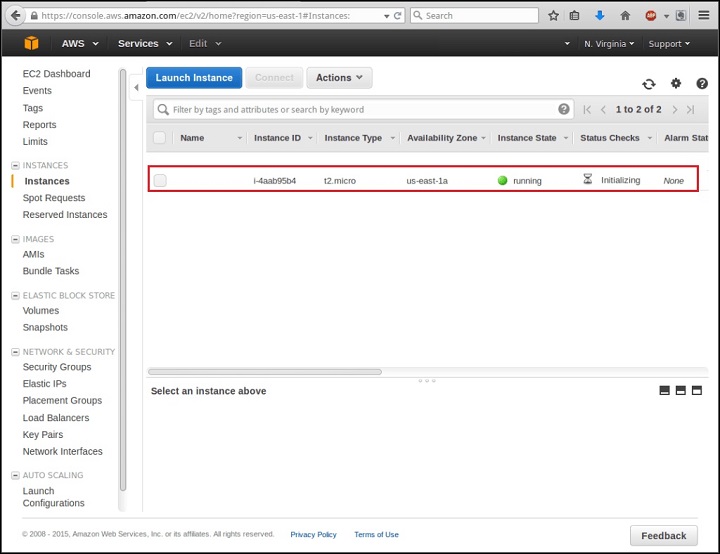
Please wait until the status show “running” mode , Than we can log into it.
Connecting to VPS
To connect to VPS we will use SSH Protocol. It comes built-in on Linux and Ubuntu but for Windows OS you will need to download “Putty”.
Before connecting to VPS we will need Instance IP Address. To view Information of instances click on check box next to the instance.

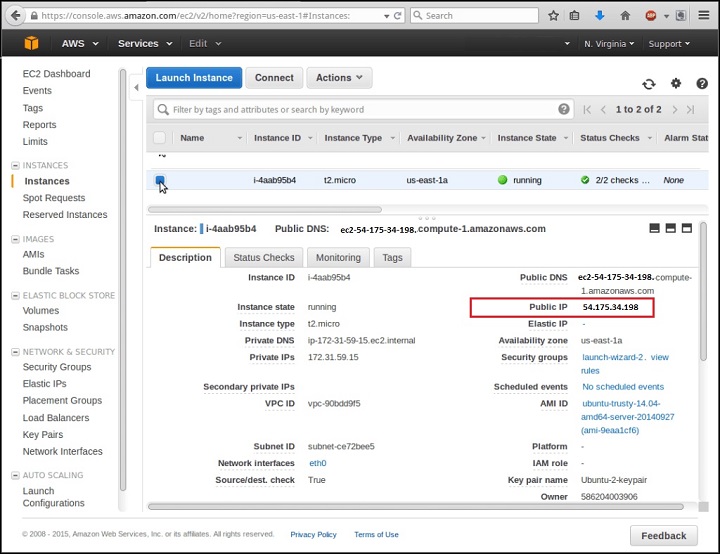
Note down IP which is assign to instance in my example you can see IP is : 54.175.34.198.
Note if you restart your instance, it will assign a different IP address and DNS name.
To see more information go to its “accessing AWS linux instances” documentation.
SSH Usage Example
Connecting to instance we user our previous downloaded key named “Centos-2-keypair.pem ” which I saved into my “/root/AWS-key” Directory.
Follow the below command
Here you will see the security warning ignore it and type “yes”
“The authenticity of host '54.175.34.198 (54.175.34.198)' can't be established.

ECDSA key fingerprint is cc:94:f4:d6:95:4e:75:aa:f2:86:c6:94:9e:0f:c9:0f.
Are you sure you want to continue connecting (yes/no)? yes “
Stop, Start and Restart instance
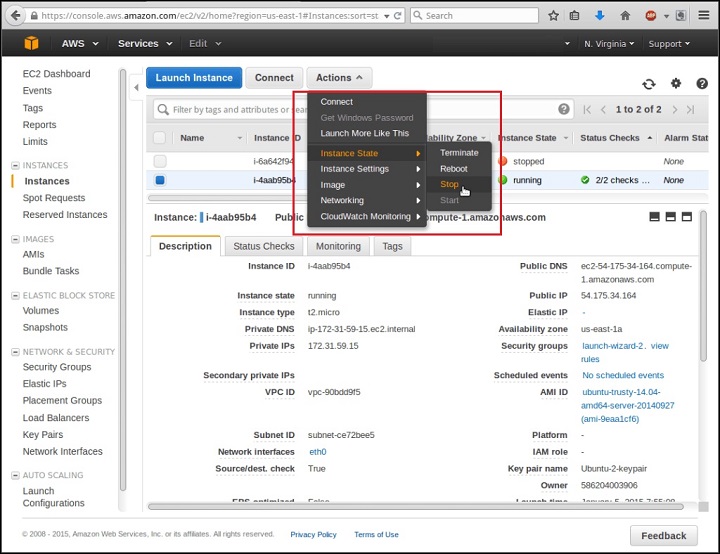
Select the running instance and click on the “Action” button. Go to “Instance State” from drop down window and select stop,start and reboot.

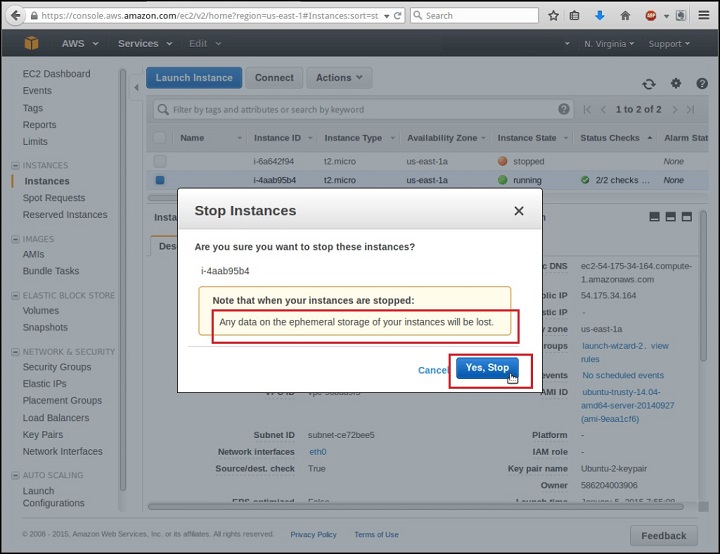
Pop-up window will open for confirmation. It will warn you to “Any data on the ephemeral storage of your instances will be lost” no need to worry because we did not setup any storage volumes.

Are you remember ? when we restart the instances again, it will assign new IP address. Use this new IP to connect to your server.
I hope this article will be helpful to you. If you have any queries and problem please comment in comment section.
Thanks
Thank you! for visiting LookLinux.
If you find this tutorial helpful please share with your friends to keep it alive.
For more helpful topic browse my website www.looklinux.com.
To become an author at LookLinux Submit Article.
Stay connected to Facebook.


