How To Use Photoshop Express To Create Stunning iPhone Photo Edits
The Photoshop Express app is great for quickly editing your iPhone photos. This photo editing and photoshop app has a wide range of easy-to-use filters and adjustment tools. And you can make unique edits or collages using the app’s creative tools. Even complete beginners can produce spectacular images in minutes. In this tutorial, you’ll discover how to use PS Express to create stunning iPhone photo edits.
Nội Dung Chính
Table Of Contents: How To Use Adobe Photoshop Express App
Click any title link below to go straight to that section of the article:
1. Open An Image In Photoshop Express
2. Auto-Enhance Tool
3. Filters
3.1 Apply A Filter To Your Photo
3.2 Be Careful Not To Over-Edit With Filters
4. Crop, Rotate & Transform
4.1 Crop Your Image
4.2 Rotate & Straighten Your Photo
4.3 Transform Your Image To Correct Perspective
5. Adjustment Tools
5.1 Make Light Adjustments
5.2 Enhance Colors In Your Photo
5.3 Improve Your Image With Effects
5.4 Sharpen Detail & Eliminate Grain
5.5 Add Blur Effects To Your Photo
6. Spot Removal Tool
7. Eye Tool
8. Text, Stickers & Borders
8.1 Add Text To Your Photo
8.2 Add Stickers To Your Image
8.3 Add A Border Around Your Picture
9. Save Your Edited Photo
10. Collage Tool
10.1 Create A Single Image Collage
10.2 Create A Multi-Photo Collage
You can download Adobe Photoshop Express from the App Store for free. There are no in-app purchase fees with Photoshop for iPhone. But you’ll need to sign up for a free Adobe account to use some of its more advanced features.
1. Open An Image In Photoshop Express
When you open Adobe Photoshop Express, you’ll see the images from your photo library. There are two options at the top of the screen: Edit Images and Make Collage.
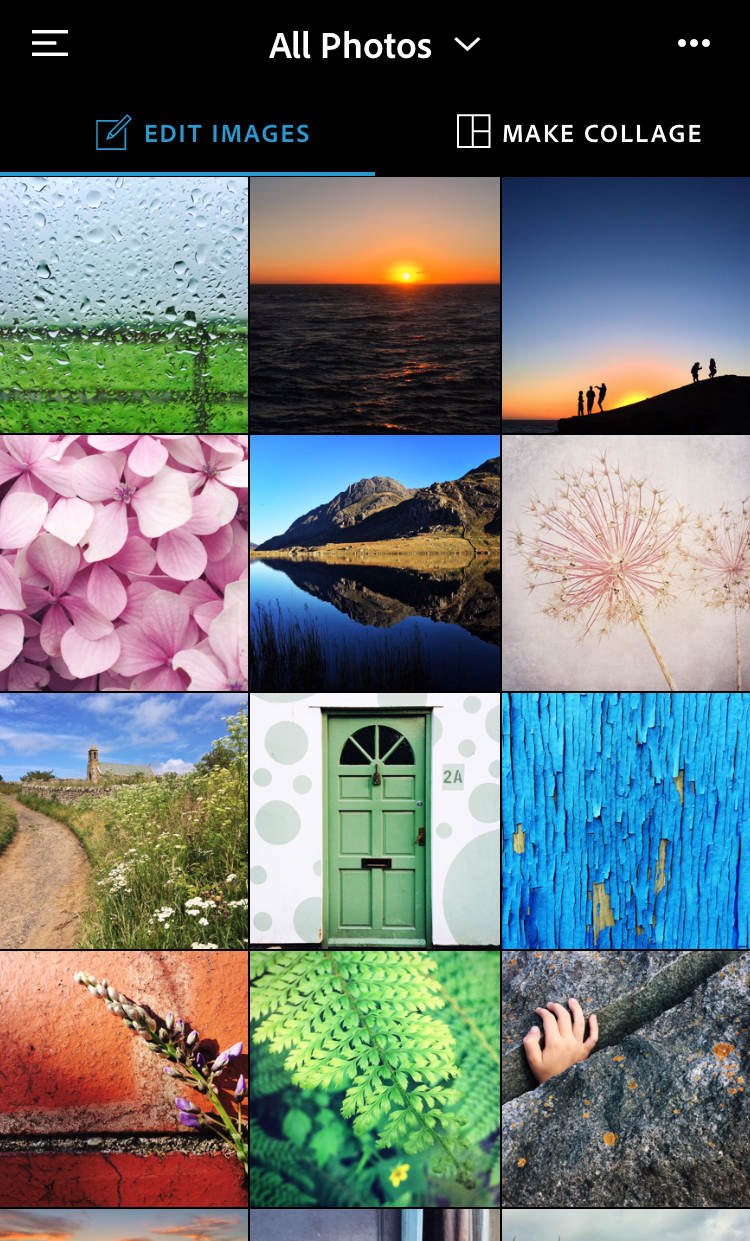
Ensure Edit Images is selected, then select the photo you want to work on.
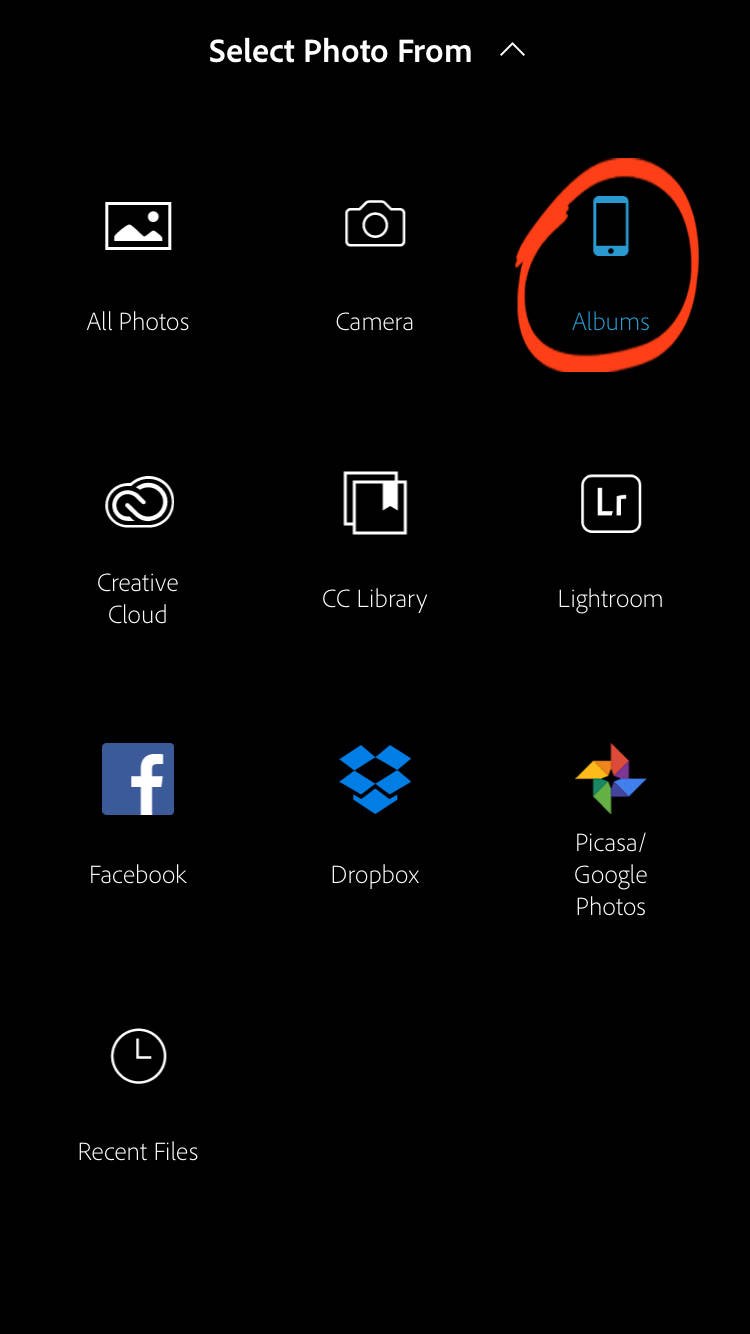
You can also open an image from a different photo album. Tap the arrow at the top of the photo library screen, then select Albums.
When you open an image, the PS Express photo editor appears as shown below. You’ll see a row of icons in the toolbar at the bottom of the screen. These give you access to the different categories of editing tools.
Swipe across the icons in the bottom toolbar to see more options. Tap on an icon to access the editing tools for that category.
If you want to return to your photo library to select a different image, tap the arrow at the top left of the screen.
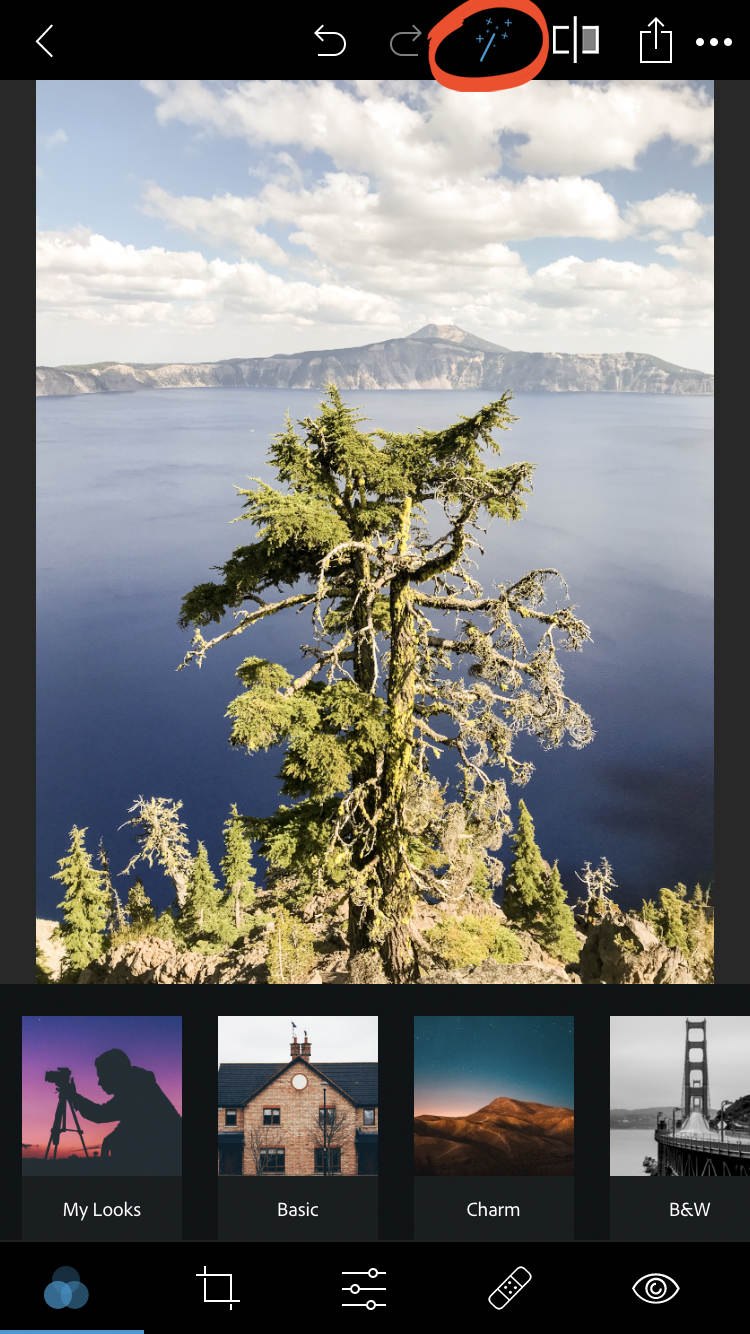
2. Auto-Enhance Tool
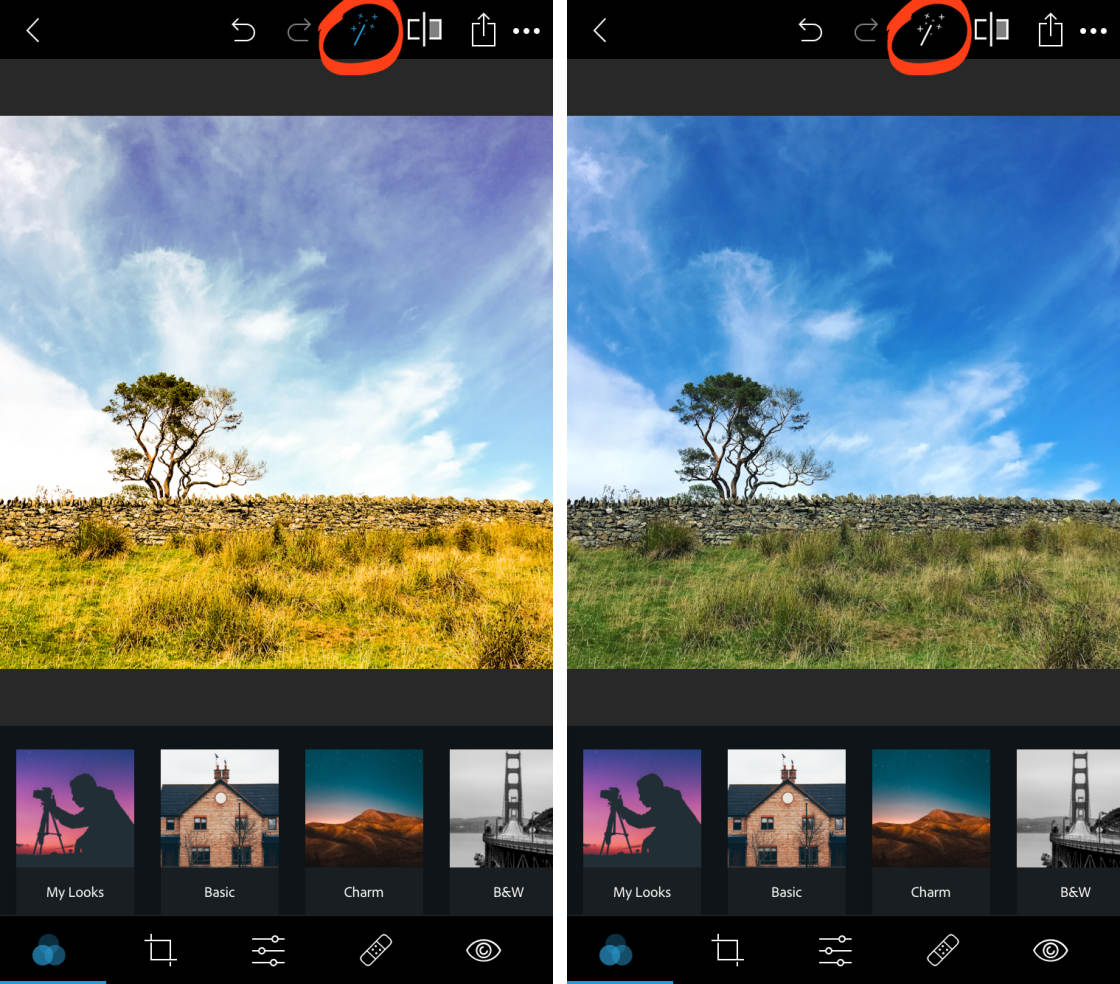
At the top of the screen, you’ll see a blue Auto-Enhance tool (wand icon). This tool applies automatic light and color adjustments in an attempt to improve your photo.
When you open a photo to edit, Auto-Enhance is switched on by default. So before you even start editing, PS Express attempts to automatically fix your photo.
This can be useful in some cases. But the app doesn’t always create the edit you want. It’s often better to make your own adjustments using the filters and adjustment tools.
To turn off automatic enhancement, tap the Auto-Enhance icon (blue wand) so that it turns white. Your photo will revert to the original unedited version.
3. Filters
Are you looking for a quick way to change the look and mood of your photos? The one-tap filters in Photoshop Express offer an easy solution.
Filters apply a particular set of pre-defined edits to your photo. These include changes to color, exposure (brightness), and sharpness.
With filters, you can quickly turn a photo black and white or add a certain color tone. You can warm up or cool down colors to change the mood in your photo. Or you can make the colors more vibrant or muted.
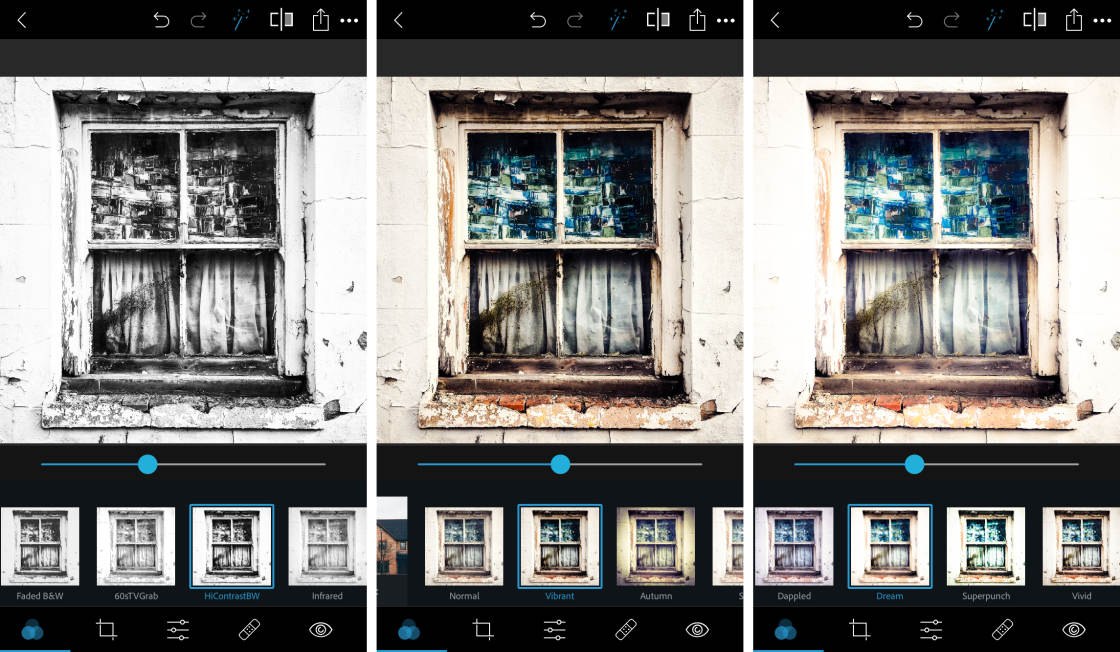
3.1 Apply A Filter To Your Photo
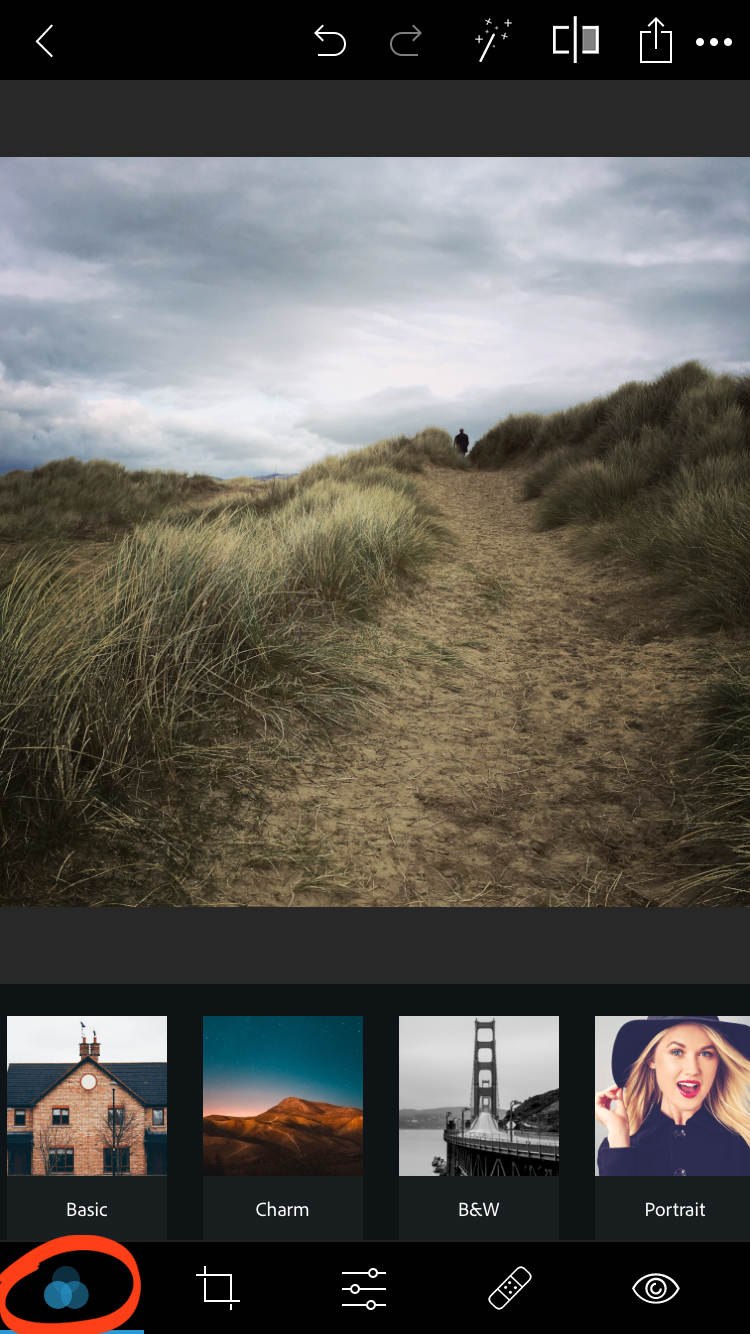
Filters are called “Looks” in the Photoshop Express app. To access the filters, tap the Looks icon (three overlapping circles) at the bottom left of the screen.
The list of filter categories appear beneath your photo. The categories are: Basic, Charm, B&W, Portrait, Nature, Pop Color, Duo Tone, and Premium.
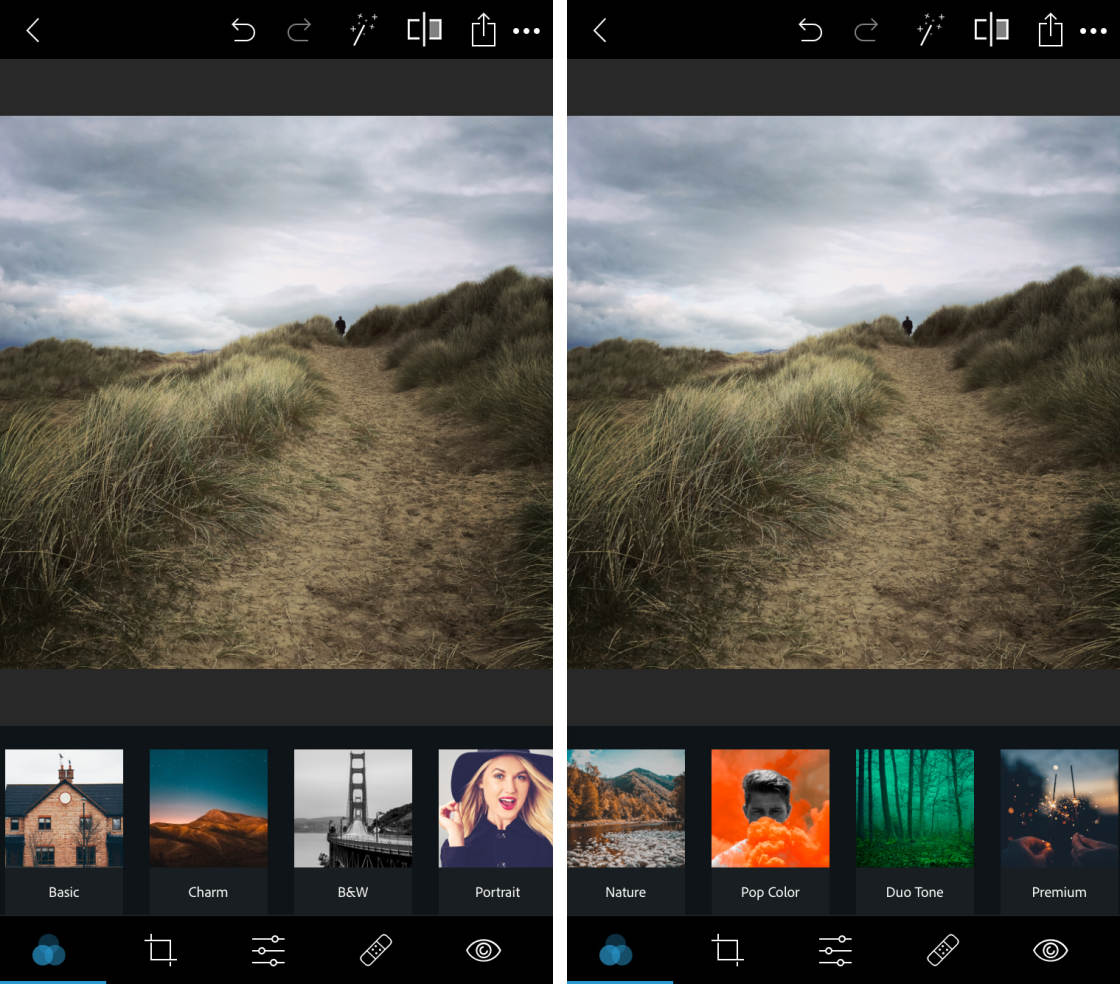
Tap on a filter category, then scroll across to view the individual filters. Tap a filter to apply it to your photo.
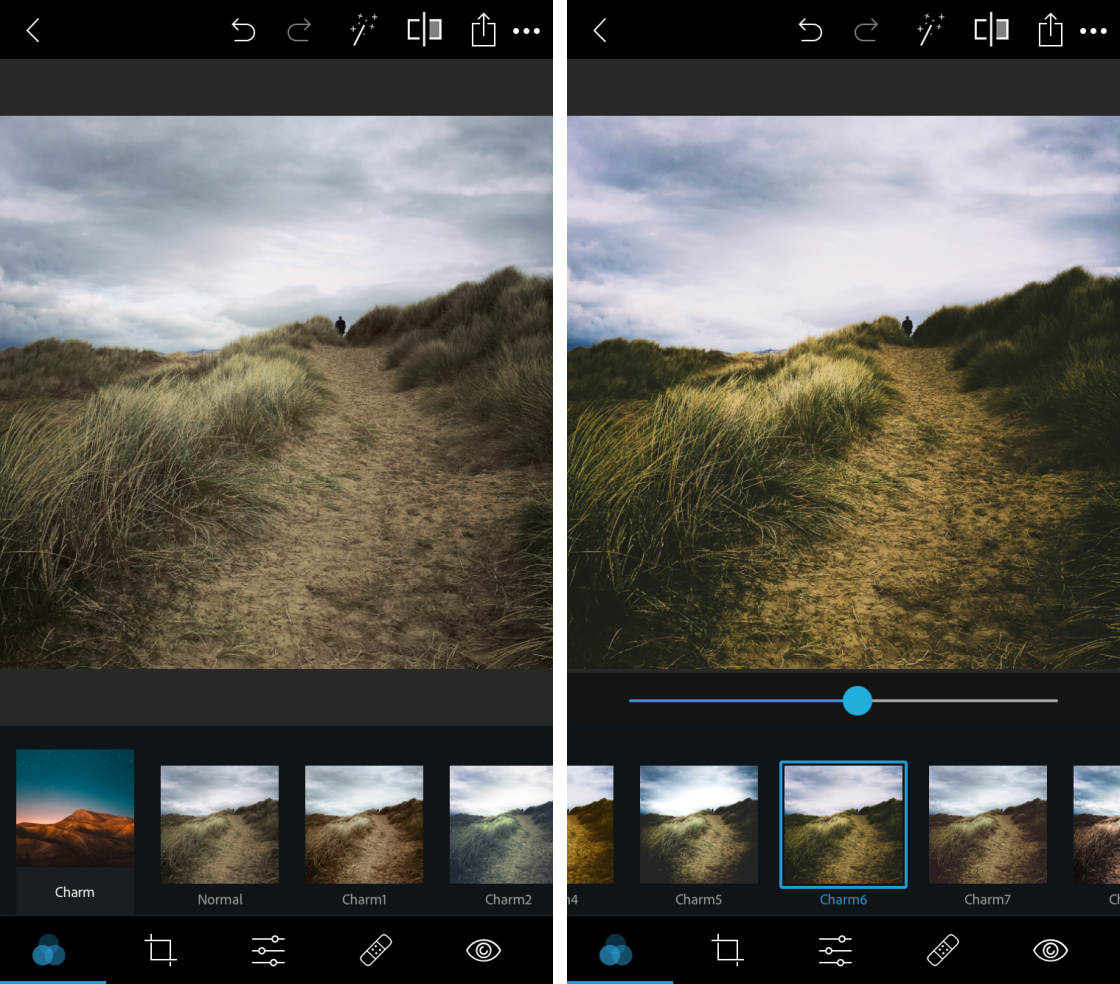
Use the slider beneath your photo to adjust the intensity of the filter. Drag right to increase the filter strength, or left to decrease it.
In most cases you’ll want to reduce the filter strength. This will avoid your photo looking over-edited.

3.2 Be Careful Not To Over-Edit With Filters
It’s worth noting that the filters in Adobe Photoshop Express are quite harsh. Many of the filters add garish colors and dark vignettes. These can make your photo look over-processed. Some filters add excessive amounts of grain.
Below is an example of the Superpunch filter which ruins the image. On the left is the original photo for comparison.
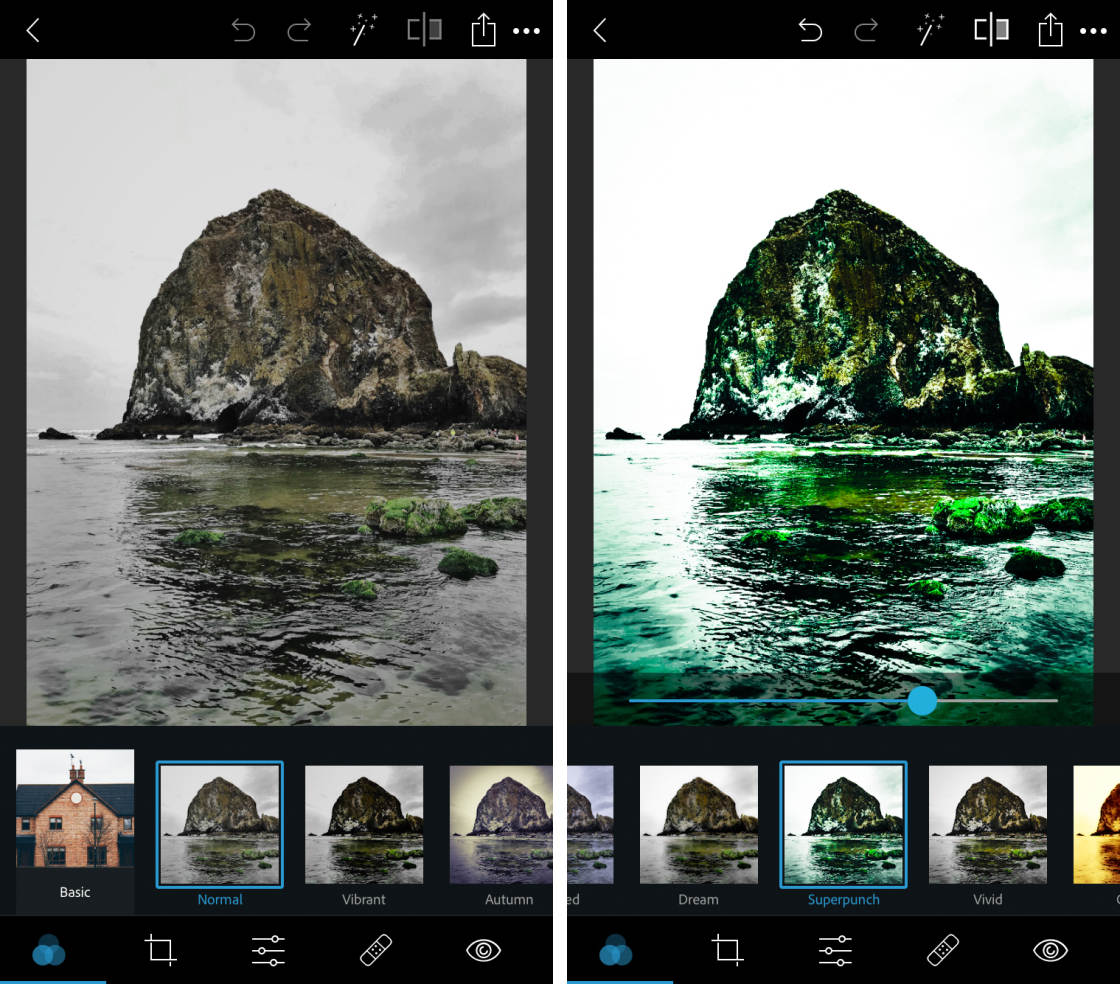
This filter adds an excessive amount of contrast. The result is an overly bright sky, and very dark rocks. Detail has been lost from both the highlights (bright areas) and shadows (dark areas). The greens are too vibrant, and don’t look natural.
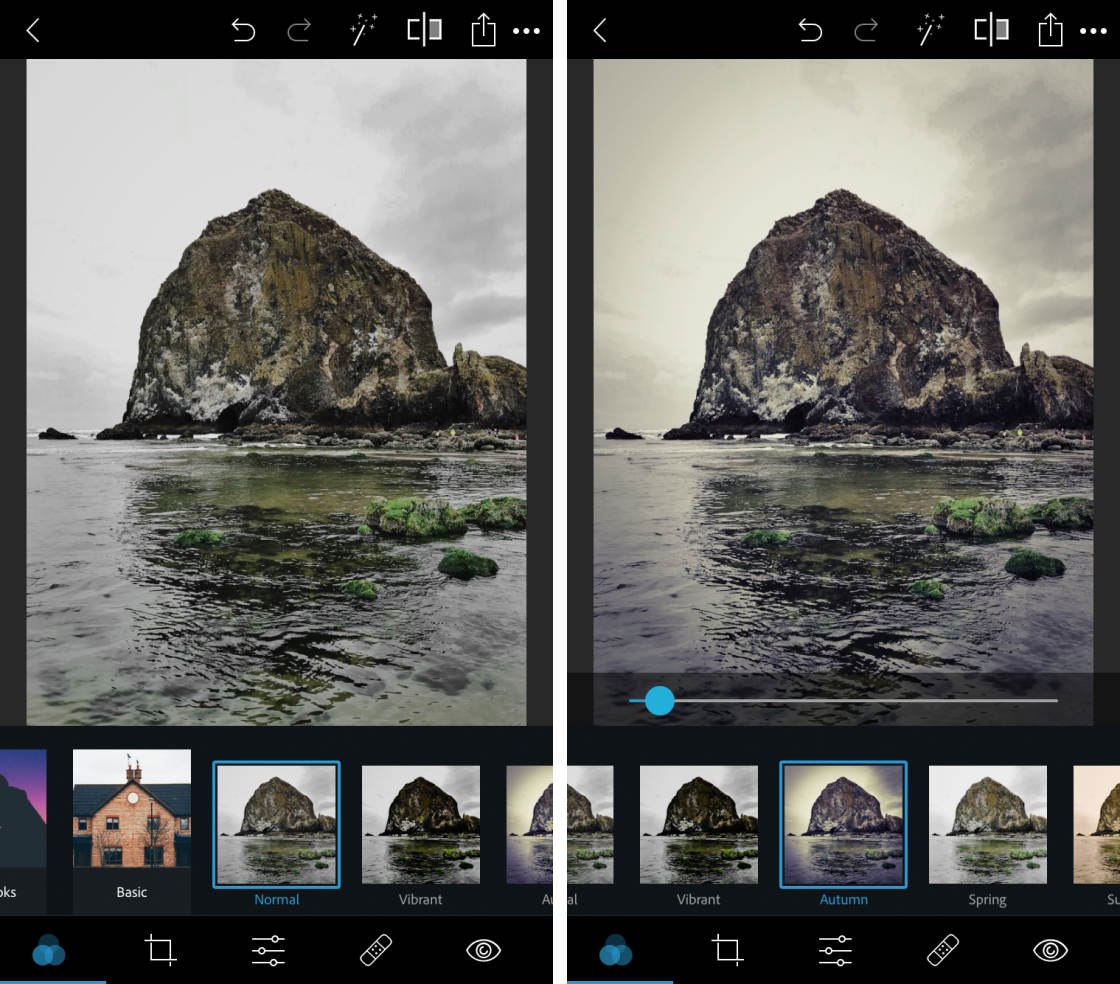
In the example below, I used the Autumn filter which looks much better. I used the slider to reduce the filter strength, creating a more subtle edit.
PS Express includes some filters that make your photos intentionally abstract. For example, the Duo Tone filters completely change the colors in your photos.

You wouldn’t use these filters for everyday photo editing. But they can work with certain images to create modern, abstract edits.
Photoshop Express isn’t considered the best filter app for iPhone. But if you use the more subtle filters, and reduce filter strength, you can definitely achieve great results.
4. Crop, Rotate & Transform
The second icon in the bottom toolbar gives you access to the Crop, Rotate and Transform tools.
With these tools, you can crop away the edges of your photo. You can rotate, flip and straighten your image. And you can skew your photo to correct perspective problems.
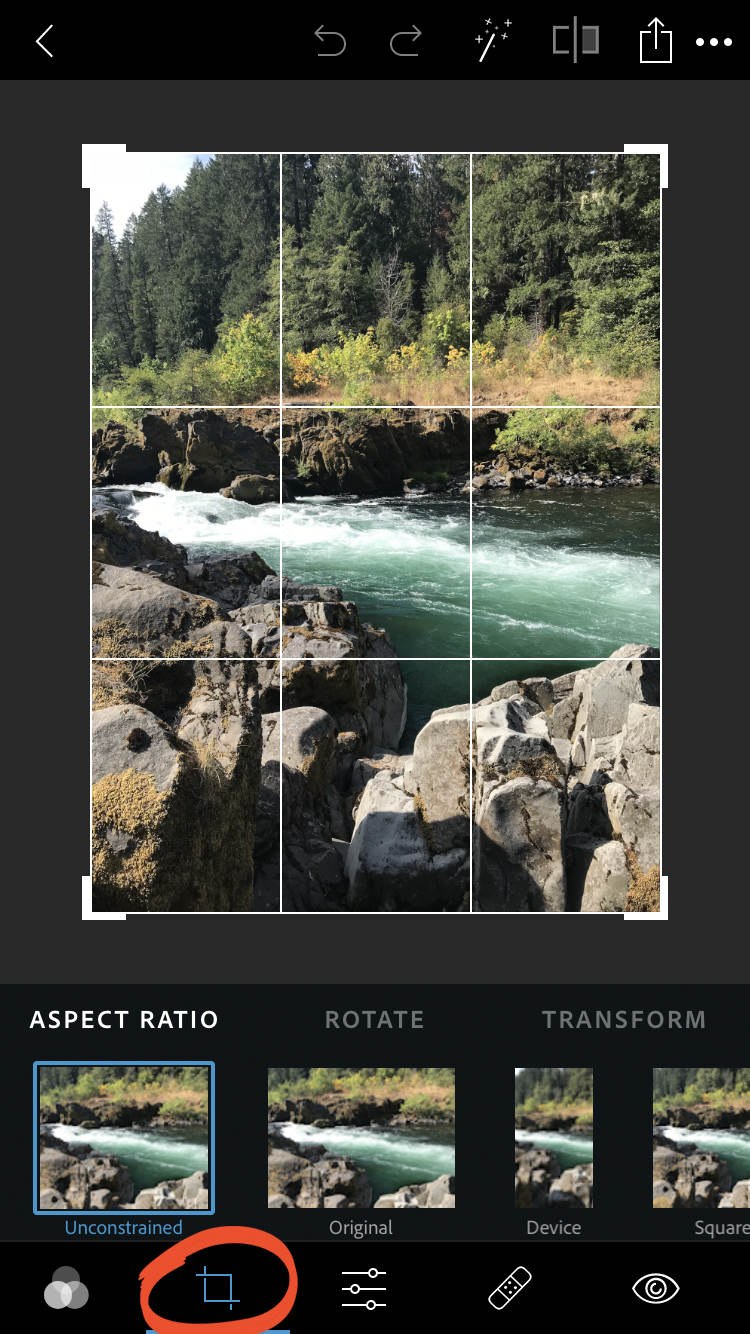
4.1 Crop Your Image
The Aspect Ratio option lets you crop your photo. Cropping is great for removing unwanted distractions from the edges of the frame. You can also use it to improve the composition of your image.
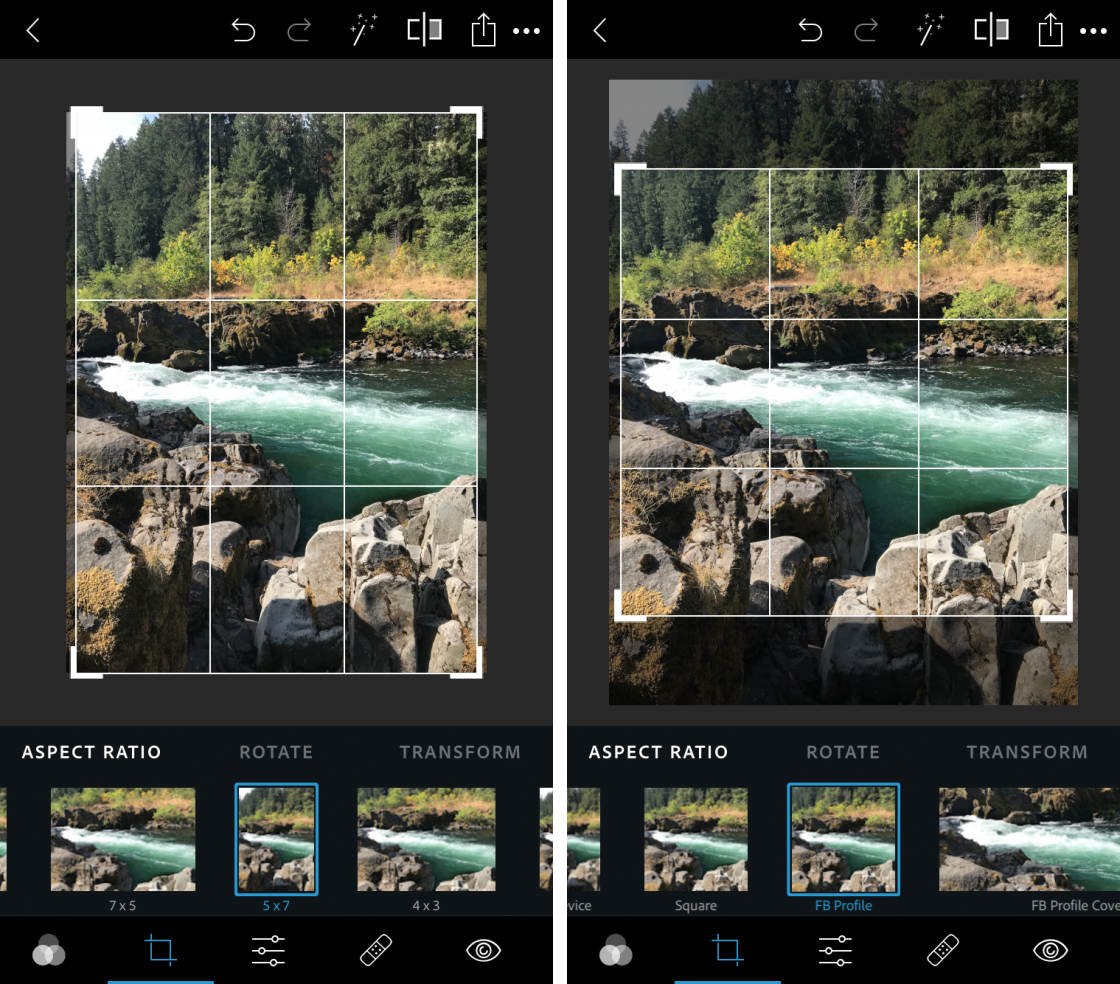
Choose an aspect ratio from the bottom of the screen. These let you crop to a predefined shape and size, e.g. Original, Square, 4:3, 7:5, etc.
You can even crop to specific aspect ratios for Facebook profile and cover photos. Select Unconstrained to crop without being restricted to a particular aspect ratio.
Once you’ve selected an aspect ratio, drag the corner handles to crop the image.
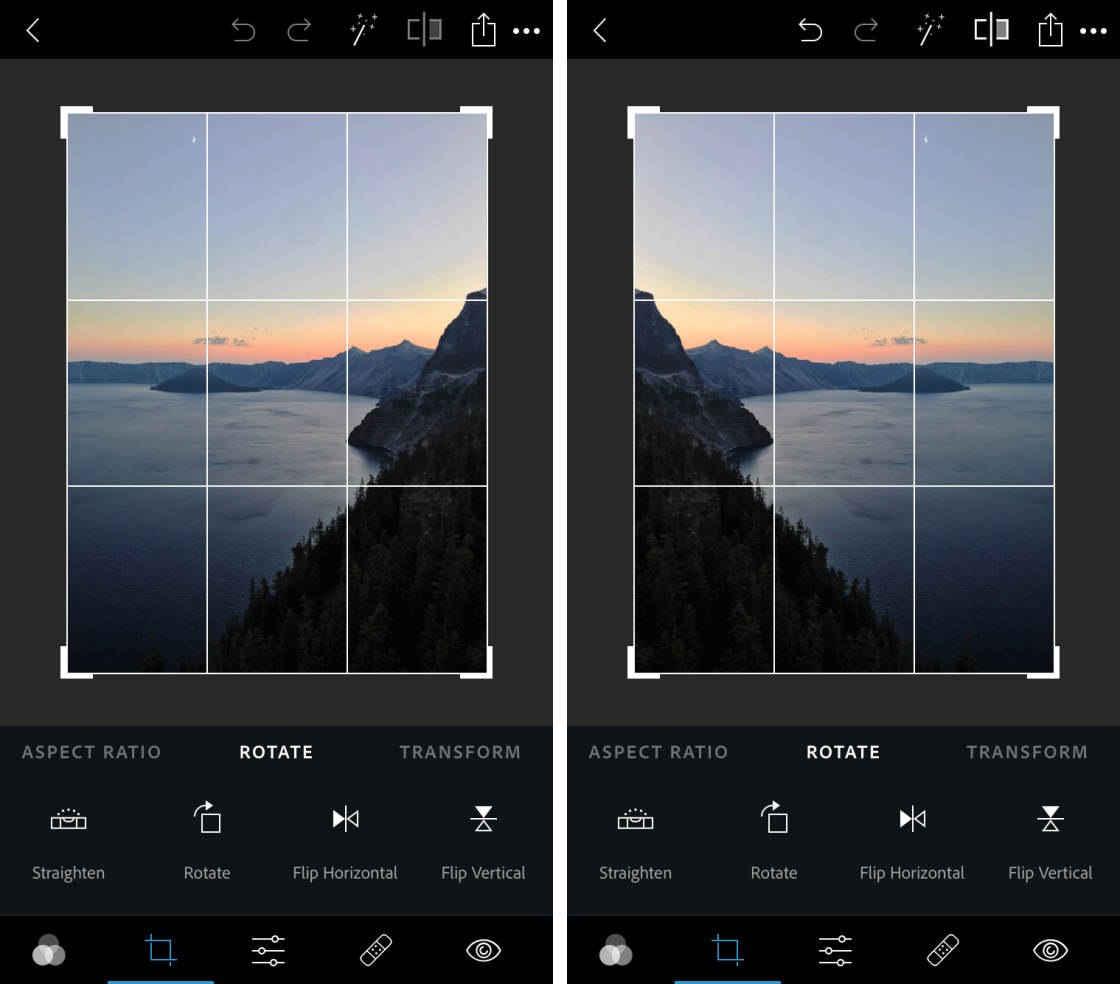
4.2 Rotate & Straighten Your Photo
The Rotate option includes four tools for changing the orientation of your photo. These tools are: Straighten, Rotate, Flip Horizontal, and Flip Vertical.
The Straighten tool is perfect for leveling the horizon in landscape photos. You can also use it to ensure lines are straight in your architecture photos.

Tap Auto to the left of the slider. Photoshop Express will analyze your photo and attempt to straighten it. If the app doesn’t get it right, drag the slider to tilt your photo. Use the grid to help you get the lines straight.
The Rotate tool lets your rotate your photo 90 degrees at a time. Use this to change the orientation of a photo from vertical to horizontal, or vice versa.
The Flip Horizontal and Flip Vertical tools flip your photo horizontally or vertically. This creates a mirror image of your original photo.
Flipping an image horizontally can sometimes improve the composition of your photo. For example, a composition can flow better if the most prominent subject is on the left. We read from left to right, so our eyes naturally want to look from left to right in a photo.
4.3 Transform Your Image To Correct Perspective
Have you ever taken a photo of a tall building, and noticed that it gets narrower towards the top? This perspective problem is caused by you tilting your iPhone up when taking the photo.
You can correct perspective problems using the Transform tools in Adobe Photoshop Express.
To straighten the building (or any other subject with perspective distortion) tap the Vertical Skew tool. Drag the slider to skew the photo. Or tap Auto to the left of the slider to let Photoshop Express do the work for you.

Use the Horizontal Skew tool to make it appear that you took the photo from straight on, rather than slightly to one side.
You can also use the Full Auto and Balanced Auto tools to automatically skew and straighten your image. Try both options to see which one works best for your particular photo.
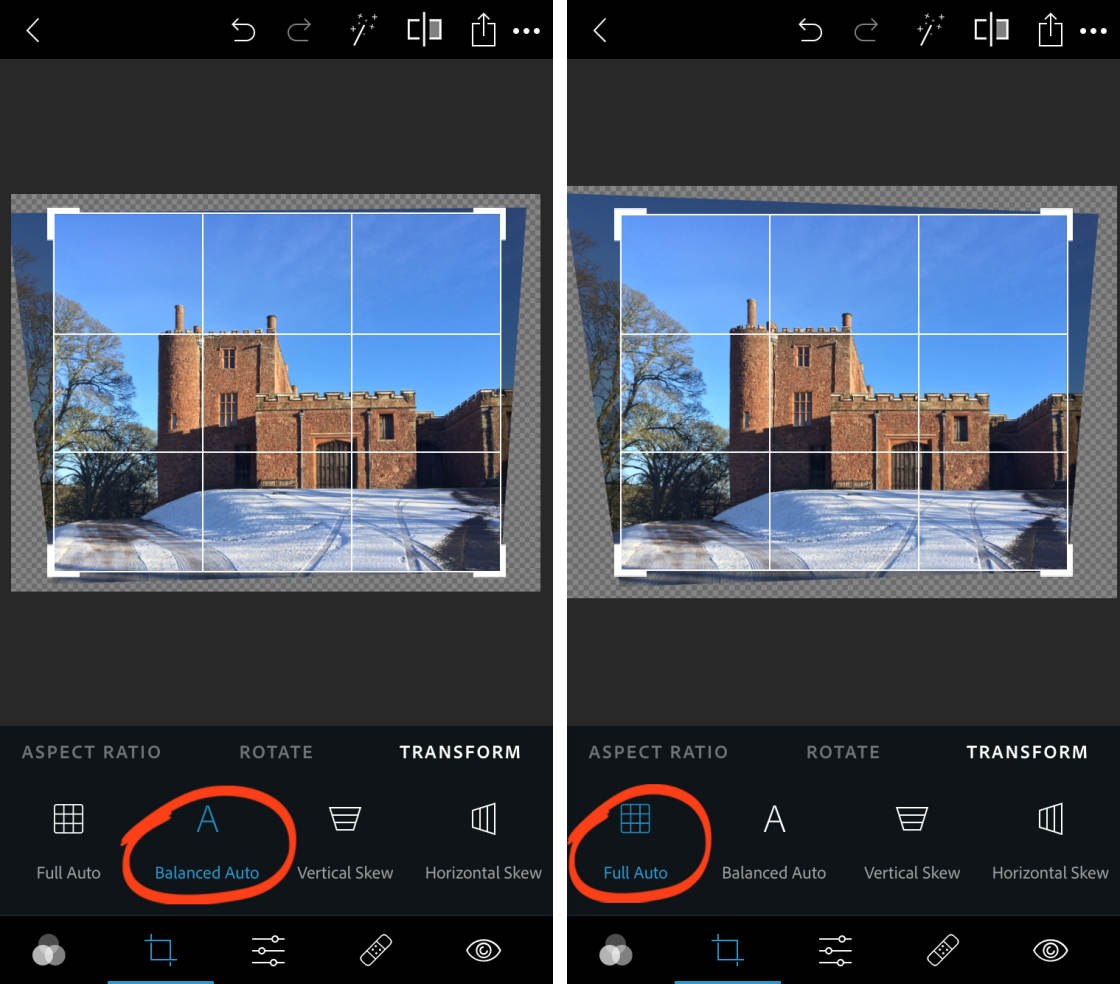
Full Auto can sometimes result in distorted and stretched images. So be careful with this tool, and always check your image looks good after using it.
The third icon (three sliders) at the bottom of Photoshop Express opens the Adjustment Tools.
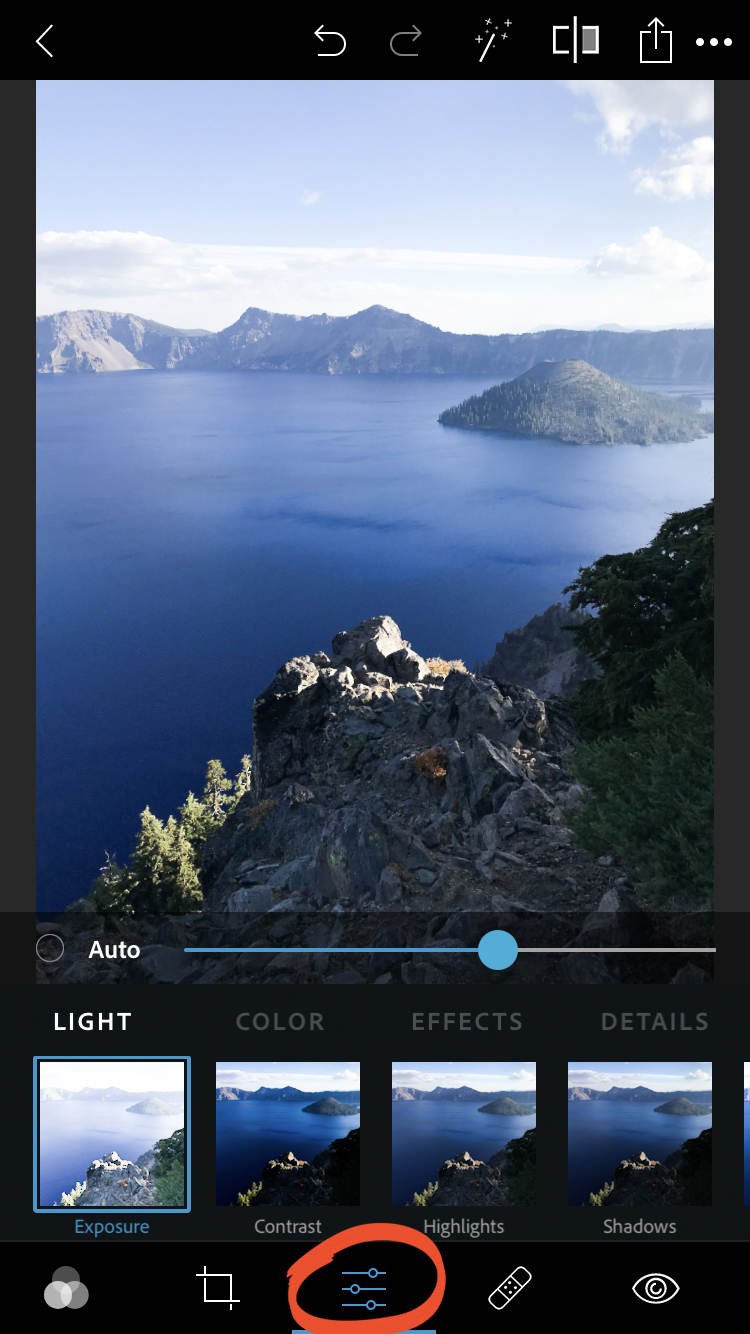
These tools adjust settings such as light, color and sharpness. The tools are very easy to use. A single slider lets you control the intensity of each effect. Use the sliders to bring out detail and make your photos “pop.”
The Adjustment tools are organized into the following categories: Light, Color, Effects, Details, and Blur. Scroll across to view the tools in each category.
As with the PS Express filters, be careful that the adjustment tools don’t ruin your photo. They can easily make your image look grainy and over-processed if used at full strength.
Use the sliders with caution, and only make small changes to your photo. Applying subtle adjustments will help you create beautiful iPhone photo edits.
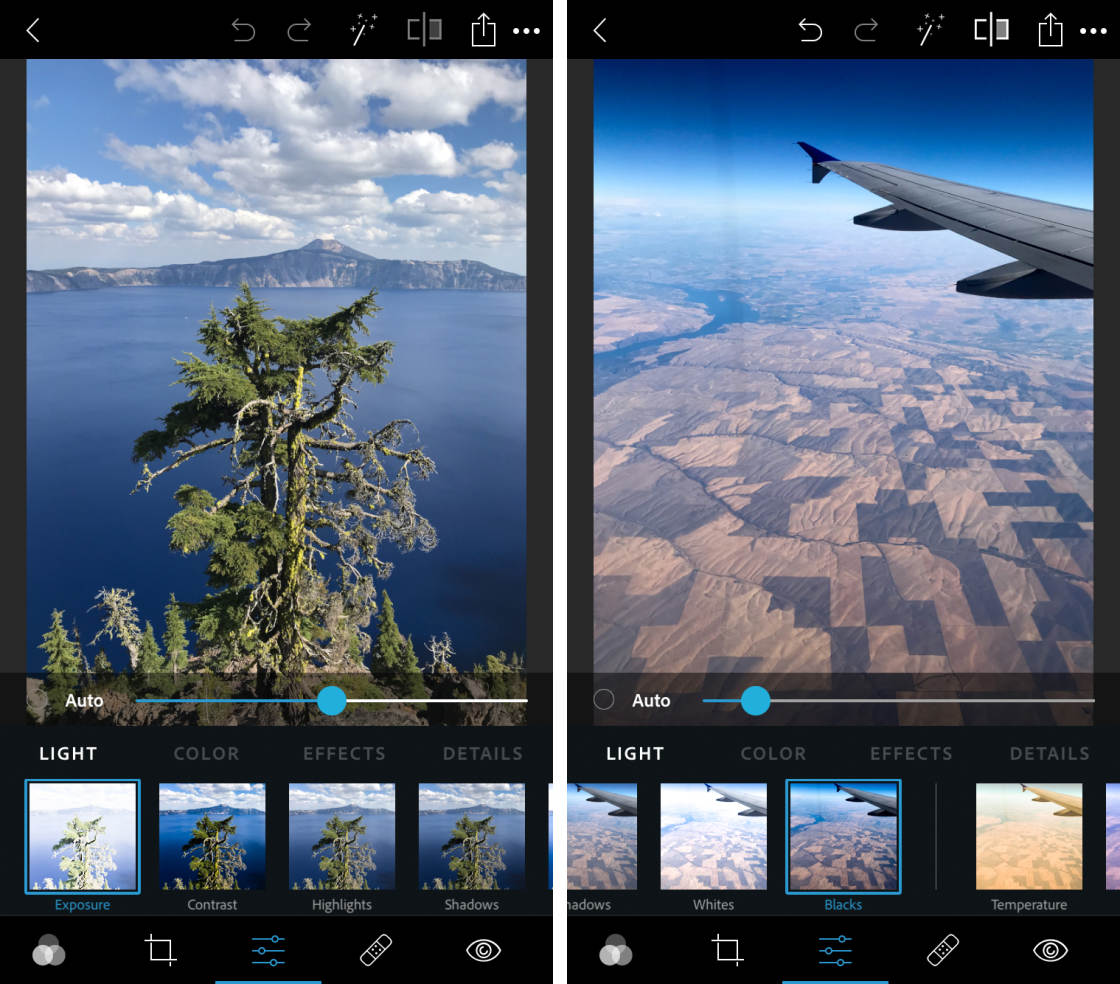
5.1 Make Light Adjustments
The sliders in the Light category let you adjust the brightness of your photo in different ways. The Light sliders allow you to control the following:
- Exposure: Brighten or darken the entire image.
- Contrast: Change the difference between the brightness of light and dark areas.
- Highlights: Adjust the brightness of the highlights (bright areas).
- Shadows: Adjust the brightness of the shadows (dark areas).
- Whites: Adjust the brightness of the brightest areas.
- Blacks: Adjust the brightness of the darkest areas.
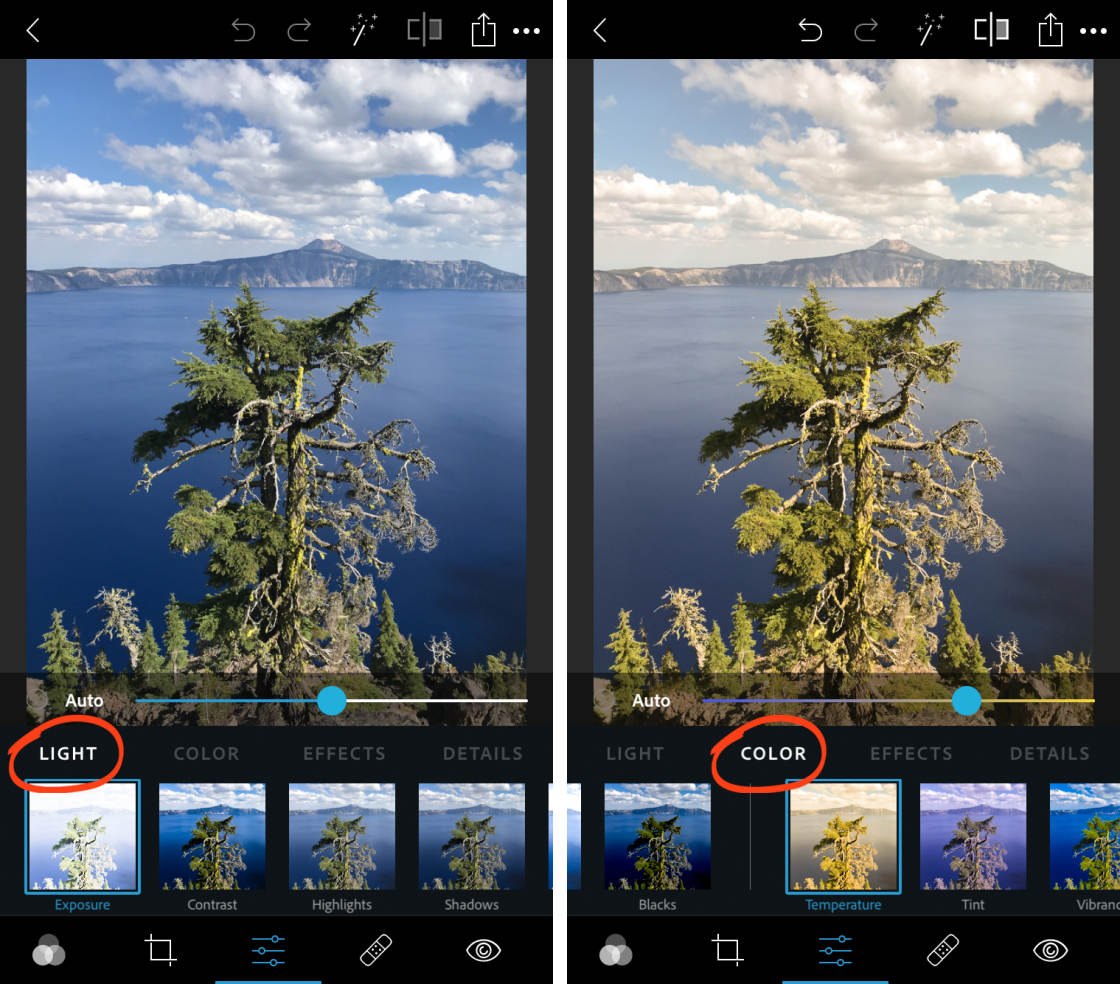
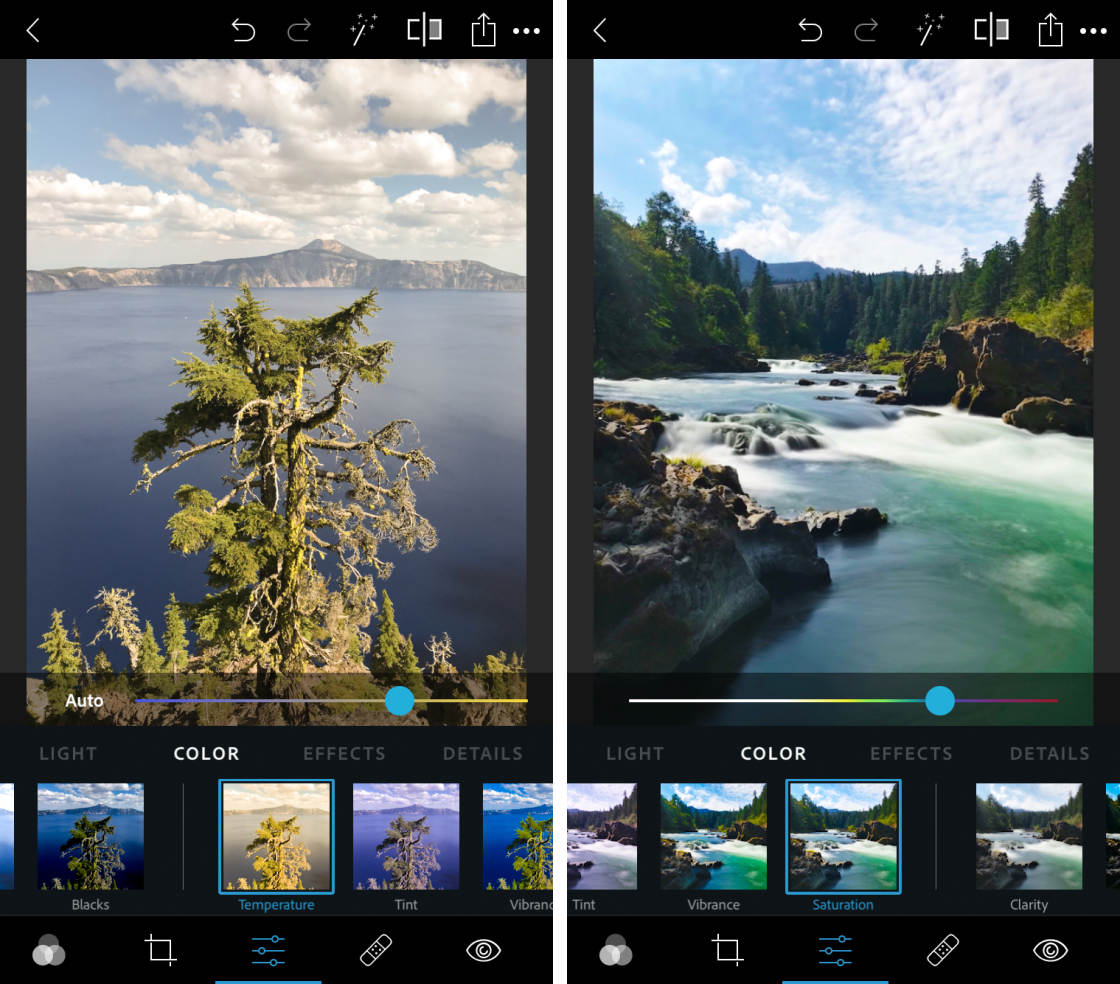
5.2 Enhance Colors In Your Photo
The sliders in the Color category give you control of the following color settings:
- Temperature: Make the colors warmer (more orange) or cooler (more blue).
- Tint: Add a green or purple tint to your photo.
- Vibrance: Adjust the lower-saturated colors without affecting the higher-saturated colors too much. This boosts colors in your photo without making it look harsh.
- Saturation: Adjust the intensity of all colors in your photo.
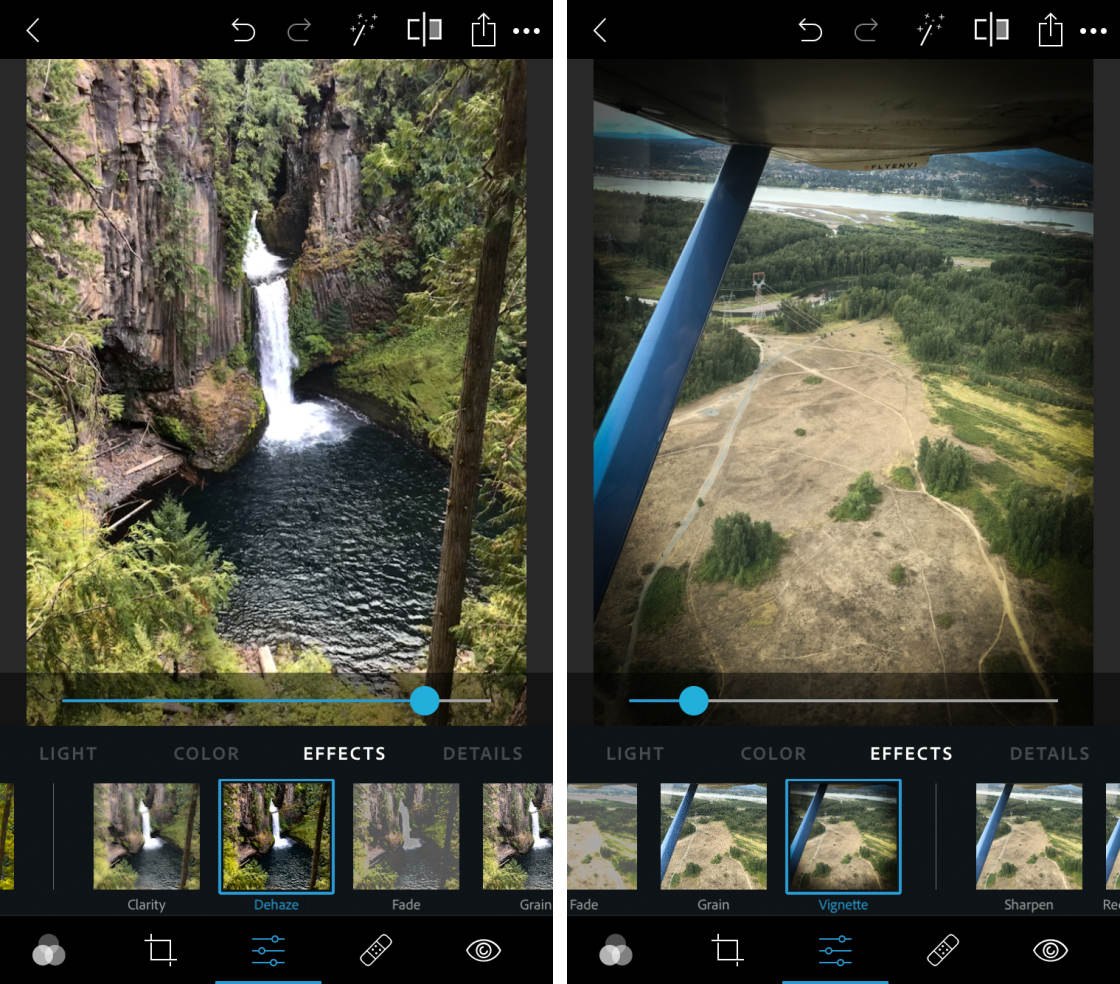
5.3 Improve Your Image With Effects
The sliders in the Effects category let you adjust the following:
- Clarity: Bring out details and textures.
- Dehaze: Adjust the amount of atmospheric haze in your photo. Drag the slider to remove or enhance fog in your photo.
- Fade: Fade the colors in your photo.
- Grain: Add grain to create an old-fashioned film or vintage look.
- Vignette: Add a black or white vignette around the edges of your image.
5.4 Sharpen Detail & Eliminate Grain
The sliders in the Details category control sharpness in your image. You can adjust the following settings:
- Sharpen: Sharpen the fine detail in your photo.
- Reduce Luminance Noise: Fix noisy (grainy) photos where the bright pixels are affected. Drag the slider to smooth out the grain.
- Reduce Color Noise: Fix noise (grain) problems where multi-colored pixels appear, especially in the darker areas of your image.

5.5 Add Blur Effects To Your Photo
The Blur category allows you to blur all or part of your image. It’s unlikely that you’ll want to blur your entire photo! But the Radial blur option can be useful in certain situations.
Radial blur lets you blur certain parts of your image. This can help focus the viewer’s attention on the most important part of the scene.
When you select the Radial tool, two circles appear over your photo. Drag the slider right to increase the amount of blur.

Anything inside the inner circle will remain in sharp focus. Anything outside of the outer circle will be blurred. The area between the two circles is where the image transitions from sharp to blurred.
You can drag the circles to a different part of the image. And you can pinch in or out with two fingers to change the size of the blurred area.
You can also change the size of the gap between the two circles. Drag an arrow on the inner circle to control how much of the image appears sharp. Drag an arrow on the outer circle to control how much of the image is blurred.
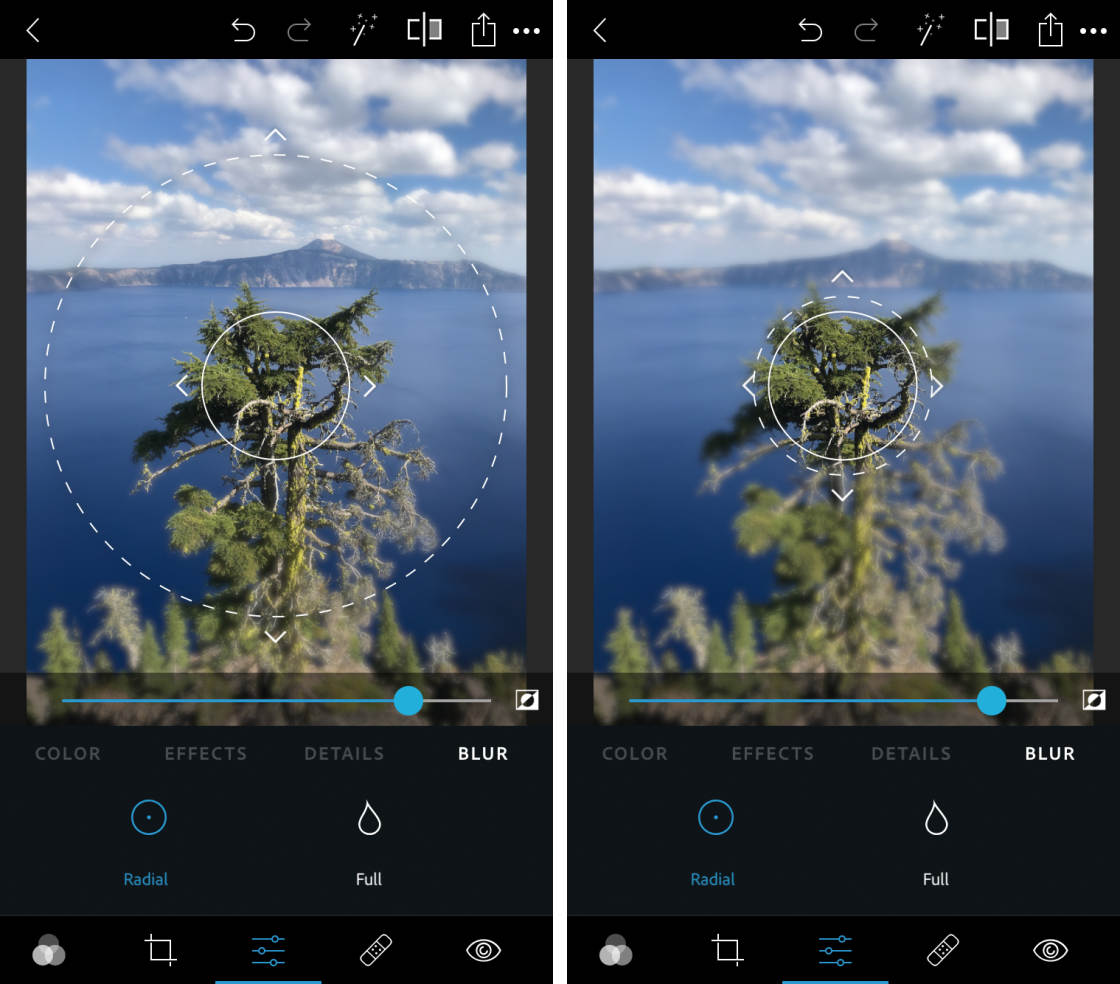
The wider the gap between the two circles, the softer the transition will be from sharp to blurred. A large gap results in a very gradual transition between the sharp and blurred areas. A narrow gap results in a harsh transition.
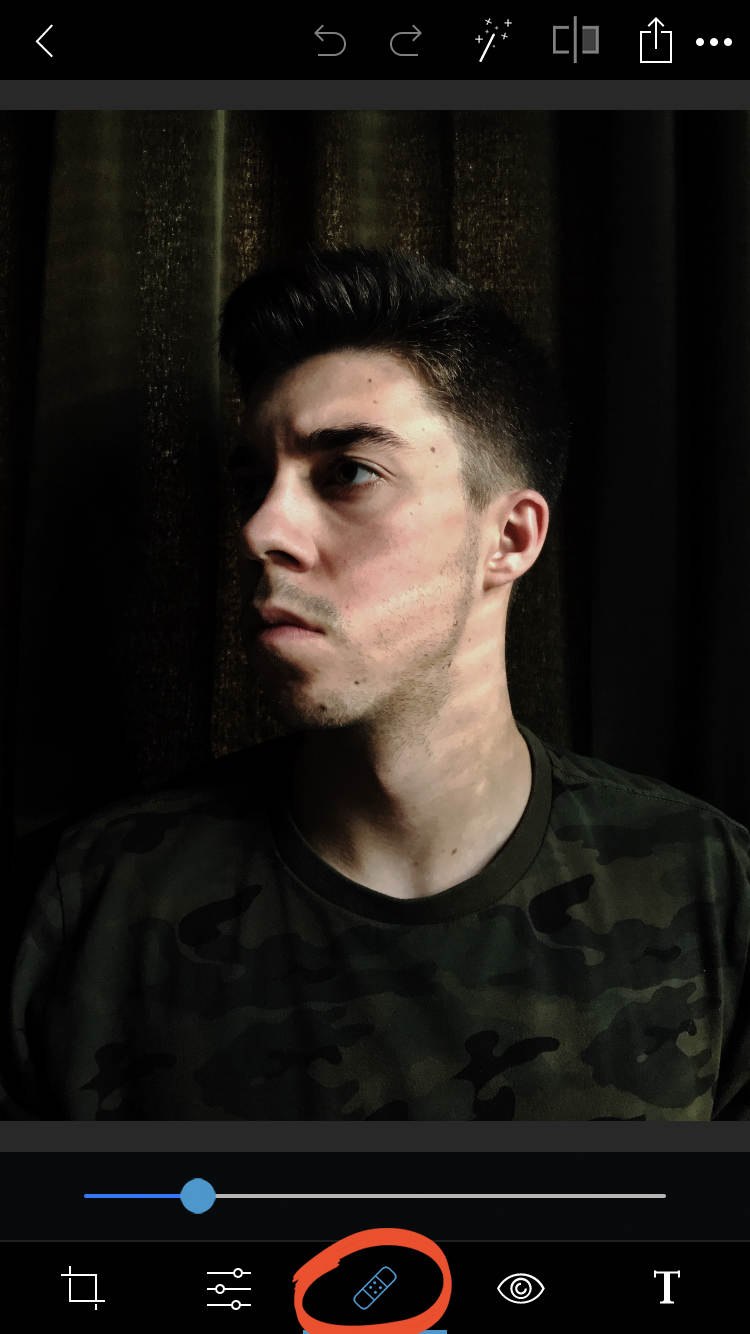
6. Spot Removal Tool
The Photoshop Express app has a handy Spot Removal tool for erasing small objects. With a single tap, you can remove spots, blemishes, dirt, and other small distractions from your photos.
Tap the Spot Removal tool (bandaid icon) at the bottom of the screen.
When removing small details, zoom in on the spot you want to remove. To zoom in, place two fingers close together on the screen, then drag them apart.
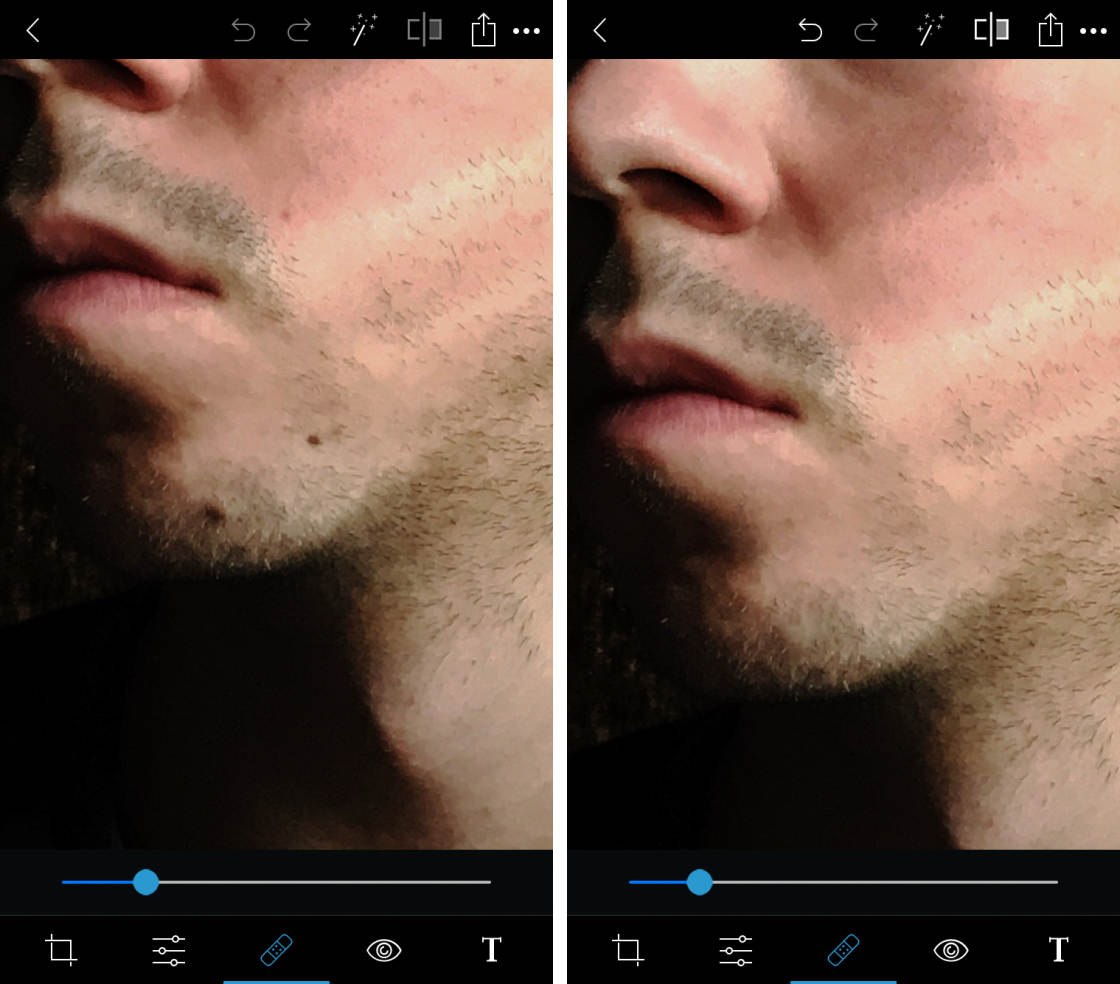
Use the slider to set the size of the Spot Removal tool. For best results, it should be slightly bigger than the blemish you want to remove.
Now tap on a small object to remove it. The area you tap will be replaced by pixels from its surroundings. You may need to tap a few times to remove it completely.
7. Eye Tool
Have you ever taken a portrait photo where the subject appears with red eyes? Or maybe you’ve taken a photo of your pet, and their eyes appear too bright or shiny. You can fix these problems using the Eye tool in Adobe Photoshop Express.
Tap the Eye icon at the bottom of the screen, then select either Red Eye or Pet Eye. Tap the eyes that you want to correct. The Red Eye tool also includes the option to automatically detect and correct red eyes.
8. Text, Stickers & Borders
The Text, Stickers and Borders tools let you add some final touches to your image.
Add a text caption or personal message. Jazz up your photo with an artistic or cartoon-style sticker. Or apply a frame around the edge of your picture.
You probably won’t want to use these elements on every photo. But they can definitely add a unique touch to an image. Use them to tell a story or craft a personal message through your photos.
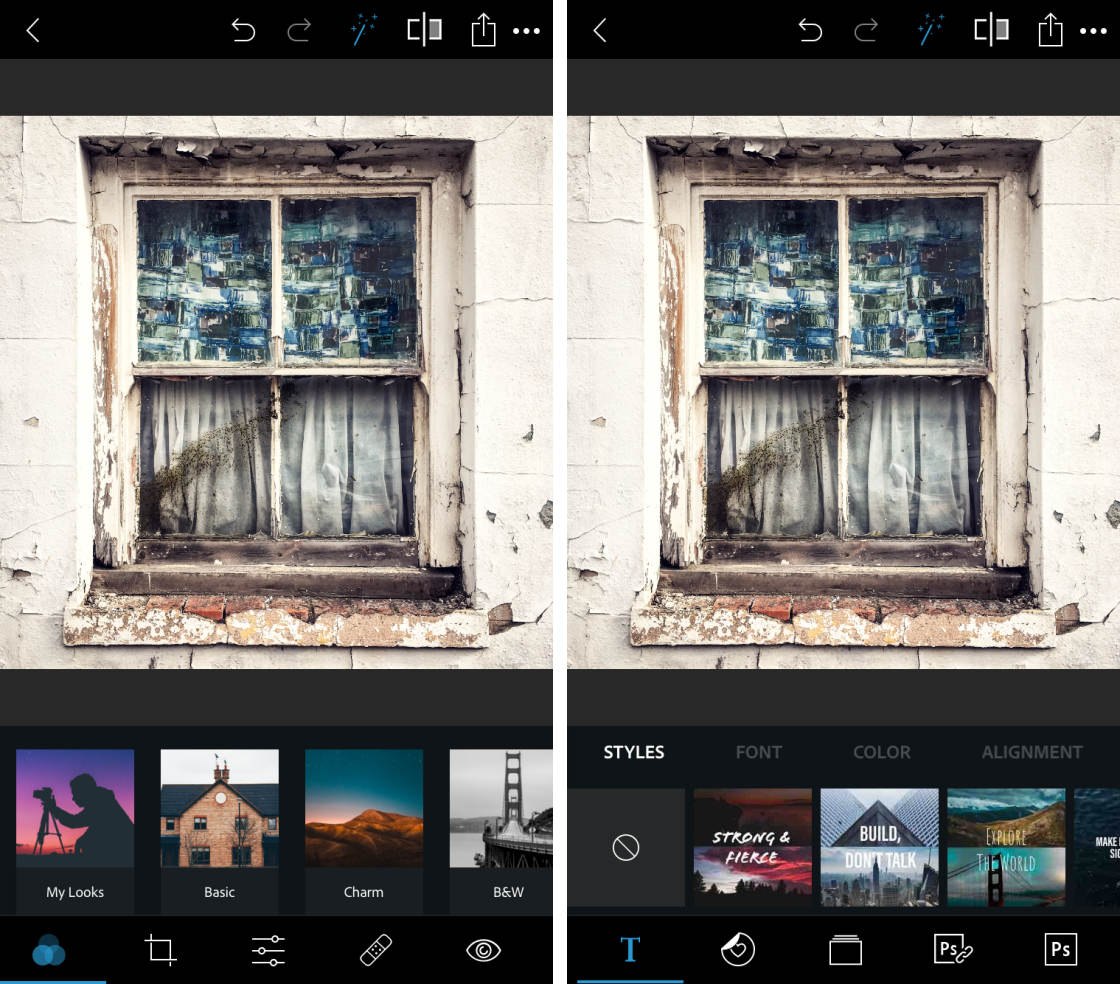
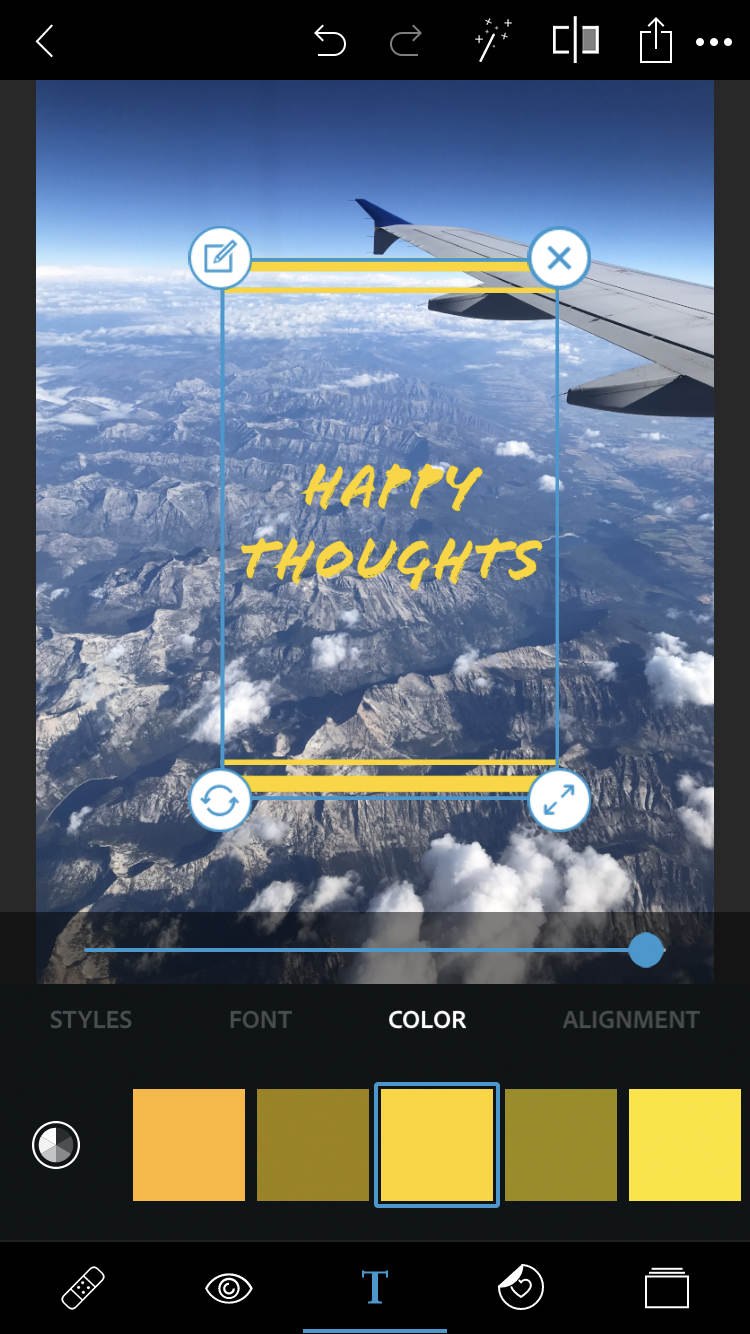
8.1 Add Text To Your Photo
To add text to your image, tap the Text icon (T) in the bottom toolbar. You many need to scroll across the icons to find it.
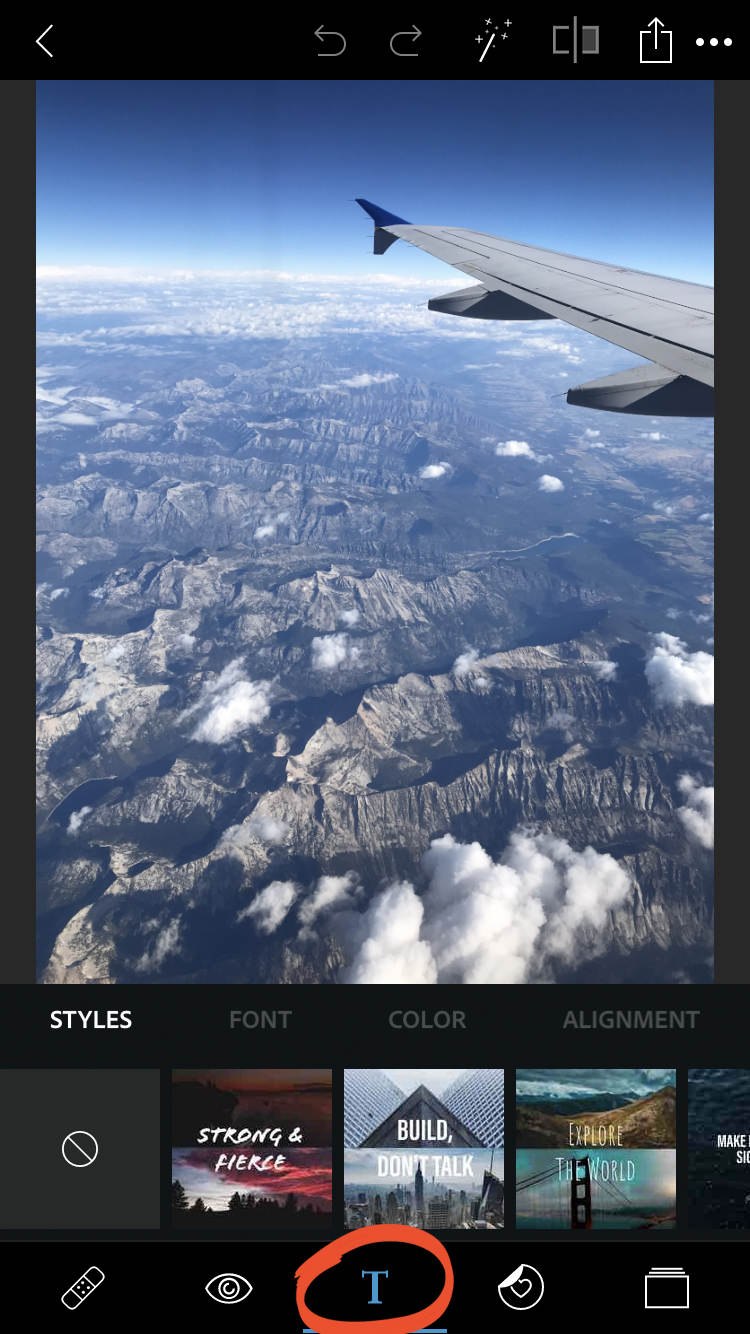
There are four categories within the Text tool: Styles, Font, Color, and Alignment.
Browse through the Styles, and tap on a style of text that you like. You can keep the default text, or delete it and type your own. If you don’t know what to write, these preset styles may give you an idea.
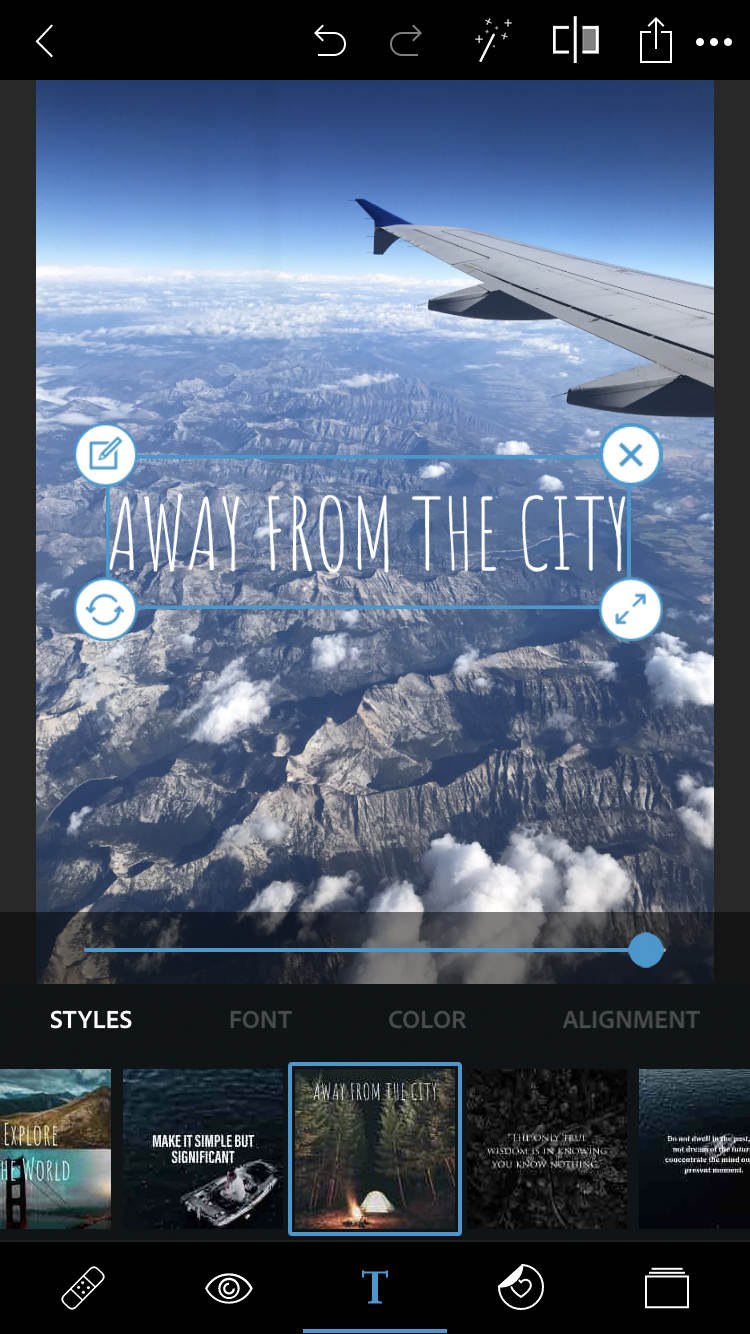
To add your own text, tap the Pencil icon at the top left corner of the text box. A screen will open where you can type your text. Tap Done to add the text to your photo.
Use your fingers to resize, rotate, or drag your text to a different position if necessary.
You can customize your text using the options beneath your photo. Tap Font to choose a different font style. Select Color to change the color of your text. Or tap Alignment to align your text to the left, center, or right.
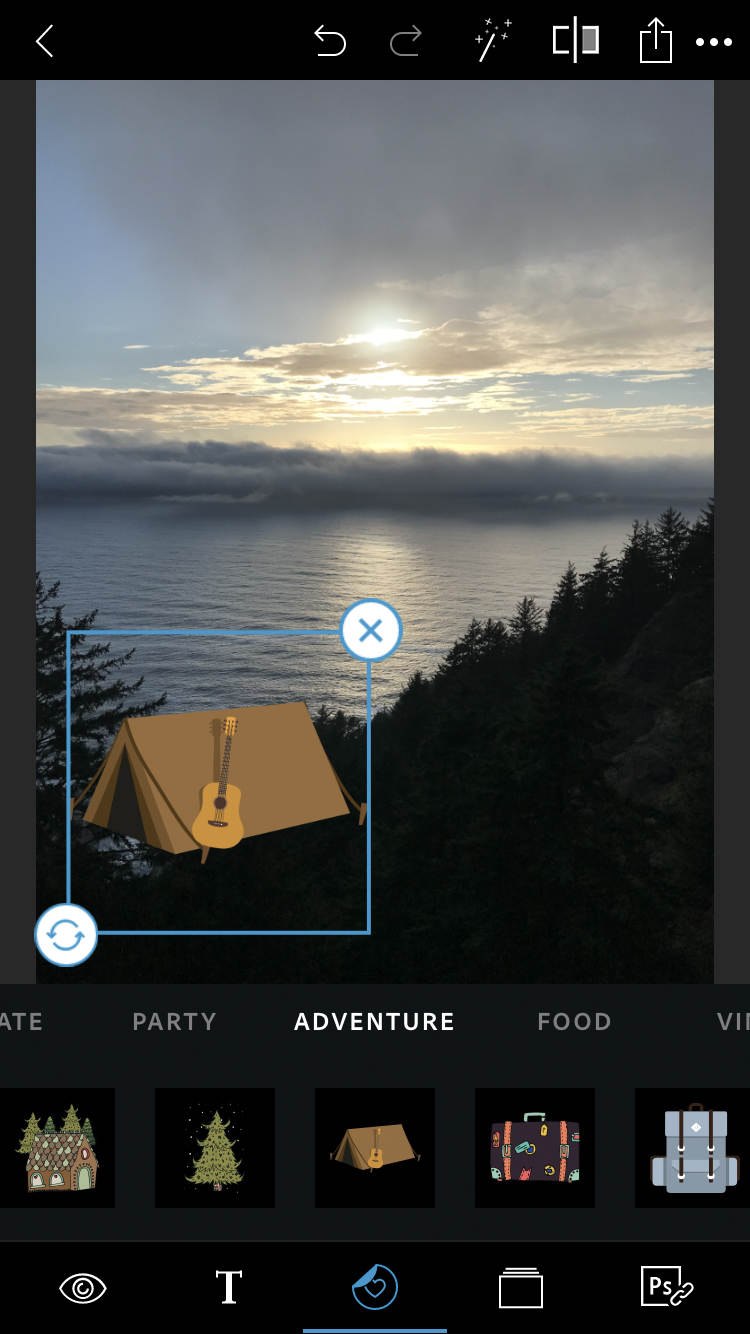
8.2 Add Stickers To Your Image
The Stickers tool lets you add decorative or fun graphics to your photos. Tap the Stickers icon (circle with a heart) at the bottom of the screen.
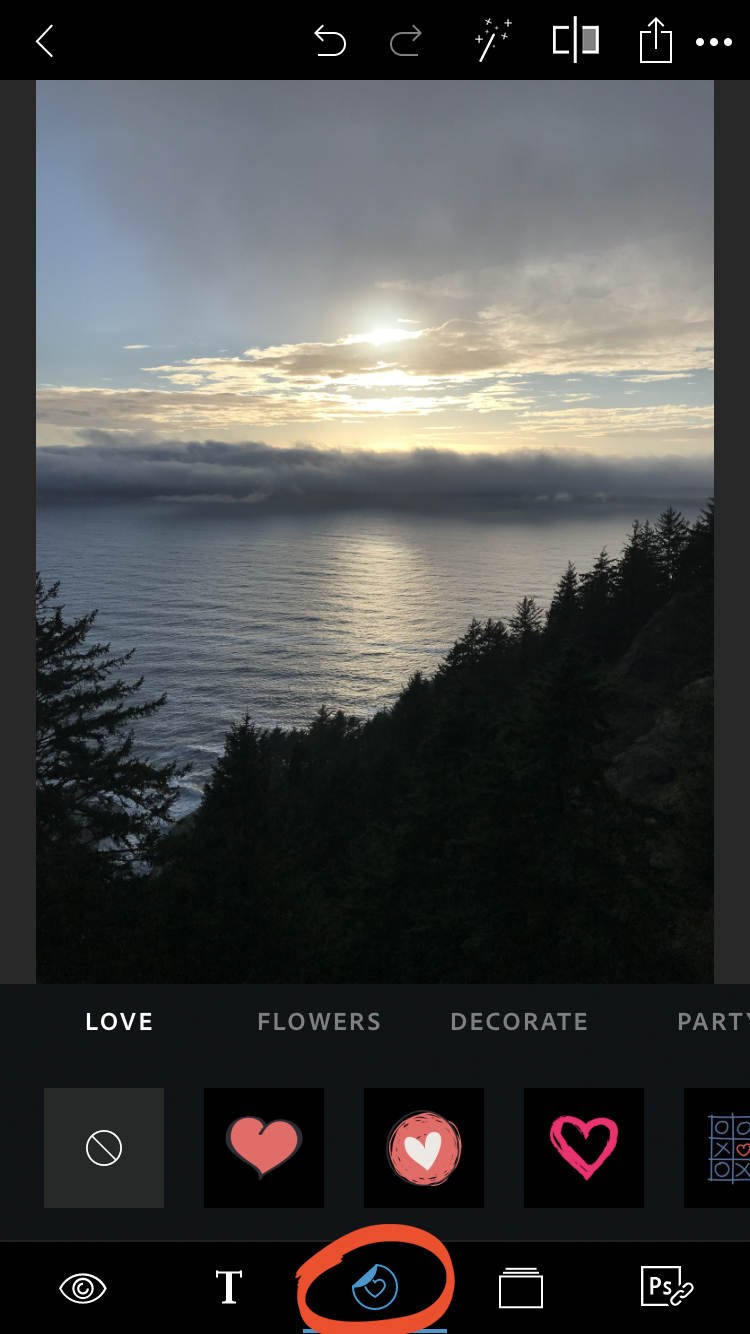
Stickers are grouped by mood and content. Swipe across to view the stickers, or tap any category beneath your photo.
Tap a sticker to add it to your image. Use your fingers to move, resize, or rotate the sticker.
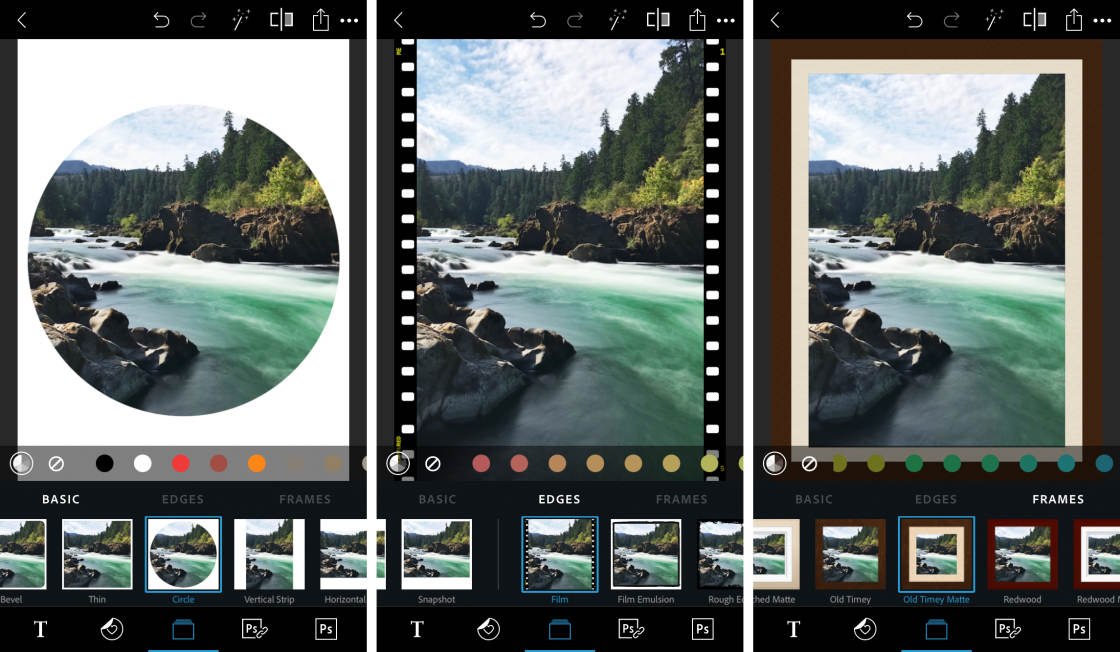
8.3 Add A Border Around Your Picture
Borders are a great way to add a finishing touch to your edit. Tap the Borders icon (stacked rectangles) in the bottom toolbar.

Beneath your photo you’ll see three categories: Basic, Edges, and Frames. Tap on a category, or swipe across to view the range of borders available.
You can change the color of some of the borders using the colored dots at the bottom of your photo.
9. Save Your Edited Photo
When you’ve finished editing your photo, you’ll need to save it. Tap the Share icon (square with up arrow) at the top of the screen. On the next screen, tap Camera Roll.
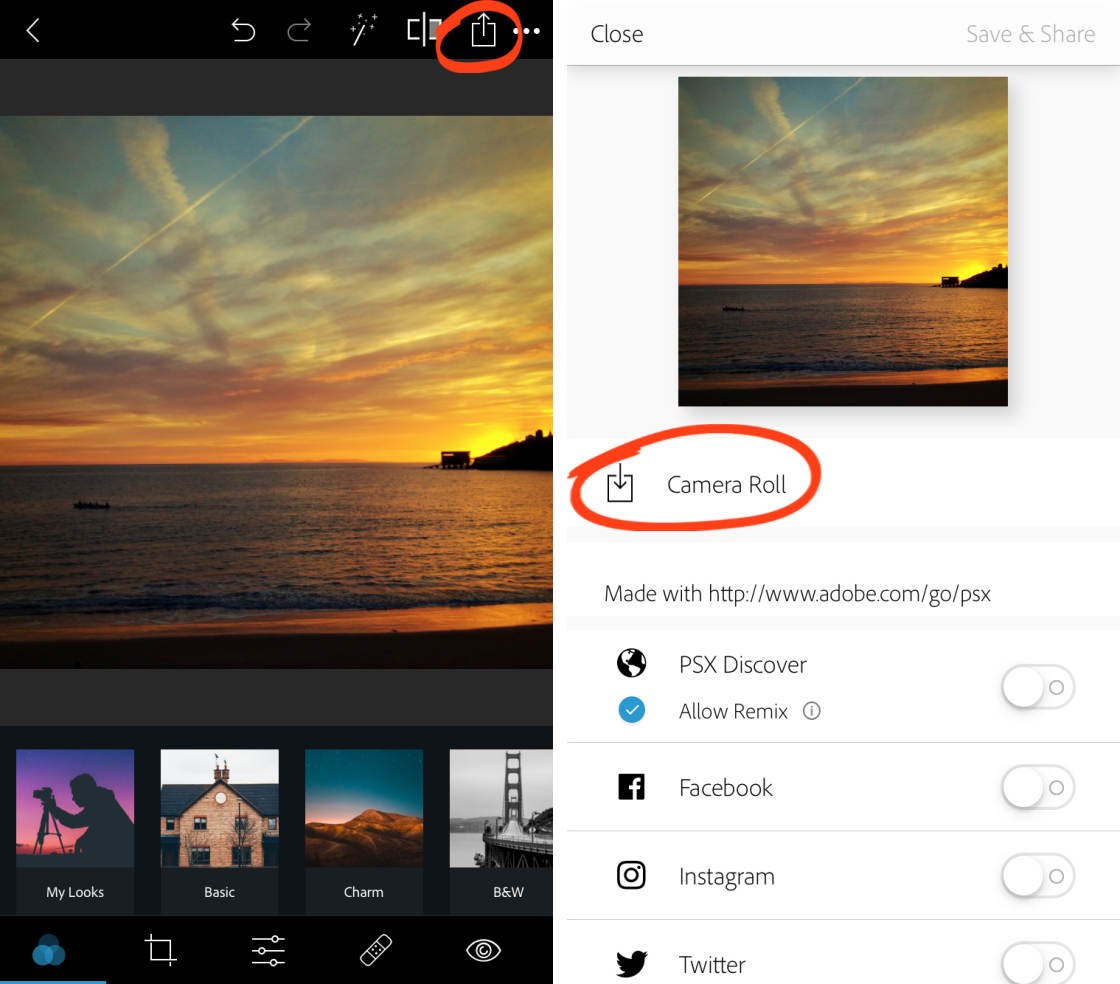
Your edited photo will be saved to the built-in Photos app on your iPhone.
10. Collage Tool
One of the most powerful features of Photoshop Express is the Collage tool. This is where learning how to Photoshop on iPhone gets really creative!
You can create multi-photo collages using a range of different layouts. Or try applying a collage effect to a single image. This can can result in wonderful unique abstracts.
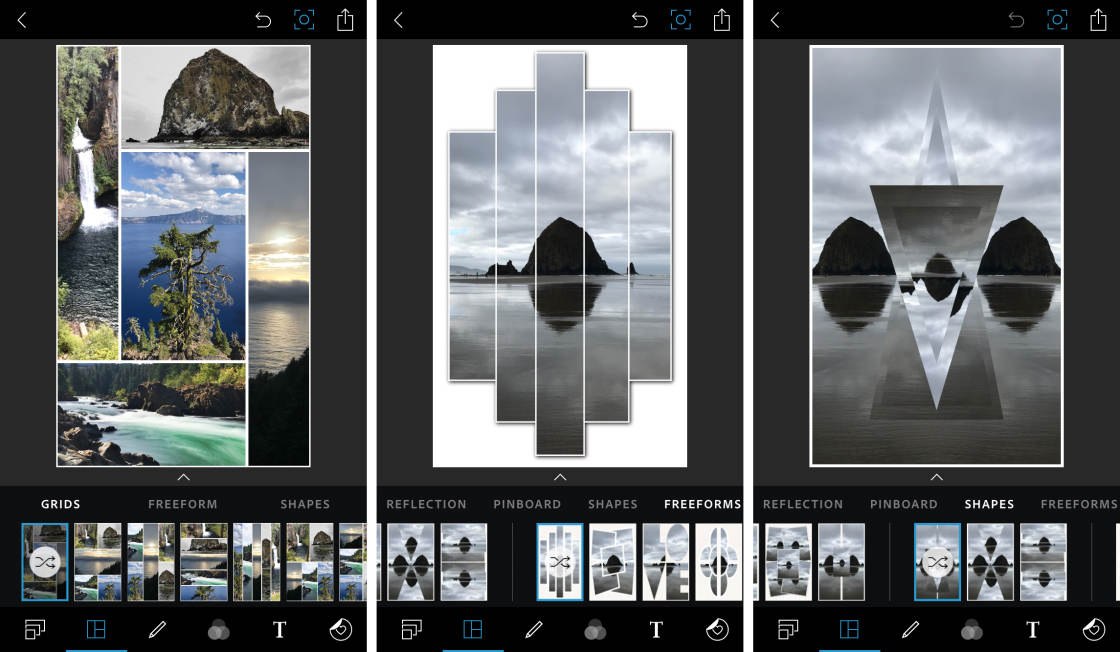
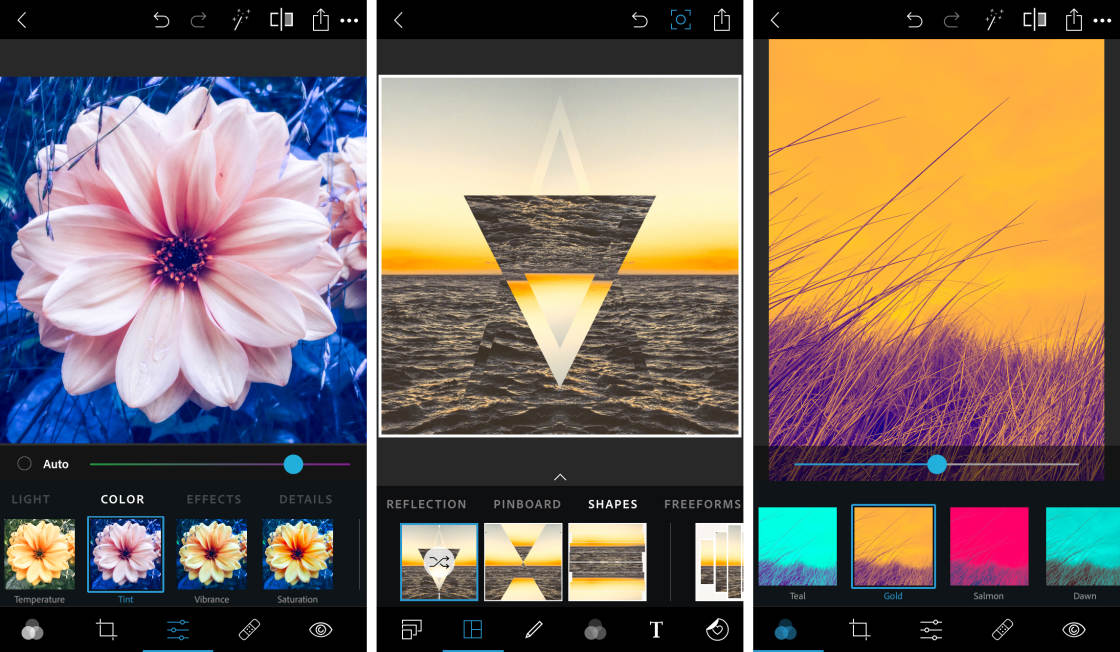
10.1 Create A Single Image Collage
Ensure you have a photo open in the Photoshop Express app. Tap the Collage icon (square with three sections) in the bottom toolbar.
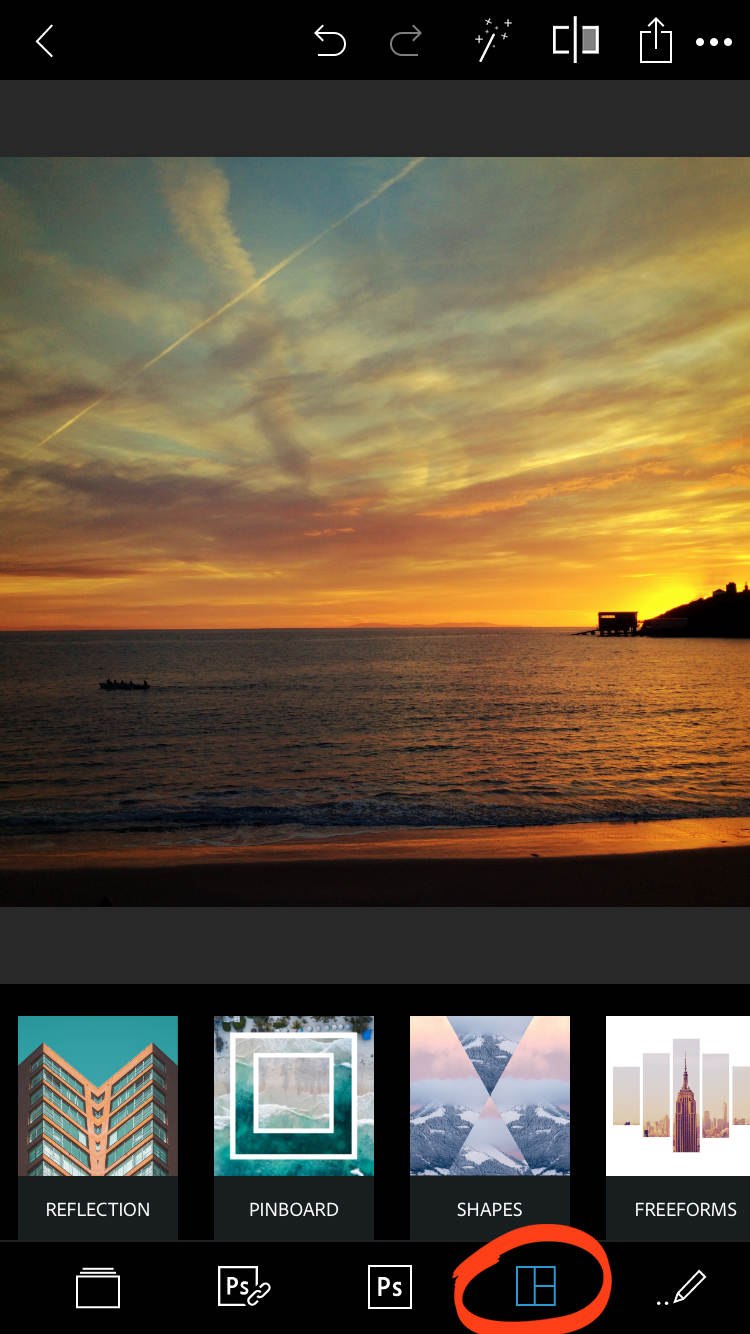
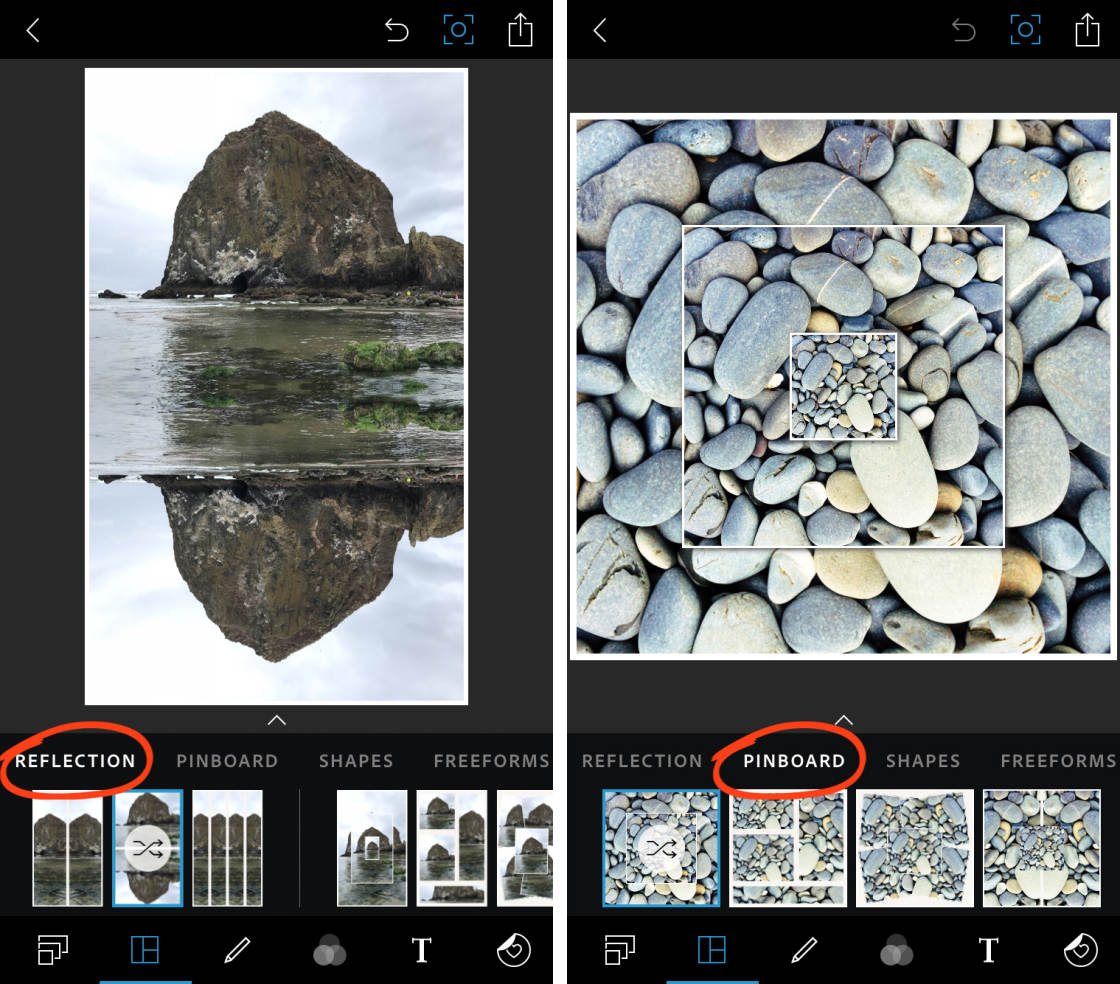
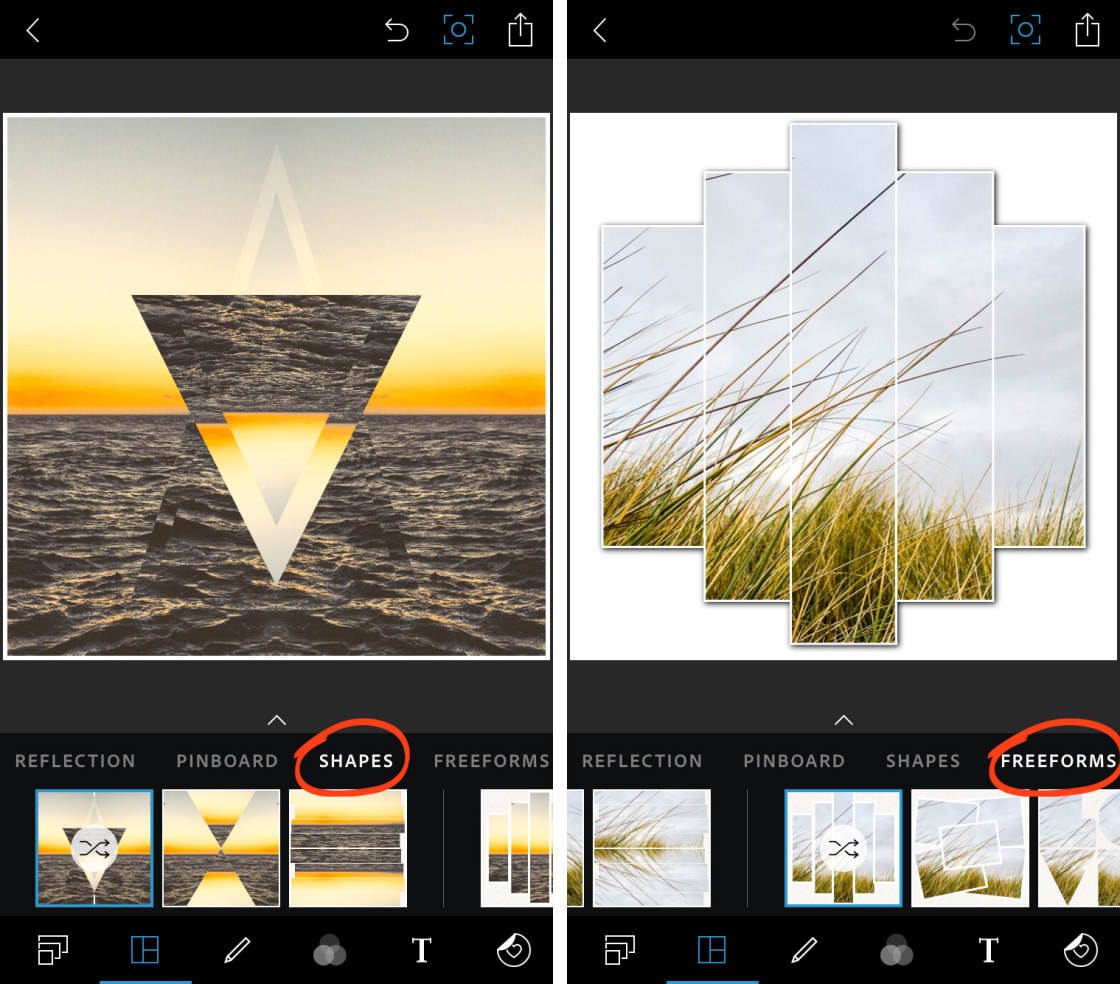
Beneath your photo are four categories: Reflection, Pinboard, Shapes, and Freeforms. Tap on a category, or swipe across to view the range of collage effects. Tap a collage layout to apply it to your photo.
Below are some examples of collage layouts from each category. Each layout has been applied to a single photo.
After applying a collage effect, the icons in the bottom toolbar give you access to a range of editing tools. You can enhance your image with filters. Or customize your collage with text, stickers, borders, and backgrounds.
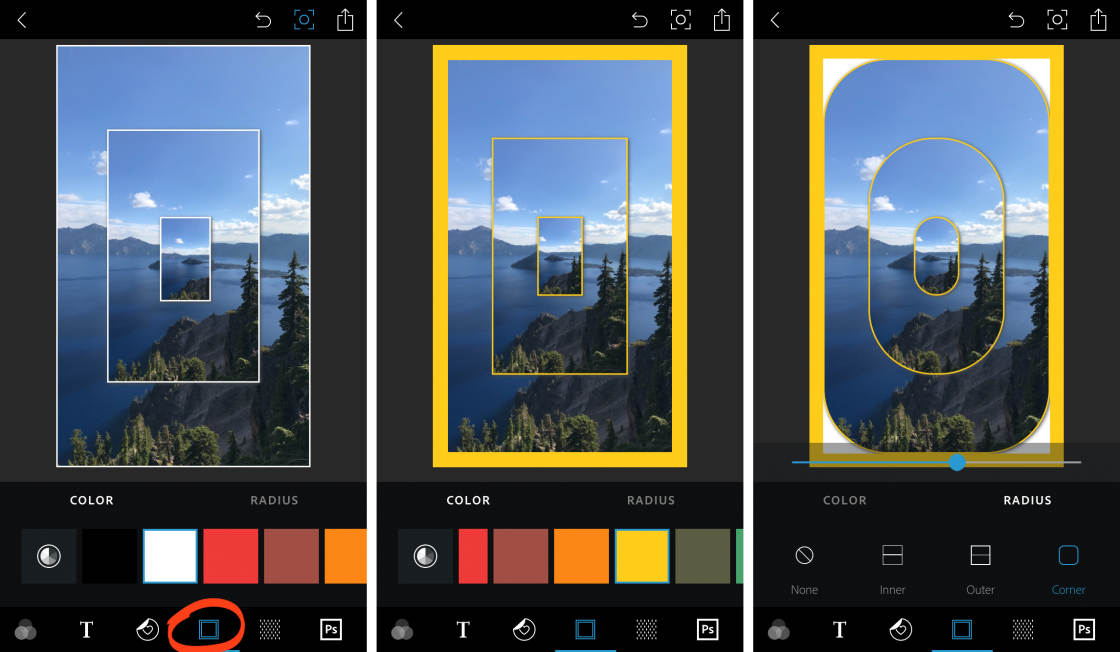
You can easily change the color and width of the borders in your collage. Tap the Borders icon (nested squares) in the bottom toolbar. Use the Color and Radius options to customize your collage borders.
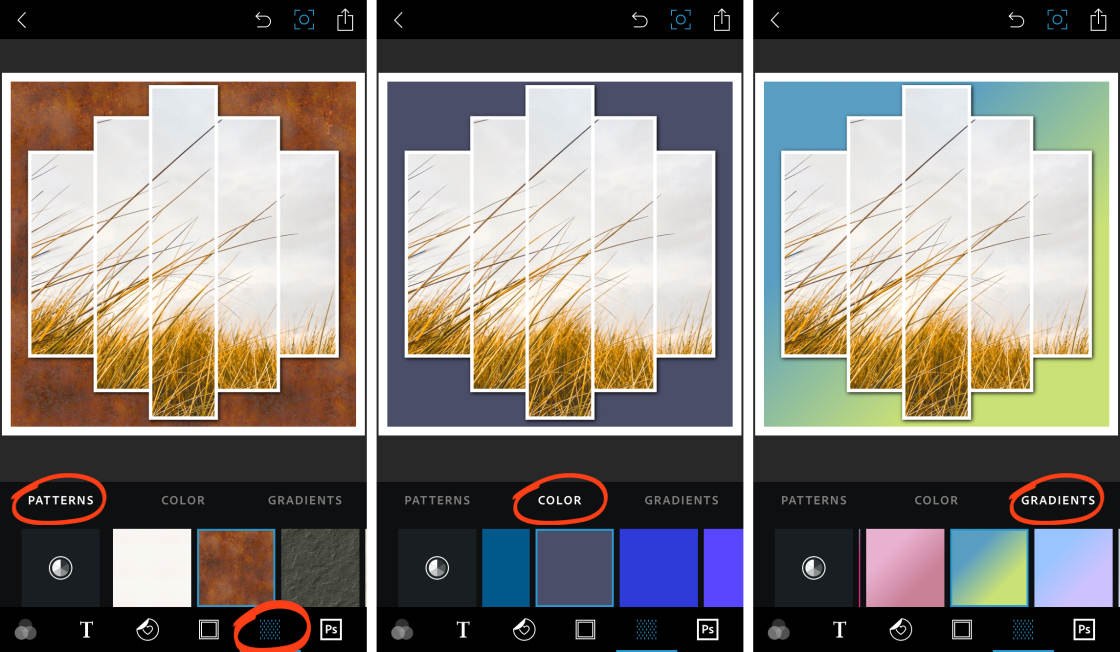
The Background tool (dotted square) lets you add a Pattern, Color, or Gradient to the background of your collage. Rather than having a plain white background, add some texture or beautiful color to finish your edit.
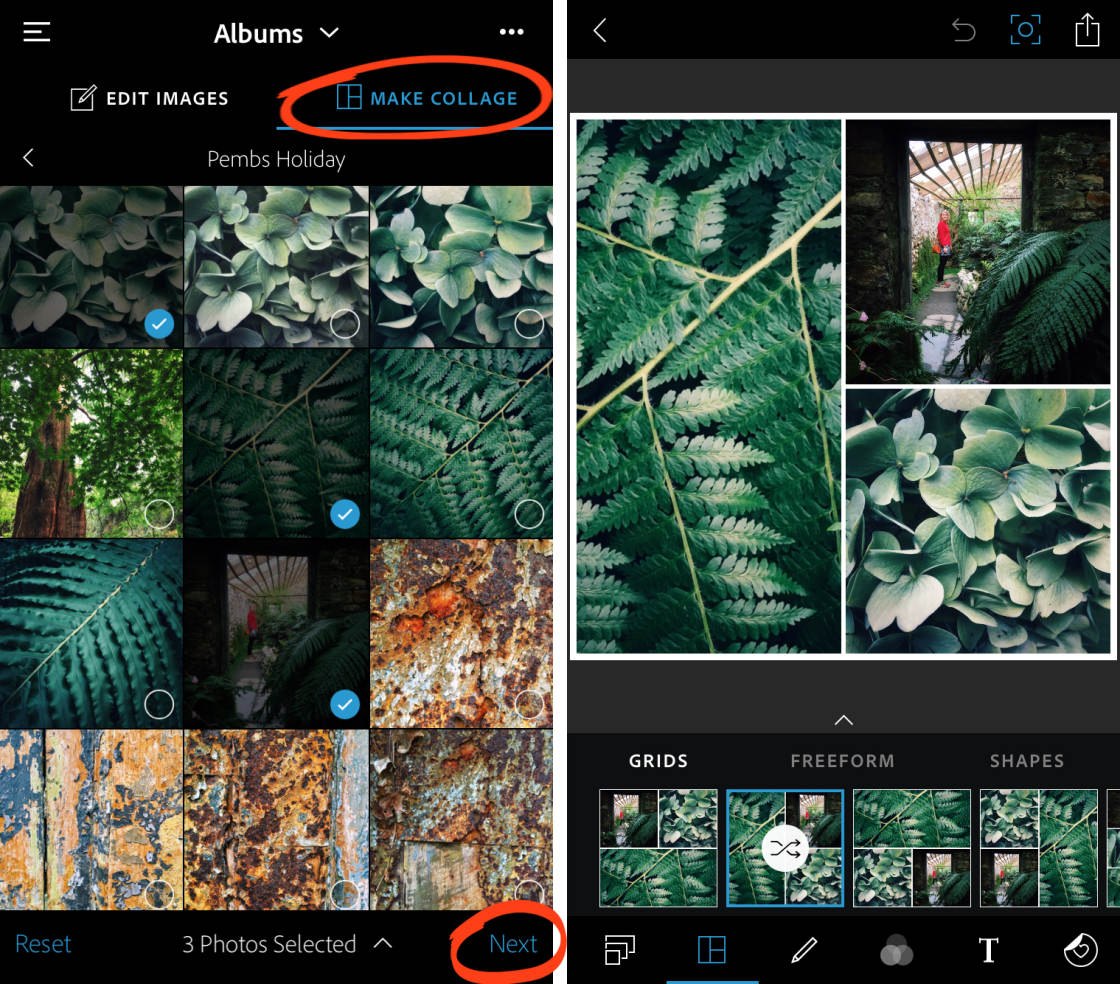
10.2 Create A Multi-Photo Collage
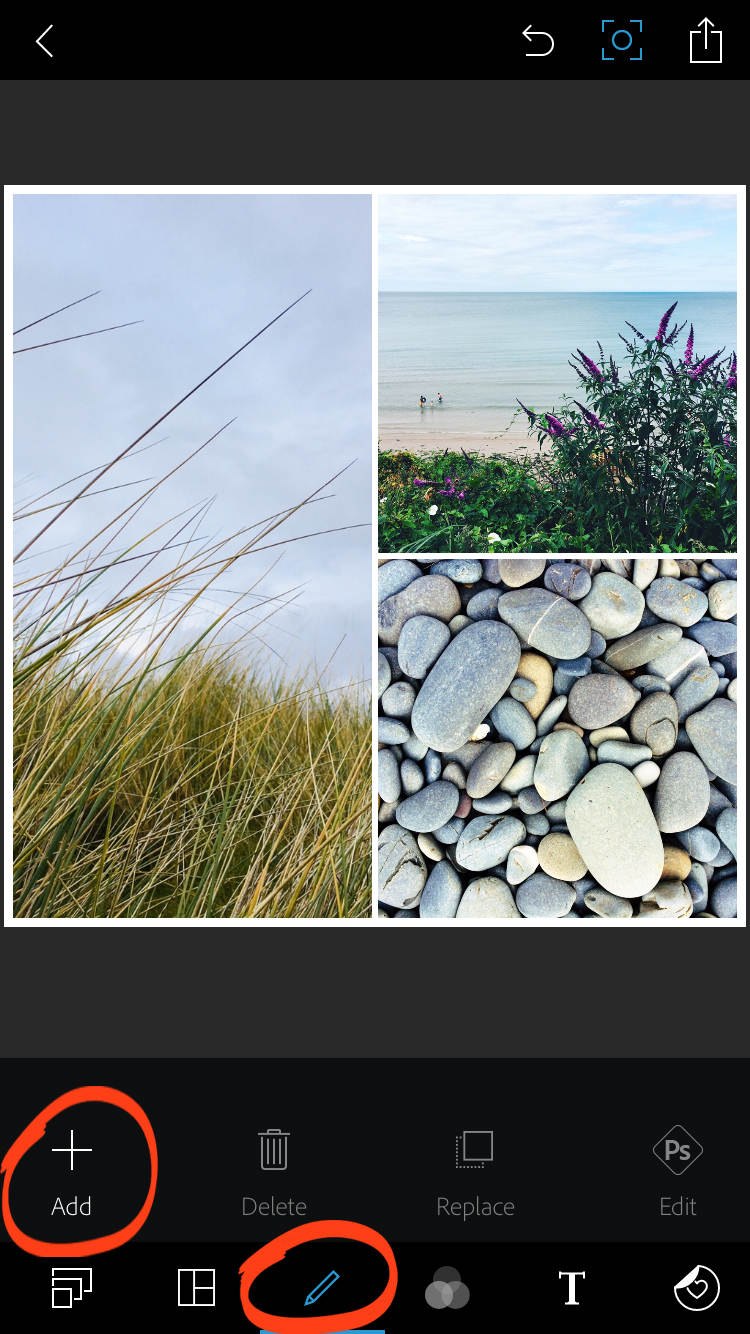
To add more photos to your collage, tap the Pencil icon in the bottom toolbar. Tap Add, then select the image you want to use. Repeat this process to add more photos.
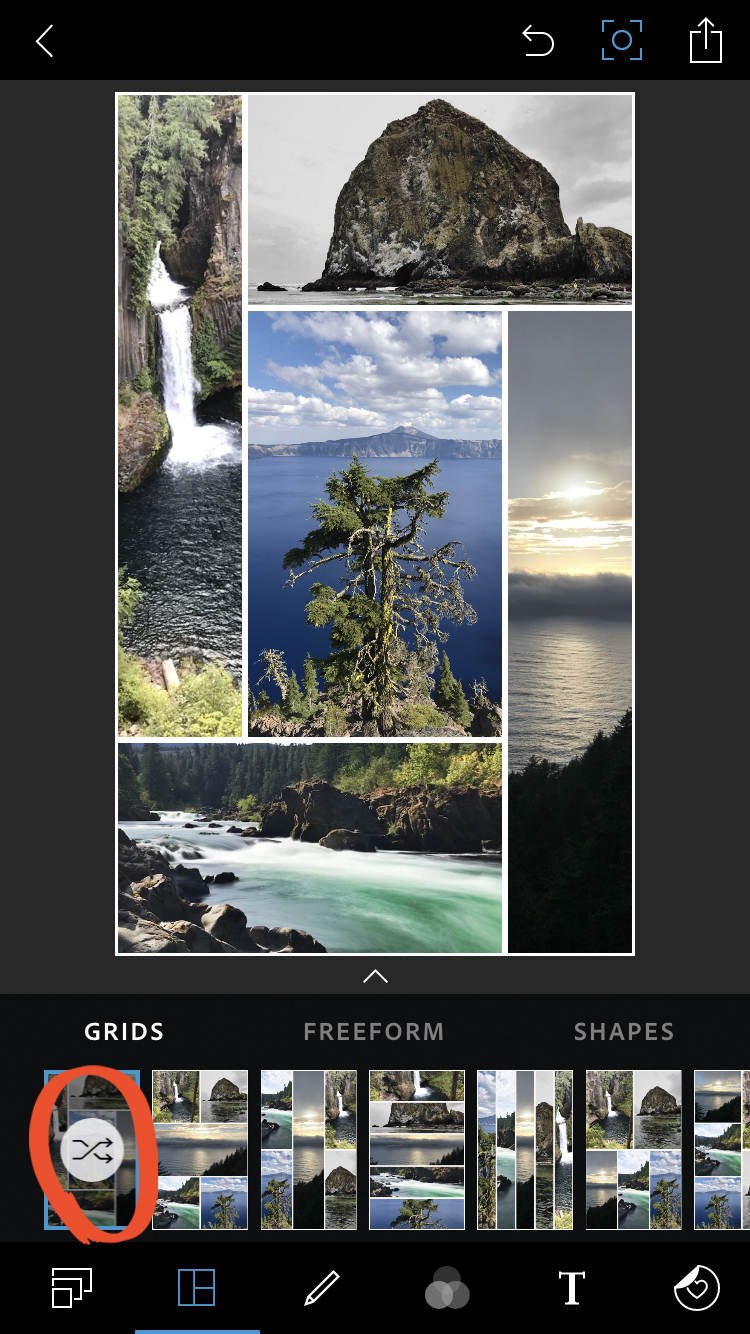
When you’ve finished adding photos, tap the Collage icon at the bottom of the screen. You can now choose a layout for your multi-photo collage. There are three categories to choose from: Grid, Freeform, and Shape.
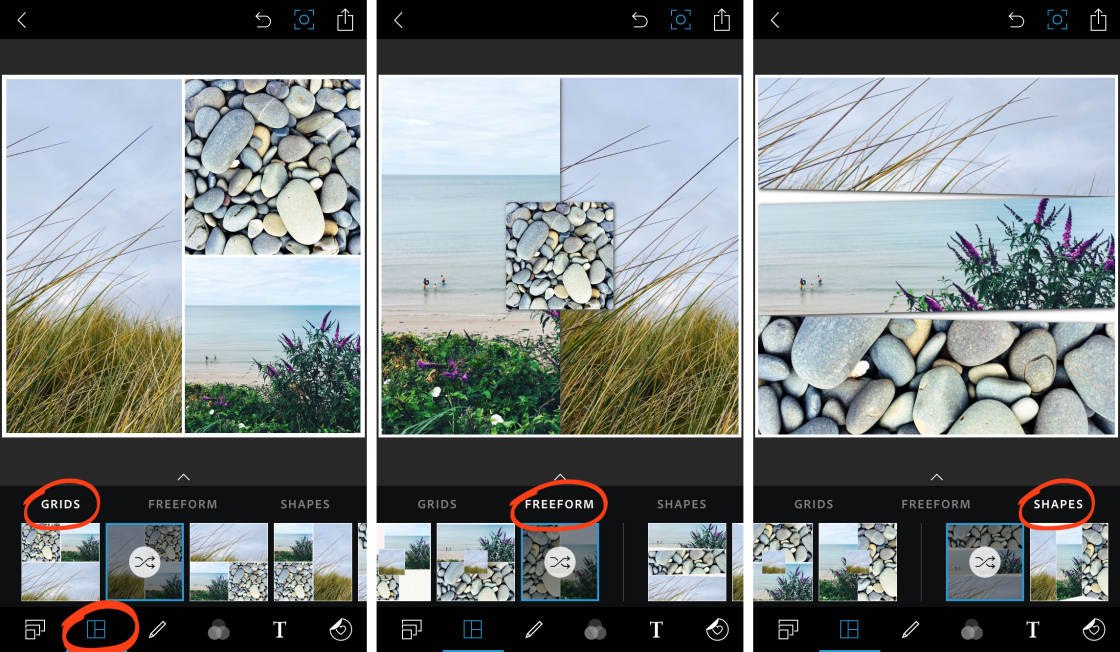
When you’ve chosen a layout, tap the layout icon with double arrows to shuffle the images into different positions. You can also drag photos within a frame to reposition them if necessary.
Some layouts allow you to tap on the borders, and then drag them to resize the individual sections. Other layouts let you drag the images to a completely different position on the background.
Experiment with different combinations of collage design, border styles, and backgrounds. There are so many combinations to make your photos stand out!
You can also create a multi-photo collage from the main photo library screen of the PS Express app. If you’re currently editing a photo, you can get to this screen by tapping the arrow at the top left.
Tap Make Collage at the top of the photo library screen. Select the images you want to use, then tap Next. You can now customize your collage using the tools at the bottom of the screen.