Express middleware: A complete guide – LogRocket Blog
Ashutosh is a JavaScript developer and a technical writer. He writes about the fundamentals of JavaScript, Node.js, React, Next, Vue, and tutorials on building projects.
In this guide, we’ll explore the basics of using Express.js middleware. We’ll create a simple Express API from scratch, then add the middleware to it and demonstrate how to use each tool.
The Express middleware tools we’re going to discuss are must-haves for your initial Express.js app setup. We’ll show you how to get started with them, and you can further configure them according to your application’s unique needs.
We’ll go over the following:
For simplicity’s sake, we’ll create only one endpoint in the example Express API. The complete code is available on GitHub.
Nội Dung Chính
What is Node.js?
Node.js is an open-source JavaScript runtime environment built on top of Chrome’s V8 JavaScript engine.
While Node.js can handle elementary tasks such as creating a simple server, more complex tasks, such as separately handling requests at different routes or serving static files, are more difficult.
What is Express.js?
Express.js is one of the most popular and widely used Node web frameworks. In fact, the “E” in MERN, MEVN, and MEAN Stack stands for “Express.”
According to the official Express.js documentation, “Express is a fast, unopinionated, minimalist web framework for Node.js.” Although Express is minimalist, it is also very flexible, which has led to the development of various middlewares that can be used with Express.js to address almost any task or problem you can think of.
What is Express middleware?
Middleware is software containing functions that execute during the request-response cycle and have access to both the request object (req) and the response object (res). Middleware is executed during the window between when a server receives a request and when it sends a response.
Express middleware includes application-level, router-level, and error handling functionality and can be built-in or from a third party. Since Express.js has limited functionality of its own, an Express app is largely comprised of multiple middleware function calls.
You could write your own middleware for Express.js, but most developers prefer to use and configure built-in and third-party tools for common tasks. In this guide, we’ll show you how to use five of the most popular Express middlewares. But first, a short overview of how middleware functions within an app.
How does middleware work?
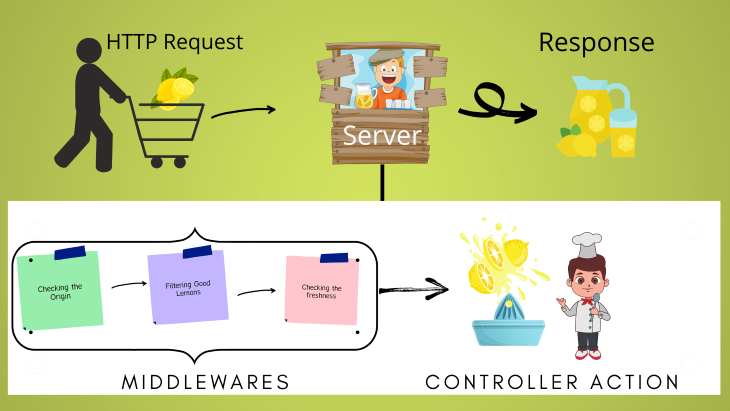
To understand how middleware works, imagine you own a lemonade stand where customers bring their own lemons and you make the lemonade. You’re responsible for evaluating the lemons’ origin and freshness, discarding any subpar lemons, and, finally, making the lemonade.
To reduce your workload, you hire a worker — we’ll call him Larry — to make sure the lemons were grown organically and without any harmful chemicals. In this analogy, Larry is the middleware that functions between you and your customers’ lemons.
Now you’re making a profit, so you hire two other employees, Curly and Moe. Larry checks the lemons’ origin and passes the organically grown lemons to Curly, who discards the rotten lemons and hands the good ones to Moe. Moe verifies their freshness and hands the fresh lemons to you.
Now you can focus on making the lemonade and increasing your profits.
Think of the lemons as your HTTP requests and your lemonade stand as the server. You check a lemon’s origin just as you would with an HTTP request before accepting or rejecting it. Not all requests from a trusted origin are good, so they still need to be filtered. Your employees — Larry, Curly, and Moe — are like middleware for your lemonade program. If at any stage a middleware determines that a request is bad, it has the ability to terminate the request-response cycle.
Once a request has passed all the middleware present in your app, it reaches the controller function — which, in the case of our example, is you (or, more specifically, the act of making the lemonade).
This is, obviously, just a simple example. In a real-life scenario, you may need to use multiple middlewares to perform a single task, such as logging a user.
Setting up an Express.js API
To demonstrate how to use Express.js middleware, we’ll create a simple Express API with a single endpoint.
Run the following commands in the terminal:
mkdir express-apicd express-apinpm init -y
The last command will create a package.json file in your project’s root directory. It will look something like this:
{"name": "express-api","version": "1.0.0","description": "","main": "index.js","scripts": {"test": "echo \"Error: no test specified\" && exit 1"},"keywords": [],"author": "","license": "MIT"}Run the following commands to install express:
npm install express
Create a file named index.js:
touch index.js
Add the following to index.js to create a simple Express API:
const express = require("express");const app = express();// Portconst port = 3000;app.get("/", (req, res) => { res.json({ message: "Hello Stranger! How are you?", });});// Listenapp.listen(port, () => { console.log(`Listening on port: ${port}`);});Run the following command in your project’s root directory to install nodemon as a dev dependency. This is an excellent local development tool.
npm install -D nodemon
With nodemon, you don’t have to restart the Express.js server manually; nodemon detects file changes and restarts the server automatically.
Modify "scripts" in your package.json, like this:
"scripts": { "start": "node index.js", "dev": "nodemon index.js" },Your package.json should look like this:
{ "name": "express-api", "version": "1.0.0", "description": "", "main": "index.js", "scripts": { "start": "node index.js", "dev": "nodemon index.js" }, "keywords": [], "author": "Ashutosh K Singh", "license": "MIT", "dependencies": { "express": "^4.17.1" }, "devDependencies": { "nodemon": "^2.0.6" }}Run the following command to start your Express server:
npm run dev
You’ll see the following message in your terminal once the server has started:
[nodemon] 2.0.5[nodemon] to restart at any time, enter `rs`[nodemon] watching path(s): *.*[nodemon] watching extensions: js,mjs,json[nodemon] starting `node index.js`Listening on port: 3000
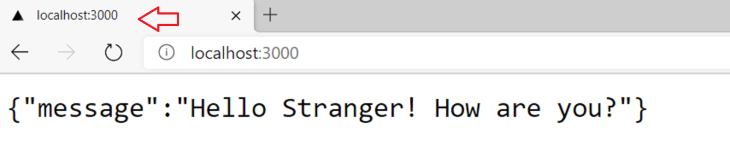
Head over to http://localhost:3000 and you’ll see the following response from the API:
{ "message": "Hello Stranger! How are you?"}Using Express middleware
Now that we’ve set up a simple API, let’s take a detailed look at five of the top Express.js middleware tools and how to use them. We’ll describe each piece of middleware, what it does, and how to set up and use it with our Express API.
morgan
morgan is an HTTP request logger middleware for Node.js that generates logs for each API request. The best part is that you can either use a predefined format or create a new one based on your needs.
To install morgan, run the following command:
npm install morgan
morgan contains many predefined formats that you can use. Many developers prefer to use common, a standard Apache common log output.
Modify your index.js like this:
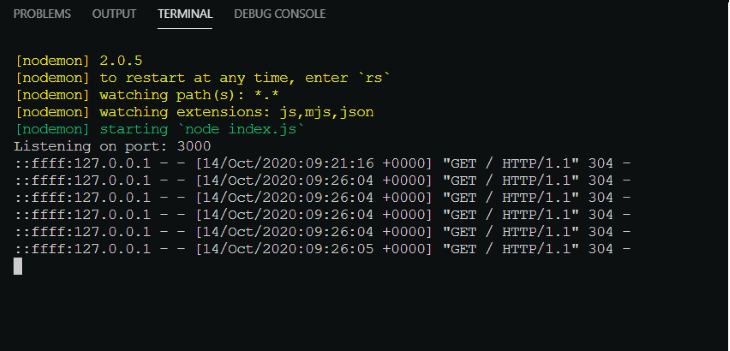
const express = require("express");const morgan = require("morgan")const app = express();// Middlewaresapp.use(morgan("common"))// Portconst port = 3000;app.get("/", (req, res) => { res.json({ message: "Hello Stranger! How are you?", });});// Listenapp.listen(port, ()=>{ console.log(`Listening on port: ${port}`)})And it’s done! Head over to http://localhost:3000, and you’ll see a log like this generated by morgan in the terminal where your server is running:
::ffff:127.0.0.1 - - [14/Oct/2020:09:21:16 +0000] "GET / HTTP/1.1" 304 -
Here’s a screenshot of the same:
It’s important to note that middleware tools are executed according to the order in which you define them.
Helmet
Helmet is a security middleware that protects Express.js apps by setting various HTTP headers.
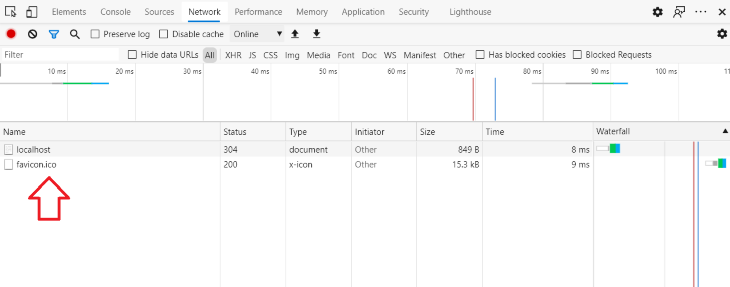
To better understand how Helmet works, head over to http://localhost:3000/ and open the console by pressing CTRL + Shift + J in Chrome or CTRL + Shift + K in Firefox. Now click on the Network tab.

If the Network tab is empty, reload your page with the Network tab opened, and you’ll see it fill up with entries.

You can ignore the favicon request for now; we will get to that later.
Click on the GET / request data. Focus on the Response Headers section.
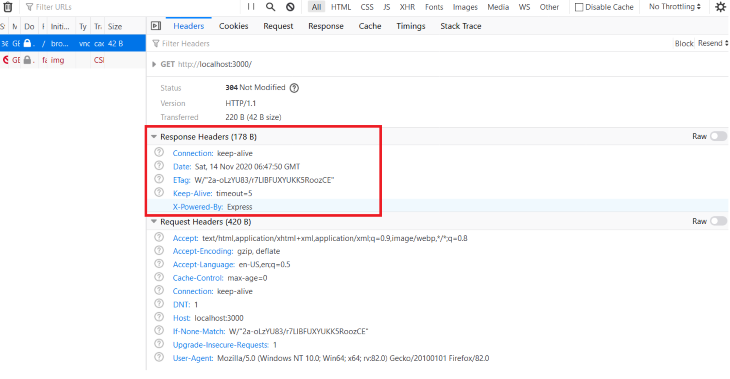
You may not see any vulnerabilities, but, as your API stands right now, attackers and hackers could easily take advantage of it — especially the X-Powered-By: Express field, broadcasts to the world that the app is running Express.js.
Helmet is a collection of 11 small middlewares that, together, protect your app from well-known vulnerabilities and attacks.
Run the following command to install helmet:
npm install --save helmet
Update the index.js file like this to include helmet middleware:
const express = require("express");const morgan = require("morgan")const helmet = require("helmet");const app = express();// Middlewaresapp.use(morgan("common"))app.use(helmet());// Portconst port = 3000;app.get("/", (req, res) => { res.json({ message: "Hello Stranger! How are you?", });});// Listenapp.listen(port, () => { console.log(`Listening on port: ${port}`);});Again, head over to http://localhost:3000/, refresh the page, and open the Response Headers section under the Network tab in Developer tools.
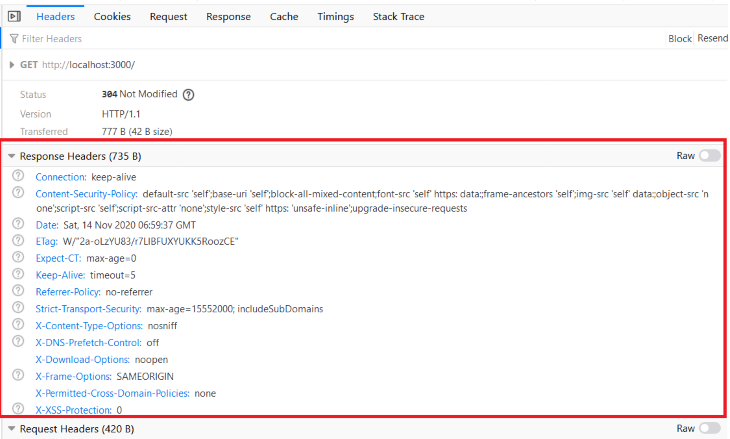
As you can see this time, there are new items in Response Headers, and the X-Powered-By: Express field has disappeared.
You can also configure the helmet() function to disable a middleware like this.
// This disables the `referrerPolicy` middleware but keeps the rest.app.use( helmet({ referrerPolicy: false, }) );cors
CORS stands for cross-origin resource sharing. It is used to enable and configure CORS in Express.js apps.
Imagine you have a full-stack app with a React frontend running on port 3000 and an Express backend server running on port 8000. A request comes from the client (i.e., the React frontend) to the backend Express server, but your request will most likely fail since it is coming from a different origin than the Express server.

You need to tell the server to accept this request even if it comes from a different origin. That’s where cors comes in.
Run the following command to install cors:
npm install --save cors
Update index.js like this:
const express = require("express");const morgan = require("morgan")const helmet = require("helmet");const cors = require("cors");const app = express();// Middlewaresapp.use(morgan("common"))app.use(helmet());app.use(cors())// Portconst port = 3000;app.get("/", (req, res) => { res.json({ message: "Hello Stranger! How are you?", });});// Listenapp.listen(port, () => { console.log(`Listening on port: ${port}`);});The above code app.use(cors()) allows requests from any origin, but this can open your app to security vulnerabilities unless you have a public API where you want to accept requests from any origin.
Let’s consider the above example of the full-stack app with React and Express. Instead of allowing requests from any origin, you can create a whitelist of allowed domains and check to see if the request is from a whitelisted domain.
// whitelistconst whitelist = ['http://localhost:3000', 'http://localhost:3001']const corsOptions = { origin: function (origin, callback) { if (whitelist.indexOf(origin) !== -1) { callback(null, true) } else { callback(new Error('Not allowed by CORS')) } }}app.use(cors(corsOptions));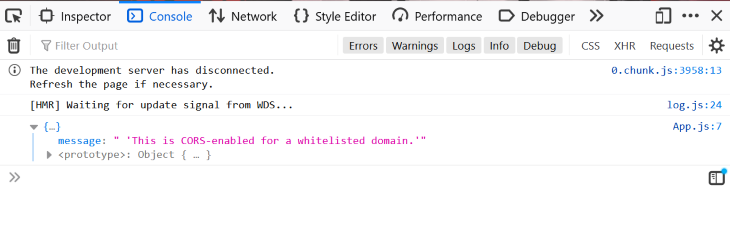
You can read more about CORS on MDN web docs.
Express Rate Limit
Express Rate Limit is a basic rate-limiting middleware for Express.js that, as the name suggests, limits the repeated API requests from the same IP address.
Here’s how to install express-rate-limit:
npm install --save express-rate-limit
Next, import this middleware to index.js and create a variable named limiter to configure express-rate-limit.
const rateLimit = require("express-rate-limit");const limiter = rateLimit({ windowMs: 15 * 60 * 1000, // 15 minutes max: 100 // limit each IP to 100 requests per windowMs });The above code limits each IP address to 100 requests in a 15-minute duration.
Update index.js like this:
const express = require("express");const morgan = require("morgan")const helmet = require("helmet");const cors = require("cors");const rateLimit = require("express-rate-limit");const limiter = rateLimit({ windowMs: 15 * 60 * 1000, // 15 minutes max: 100 // limit each IP to 100 requests per windowMs });const app = express();// Middlewaresapp.use(morgan("common"))app.use(helmet());app.use(cors())app.use(limiter); // apply to all requests// Portconst port = 3000;app.get("/", (req, res) => { res.json({ message: "Hello Stranger! How are you?", });});// Listenapp.listen(port, () => { console.log(`Listening on port: ${port}`);});To better show how to use express-rate-limit, change limit, like this:
const limiter = rateLimit({ windowMs: 60 * 1000, // 1 minute max: 2, // limit each IP to 2 requests per windowMs message: "Too many accounts created from this IP, please try again after a minute" });Head to http://localhost:3000/ and refresh the page three or four times.
Since morgan is still in effect, you can see the logs in the terminal.
::1 - - [14/Nov/2020:08:15:58 +0000] "GET / HTTP/1.1" 304 -::1 - - [14/Nov/2020:08:15:59 +0000] "GET / HTTP/1.1" 304 -::1 - - [14/Nov/2020:08:15:59 +0000] "GET / HTTP/1.1" 429 71
The 429 status code indicates that the user has sent too many requests in a given amount of time (“rate limiting”).
You can also configure the express-rate-limit to apply to specific requests or not all requests.
// apply to all requestsapp.use(limiter); // only apply to requests that begin with /api/app.use("/api/", limiter);Here are some other rate-limiting middlewares worth checking out:
serve-favicon
serve-favicon is a favicon serving middleware. You may remember the failed favicon request when we opened the Network tab in the Helmet section.

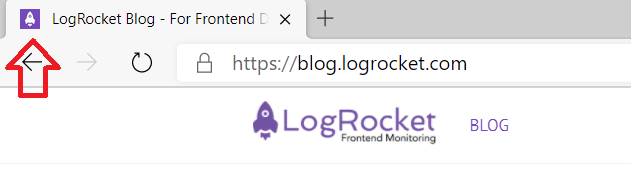
A favicon is a small icon that is often present on the page title’s left side in the address bar. For example, here is the favicon for the LogRocket blog:
To install serve-favicon:
npm install serve-favicon
You will also need a favicon file in your project’s root directory. You can grab the sample favicon from GitHub.
Update the index.js file like this:
const express = require("express");const morgan = require("morgan")const helmet = require("helmet");const cors = require("cors");const rateLimit = require("express-rate-limit");var favicon = require('serve-favicon')const limiter = rateLimit({ windowMs: 15 *60 * 1000, // 15 minutes max: 100, // limit each IP to 100 requests per windowMs message: "Too many accounts created from this IP, please try again after a minute" });const app = express();// Serve Faviconapp.use(favicon('favicon.ico'))// Middlewaresapp.use(morgan("common"))app.use(helmet());app.use(cors())app.use(limiter); // apply to all requests// Portconst port = 3000;app.get("/", (req, res) => { res.json({ message: "Hello Stranger! How are you?", });});// Listenapp.listen(port, () => { console.log(`Listening on port: ${port}`);});If your favicon is present in the public folder, you can use path.
var path = require('path') ...// Serve Faviconapp.use(favicon(path.join(__dirname, 'public', 'favicon.ico')))...Head over to http://localhost:3000/; you will see that a favicon is present on the page.
Now open the Network tab and reload the page.
serve-favicon also caches the favicon in memory to improve performance by reducing disk access.
By default, serve-favicon caches the favicon for one year.
Cache-Control: public, max-age=31536000
You can also change Cache-Control by passing an option object with a property of maxAge in favicon.
// Serve Faviconapp.use( favicon("favicon.ico", { maxAge: 500 * 60 * 60 * 24 * 1000, }));Conclusion
In this article, we discussed how to use five Express.js middlewares. Of course, you may want to explore other middlewares for your Express API, but the tools we examined in this guide can be used in almost any application and provide an excellent snapshot what Express middleware can do to enhance your API.
200’s only  Monitor failed and slow network requests in production
Deploying a Node-based web app or website is the easy part. Making sure your Node instance continues to serve resources to your app is where things get tougher. If you’re interested in ensuring requests to the backend or third party services are successful,  https://logrocket.com/signup/
Deploying a Node-based web app or website is the easy part. Making sure your Node instance continues to serve resources to your app is where things get tougher. If you’re interested in ensuring requests to the backend or third party services are successful, try LogRocket
LogRocket is like a DVR for web and mobile apps, recording literally everything that happens while a user interacts with your app. Instead of guessing why problems happen, you can aggregate and report on problematic network requests to quickly understand the root cause.
LogRocket instruments your app to record baseline performance timings such as page load time, time to first byte, slow network requests, and also logs Redux, NgRx, and Vuex actions/state.
LogRocket instruments your app to record baseline performance timings such as page load time, time to first byte, slow network requests, and also logs Redux, NgRx, and Vuex actions/state. Start monitoring for free


