ESP8266 Not Responding To At Commands – Circuits Gallery
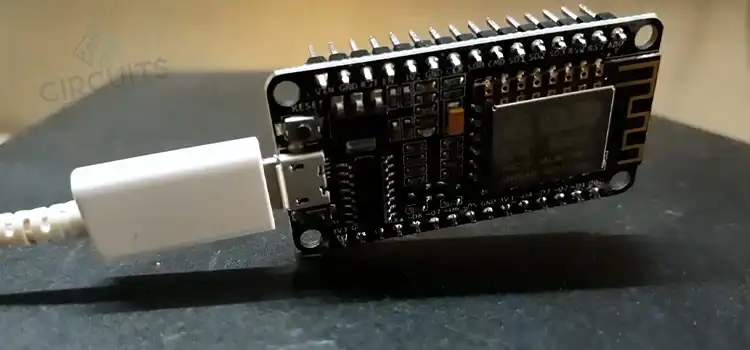
If your ESP8266 not responding to At Commands then you need to flash the ESP8266 with the AT firmware. ESP8266 is an external router module with built in TCP/ IP networking software and microcontroller capacity. The ESP8266 help you to control and monitor any electrical device from any place in the world.
Nội Dung Chính
What Do You Do If Your ESP8266 Not Responding To At Commands?
You need to flash the ESP8266 with the AT firmware. Follow the steps below:
- Download firmware from the link:
https://bbs.espressif.com/
Go to SDKs under downloads and click on “latest release”.
- Download esptool.py or NodeMCU flasher from the links below
esptool.py flasher – https://github.com/espressif/esptool
NodeMCU flasher – https://github.com/nodemcu/nodemcu-flasher
You can also see the guidelines to flash the ESP8266.
How Do You Send Commands To ESP8266?
To send a command, at first you are going to need some parts. They are 1 x Arduino UNO, 1 x ESP8266-01 module, 1 x 1kΩ resistor, 1 x 2.2kΩ resistor, 1 x 10kΩ resistor, Jumper wires, and 1 x LED light.
Now you need to upload your Arduino sketch. You can use the sketch below. Copy the sketch and paste it onto the Arduino board.
Code:
/*
* Rui Santos
* Complete Project Details https://randomnerdtutorials.com
*/
// Send Data From Arduino to ESP8266 via Serial @ baud rate 9600
void setup() {
Serial.begin(9600);
}
void loop() {
Serial.print(” hello world “);
delay(1000);
}
Follow the instructions:
- Download the ESPlorer IDE.
Link: https://esp8266.ru/esplorer/#tutorials
- Unzip the folder and go to the main folder.
- Run esplorer.jar and open the ESPlorer.
Now right your script. You can copy and paste the code into the ESPlorer IDE window from below:
ledOn = 0
pin=4
gpio.mode(pin,gpio.OUTPUT)
uart.on(“data”, 3,
function(data)
print(“Received from Arduino:”, data)
if data==” hello world ” then
if ledOn==0 then
ledOn = 1
gpio.write(pin,gpio.HIGH)
print(“LED On”)
else
ledOn = 0
gpio.write(pin,gpio.LOW)
print(“LED Off”)
end
end
end, 0)
Now follow these steps to send the commands to your ESP8266.
- Connect the FTDI programmer to the computer.
- Set the bad route as 9600.
- Now select the FTDI programmer port.
- Press open or close.
- Select the Node+MycroPhython tab.
- Copy the script and paste it into the ESPlorer.
Complete the circuit following this tutorial.
Now you can see the LED light is turning on and off every second. So, the Arduino is sending the command and the ESP is receiving the command.
How Do I Know If My ESP8266 Is Working?
Follow these steps to check whether your ESP8266 is working or not.
- Open Arduino IDE.
- Go to the file and scroll up or down to ESP8266.
- Open blink and upload the code (you can decrease the delay from the code).
- Now you can see a blue light blinking. That means the ESP8266 is working.
How Do I Reset My ESP8266?
There are many ways to restart the Esp8266. They are huhnitor, refresh ESP8266, using restart sketch, serial.huhu.me, Arduino IDE
Serial.huhu.me
- First, open serial.huhu.me with a browser such as chrome, Microsoft edge, opera, etc.
- Click to connect.
- Plug the Esp8266 chip.
- Click on the port that pops up on the list. Then click connect.
- Type ‘reset’ and press enter.
- Type ‘save’ and again press enter.
Huhnitor
- Install Huhnitor.
- Open Huhnitor.
- Plug the Esp8266 board. It will automatically connect with the board.
- Type ‘reset’ and press enter.
- Type ‘save’ and again press enter.
Arduino IDE
- Install ardino IDE (from https://www.arduino.cc/en/software).
- Open the Arduino IDE.
- Plug the Esp8266 board.
- Now select the COM port of the board at Tools > Port.
- Then select ‘Newline and 115200 baud’.
- Type ‘reset’ and press enter.
- Type ‘save’ and again press enter.
Using Restart Sketch
- Upload the ESP8266 Sketch Eraser code to the board.
- Open the Serial Monitor and set it to 115200 baud rate.
- Press the “Reset” button on the board to restart the ESP8266.
- The Serial Monitor will display the progress of the erasing process.
- Once the process is complete, upload the desired sketch to the board.
In this process, the memory of the ESP8266 is fully erased.
What Are At Commands ESP8266?
The AT command or attention commands are given by the hosts for controlling all of the operations of the ESP8266 like restarting, connecting to wifi, changing the mode of the operations, etc. It helps the Arduino or other controller to communicate with the ESP8266 module.
The AT commands have three parts. They are:
- Prefix (basically known as ‘AT’)
- Body (the instructions or commands that are to be executed using ‘+’ or ‘&’ operators)
- Terminator (the carriage return < CR > )
There are different types of AT commands.
- Test command
- Query command
- Write command
- Execution command
Conclusion
In this article, we have discussed the ESP8266 microchip. It is a useful device because will help you to control any kind of device. We also have to learn about sending the command to the eSP8266, resetting it, determining if it is working or not, about AT commands, and why it is not responding to the AT commands.


