Documenting your Express API with Swagger – LogRocket Blog
Editor’s note: This post on documenting an Express.js API with Swagger was last updated on 9 December 2022 to add sections on how to connect Swagger to Node.js, the benefits of Swagger, and how to use CSS to customize Swagger. This update also addresses errors in the code present in the previous version.
We all know about the importance of documenting your APIs. In terms of Node.js APIs, whether they were built on top of Express.js or any other framework, you’ve got plenty of open source options. These include apiDoc, docbox, and others.
In this tutorial, we will explore using Swagger with an Express.js API. Swagger is an open source set of tools that enable you to design, build, document, and use RESTful web services. It was created to be mostly agnostic, meaning you can use it with pretty much any of your favorite languages and frameworks.
In our example, we’ll use two libraries: swagger-ui-express and swagger-jsdoc. The first is a module that allows you to feed a Swagger UI (auto-generated views based on the swagger-ui project) from a swagger.json file or an inline object.
The second project is about integrating Swagger using JSDoc comments throughout your code. This is useful, especially when you have extensive APIs and dozens of models.
Jump ahead:
Nội Dung Chính
Benefits of using Swagger
Before we get into the Swagger integration into your Node.js application, let’s examine why Swagger is important for any application — how it helps in the development process.
One significant benefit of Swagger is that it helps to understand how API works for the client side of an application. Swagger synchronizes the API between the client and server side of the application. That way, developers who work in frontend can understand how the API works and integrate the APIs into the client side.
Another benefit of using Swagger is that it’s comprehensive for developers and non-developers. Everyone involved in product development, including product managers, stakeholders, and developers, can try out API in UI without needing to run the server independently.
We can customize the API documentation however we like. So, in summary, Swagger’s main advantage is that it makes the API development process faster and more efficient.
Now, we know the advantages of having Swagger in an application, let’s look into setting it up and configuring it in an application.
Express.js API application setup
This tutorial won’t cover anything related to Express API building. We already have a ready-to-use example that you can clone to your local machine before implementing.
It’s a simple API that allows you to manage an in-memory list of books. Feel free to increment it with your customizations.
Once you have this in your app, run the commands below in the terminal:
npm installnpm i swagger-ui-express swagger-jsdoc
These are going to download the required dependencies into your application. Now it’s time to integrate Swagger into your Node.js application.
How to connect Swagger to Node.js
To connect Swagger to your Node.js application, import swagger-ui-express and swagger-jsdoc in server.js:
const express = require("express"), bodyParser = require("body-parser"), swaggerJsdoc = require("swagger-jsdoc"), swaggerUi = require("swagger-ui-express");Those are the two respective objects representing the libraries we’ve imported. Next, add the following code before the app’s listen function:
const options = { definition: { openapi: "3.1.0", info: { title: "LogRocket Express API with Swagger", version: "0.1.0", description: "This is a simple CRUD API application made with Express and documented with Swagger", license: { name: "MIT", url: "https://spdx.org/licenses/MIT.html", }, contact: { name: "LogRocket", url: "https://logrocket.com", email: "[email protected]", }, }, servers: [ { url: "http://localhost:3000", }, ], }, apis: ["./routes/*.js"],};const specs = swaggerJsdoc(options);app.use( "/api-docs", swaggerUi.serve, swaggerUi.setup(specs));As you see in the first line, this configuration object sets an OpenAPI to v3.1.0.
Swagger uses the Open API Specification, a standard, language-agnostic interface for RESTful APIs that allows humans and machines to understand the capabilities of a web service without having to access the source code or inspect the network traffic.
You can refer to the official docs for all available settings for each version. Here, we’re using just the basics: API info, name, title, description, license, the contact of the API owner, and more.
The API’s property is essential because it searches for the model and endpoint definitions, so inform it correctly.
Finally, we’re using the swaggerJsdoc function to scan through the options passed in as a param and return the converted Swagger specification object. This one, in turn, can be used along with the swaggerUi setup process.
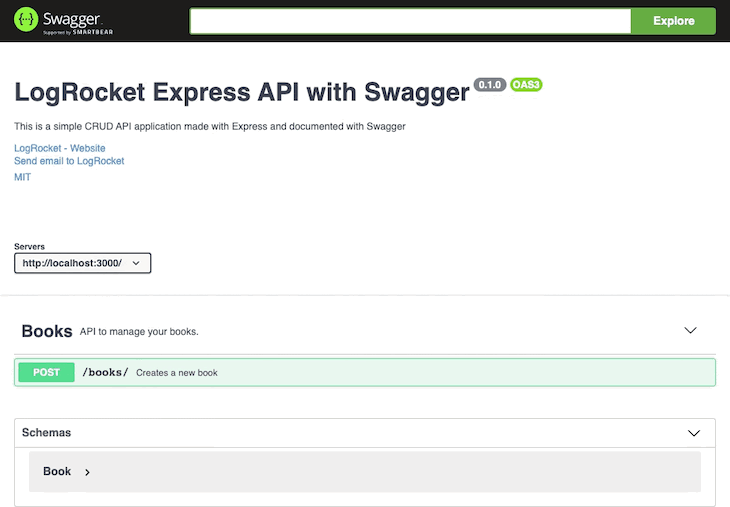
You can now start the application via the npm start command. You’ll see the following screen when accessing the http://localhost:3000/api-docs/ URL:
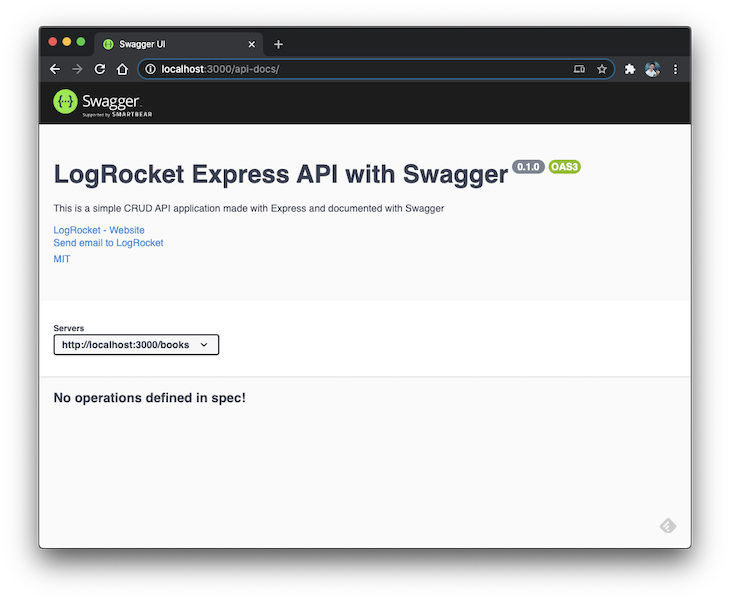
Note, that we still don’t have any operations defined in the spec. This happens because we need to map those operations to the routes explicitly. Otherwise, Swagger can’t figure out the API endpoints on its own.
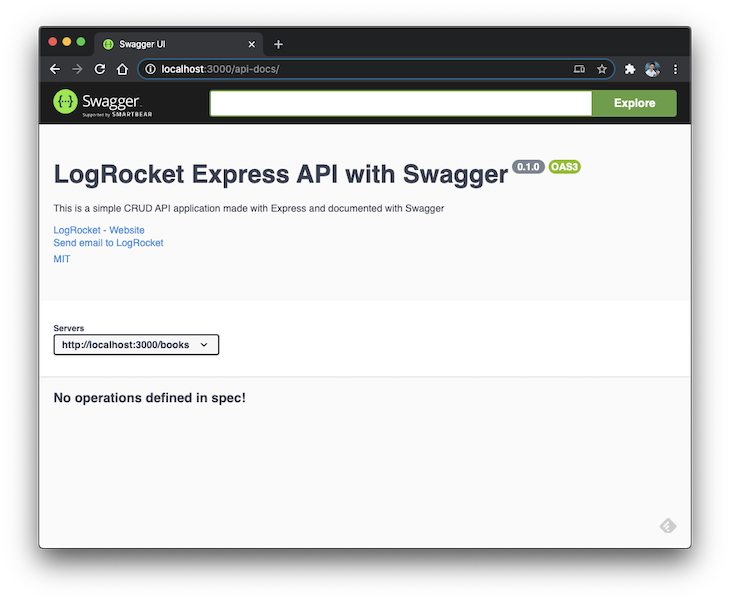
Optionally, you can add a search bar to your UI just in case your API has too many operations. For this, change the implementation to the following:
app.use( "/api-docs", swaggerUi.serve, swaggerUi.setup(specs, { explorer: true }));Now, the search bar will show up:
Creating the API model
Like many significant frameworks and API architectures, data is encapsulated into models to become more easily accessible. Swagger also expects your APIs to have models and for you to define them.
Go to routes/books.js and place the following code at the beginning of the file:
/** * @swagger * components: * schemas: * Book: * type: object * required: * - title * - author * - finished * properties: * id: * type: string * description: The auto-generated id of the book * title: * type: string * description: The title of your book * author: * type: string * description: The book author * finished: * type: boolean * description: Whether you have finished reading the book * createdAt: * type: string * format: date * description: The date the book was added * example: * id: d5fE_asz * title: The New Turing Omnibus * author: Alexander K. Dewdney * finished: false * createdAt: 2020-03-10T04:05:06.157Z */
Remember the JSDocs we’ve talked about? JSDocs now enters the scene and helps us to set up the rest of the Swagger spec definitions through the @swagger annotation. Here, you can define as many schemas as you want. In our case, we’re just defining the domain Books.
The required property receives the list of attributes that must be filled in the requests. This step is essential for letting people know what they must send when using your API.
The properties property describes detailed information about your model attributes. Each attribute must have a name followed by its type, description (optional), and format (you can validate values too). Please refer to Swagger data types for a complete list of available data types.
Finally, you can provide an example of request data for this schema model. That’s going to be useful later. When you restart the app and refresh the page, you’ll see the screen below:
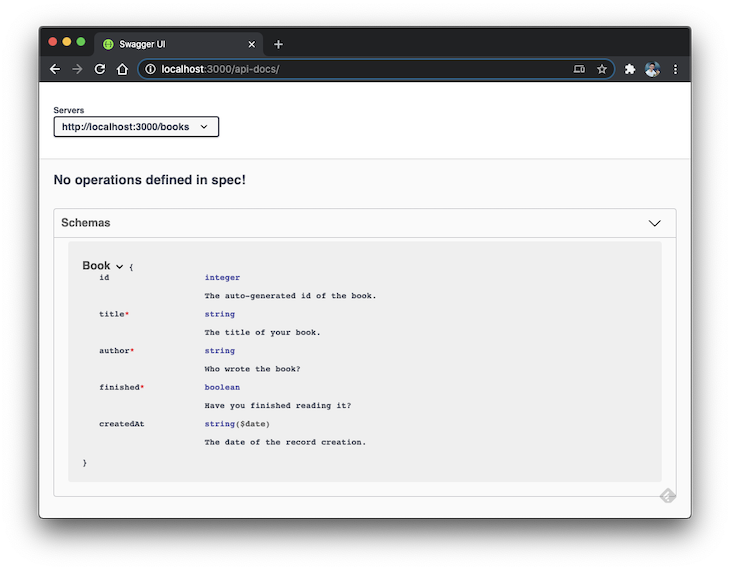
Much better, isn’t it?
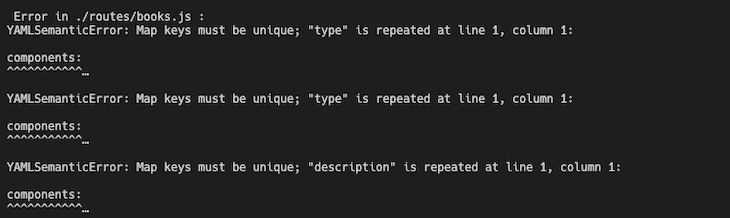
It’s important to note that if you’re facing a YAMLSemanticError in the schema, make sure to check the indentation in the YAML configuration:
Integrating operations into the routes
Now, we have Swagger schema integrated into the routes. However, we still don’t have any operations. Let’s fix that. Right after the previous JSDoc comment, add the following:
/** * @swagger * tags: * name: Books * description: The books managing API * /books: * post: * summary: Create a new book * tags: [Books] * requestBody: * required: true * content: * application/json: * schema: * $ref: '#/components/schemas/Book' * responses: * 200: * description: The created book. * content: * application/json: * schema: * $ref: '#/components/schemas/Book' * 500: * description: Some server error * */
Let’s analyze it in parts, starting with the Swagger tags. A tag allows you to create a section within the Swagger docs. All the routes assigned to this tag will appear under the same division. It’s an organizational setting.
In our example, all the endpoints will be mapped to the same tag. Next, we set up our first route: the book’s creation. It’s pretty straightforward. First, define a title and specify the tag to which the path will be attached.
Then, we have the request and the response. Within the request, define three things: whether the request is required, the content type of the request, and the schema from which it must be processed.
The schemas can be referenced through the #components/schemas Swagger operator. As for the response, define the HTTP response codes and the properties for each of them. We’re just worried about the happy path with an HTTP 200.
Go ahead and test the new operation directly within the Swagger UI page:
Now, you can see where the example values take place. It’s easier to provide your users with sample data as a reference for when they want to perform stuff.
Below, you can find the code for all the other operations:
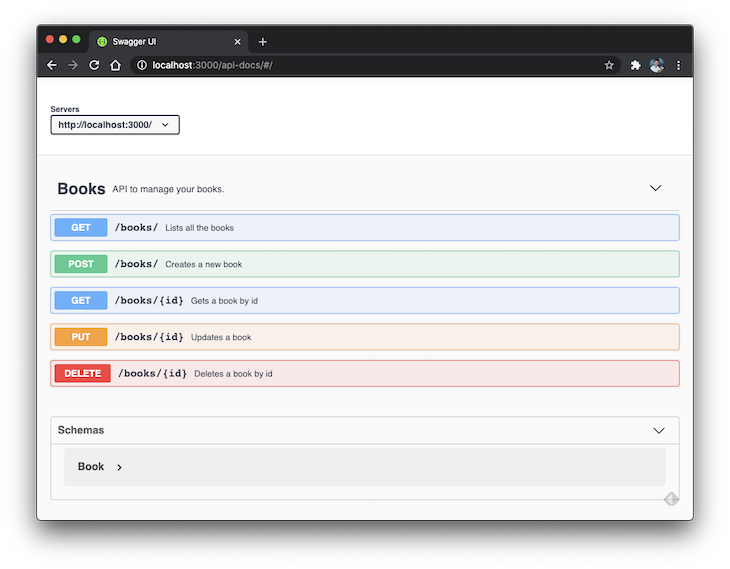
/** * @swagger * tags: * name: Books * description: The books managing API * /books: * get: * summary: Lists all the books * tags: [Books] * responses: * 200: * description: The list of the books * content: * application/json: * schema: * type: array * items: * $ref: '#/components/schemas/Book' * post: * summary: Create a new book * tags: [Books] * requestBody: * required: true * content: * application/json: * schema: * $ref: '#/components/schemas/Book' * responses: * 200: * description: The created book. * content: * application/json: * schema: * $ref: '#/components/schemas/Book' * 500: * description: Some server error * /books/{id}: * get: * summary: Get the book by id * tags: [Books] * parameters: * - in: path * name: id * schema: * type: string * required: true * description: The book id * responses: * 200: * description: The book response by id * contens: * application/json: * schema: * $ref: '#/components/schemas/Book' * 404: * description: The book was not found * put: * summary: Update the book by the id * tags: [Books] * parameters: * - in: path * name: id * schema: * type: string * required: true * description: The book id * requestBody: * required: true * content: * application/json: * schema: * $ref: '#/components/schemas/Book' * responses: * 200: * description: The book was updated * content: * application/json: * schema: * $ref: '#/components/schemas/Book' * 404: * description: The book was not found * 500: * description: Some error happened * delete: * summary: Remove the book by id * tags: [Books] * parameters: * - in: path * name: id * schema: * type: string * required: true * description: The book id * * responses: * 200: * description: The book was deleted * 404: * description: The book was not found */Ideally, those mappings should be placed above each Express.js routing function. However, we’re concentrating them in a single place for simplicity.
Mapping the endpoints
Now, we’re segregating the operations under two main categories: the ones that receive an id parameter and those that do not. That’s necessary for Swagger to understand how to match the routes with the proper path params.
Whenever you have parameters in your endpoints, regardless of their type, you must inform the details under the parameters property.
Here’s the result with all the endpoints correctly mapped:
Swagger customization with CSS
You can customize Swagger UI by implementing a custom CSS into Swagger integration. To do that, add customCssUrl option into swaggerUi.setup:
Here, we pass the custom CSS file into customCssUrl option. It will change the Swagger UI with custom styling.
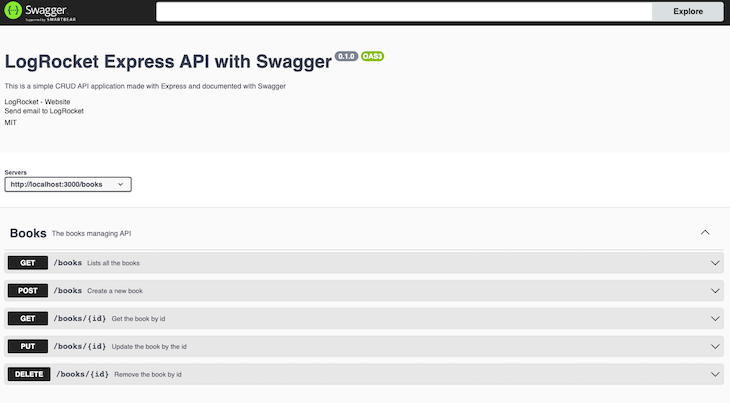
Here’s how it will look before the custom CSS file:
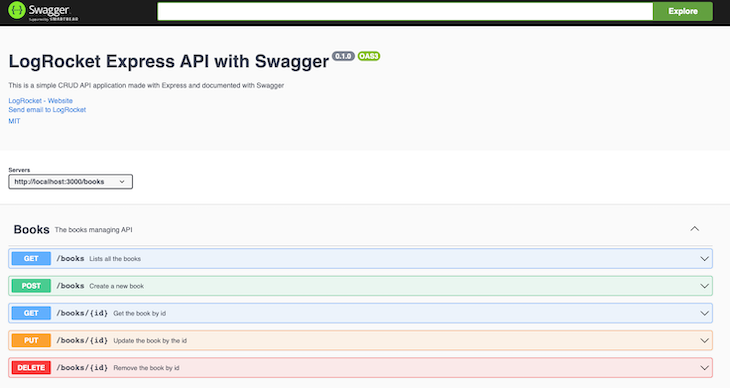
Now, take a look at what it will look like after:
Conclusion
You may test each endpoint individually to ensure it’s working precisely as your Postman requests.
Swagger is capable of way more than merely documenting your APIs. A quick read over the official docs will give you a better understanding of its power. Remember that documenting should be part of your team culture. Otherwise, your docs won’t always be up to date.
You can find the complete source code here. Good luck!
200’s only  Monitor failed and slow network requests in production
Deploying a Node-based web app or website is the easy part. Making sure your Node instance continues to serve resources to your app is where things get tougher. If you’re interested in ensuring requests to the backend or third party services are successful,  https://logrocket.com/signup/
Deploying a Node-based web app or website is the easy part. Making sure your Node instance continues to serve resources to your app is where things get tougher. If you’re interested in ensuring requests to the backend or third party services are successful, try LogRocket
LogRocket is like a DVR for web and mobile apps, recording literally everything that happens while a user interacts with your app. Instead of guessing why problems happen, you can aggregate and report on problematic network requests to quickly understand the root cause.
LogRocket instruments your app to record baseline performance timings such as page load time, time to first byte, slow network requests, and also logs Redux, NgRx, and Vuex actions/state.
LogRocket instruments your app to record baseline performance timings such as page load time, time to first byte, slow network requests, and also logs Redux, NgRx, and Vuex actions/state. Start monitoring for free


