Building a simple login form with Node.js – LogRocket Blog
Editor’s note: This guide to building a simple login form with Node.js was last updated on 29 March 2023 to include more information on login forms and add a new section on styling the login form with CSS. Visit our archives here to learn more about Node.js.
A login form is used on the frontend of a website, web app, or mobile app to collect information needed to verify whether a user has been registered in a system’s database. The authentication process is simple.
First, the user submits some credentials — typically an email and password — to the backend through a login form. Then, the backend application checks if the email and password are in the database. From there, the backend app will grant users access or require them to register.
In this tutorial, we’ll learn how to build a simple login form with Node.js. The form will require a user to register an account. Then, we’ll use the entered information and store it in a MySQL database before signing the user in.
Now that we have an overview of the project let’s start building!
Jump ahead:
Nội Dung Chính
Getting started with building a Node.js login form
You’ll need Node.js and npm installed on your local development machine to follow this tutorial. If you’re not sure if you have them installed, run the following commands to check their availability:
# To check if Node is installed, run:
node -v

# To check if Node is installed, run:
npm -v
Besides Node.js, you’ll need a MySQL server installed and running. You can use the standalone MySQL installer or server distributions with MySQL built-in, such as WAMP and XAMP.
Building a Node.js login form
Before granting a user access to resources on the server side, you’d need to identify them and validate their request. This process is known as user authentication.
The most common way to authenticate users in your application is by building a login system. A login system comprises a page with a form that the user will use to submit their login details (typically username and password). The authentication will then take place on the server side.
Another strategy is to integrate OAuth into your login system. This lets users log into your application using their accounts with third-party platforms such as GitHub, Google, or Facebook. This method is known as third-party authentication.
Node.js is the perfect framework for building a login system, thanks to its minimal design. With just a few lines of code, you can set up the route and validate the user’s login information sent in the request. Node.js also works well with a wide variety of databases, including SQL and NoSQL databases.
Setting up the Node.js application
Let’s create a new folder for the app and navigate to the folder using the command line with the cd directive:
cd path/to/your/folder
Then, run the following command to install the dependencies required for this tutorial:
npm i express mysql dotenv hbs bcryptjs
Let me explain what each library is for:
- Express.js: For creating API and web routes and setting up the app backend
- MySQL: For connecting to our local MySQL server
- dotenv: For storing environmental variables that should not be exposed in the app source code
- hbs: For rendering HTML on the server
- Bcryptjs: For hashing passwords
In addition, I recommend installing nodemon, which automatically restarts the server when file changes are detected, saving you precious time in development. Install it with the following command:
npm i nodemon --save
Finally, open your app’s package.json file with a code editor and add the following field inside the scripts object:
"start": "nodemon app.js"
Now, we’re finished with the project setup. Next, we’ll connect to our MySQL database and create a table to store user login information.
Creating a database connection in Node.js
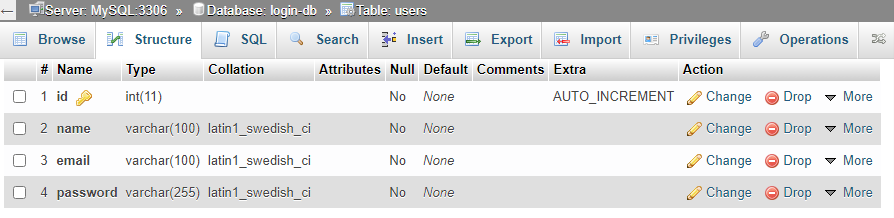
Start by creating a new database in your MySQL environment named login-db. After that, build a users table with the ID, name, email, and password. Set the ID to INT and AUTOINCREMENT, and the name, email, and password to VARCHAR.
In the end, the database in phpMyAdmin will look like this:
Then, create an .env file in your app’s root folder. Inside .env, add your database name, host domain, username, and password values to their corresponding variable names. These are the default values for MySQL:
DATABASE = login-db
DATABASE_HOST = localhost
DATABASE_ROOT = root
DATABASE_PASSWORD =
Once you’ve set the variables, create app.js in the root folder. Open it with your text editor and import the following dependencies:
const express = require('express');
const mysql = require("mysql")
const dotenv = require('dotenv')
Then, create an Express.js app:
const app = express();
After that, specify the path to the environmental variables:
dotenv.config({ path: './.env'})
Here, we’re telling the server to find .env inside the same directory as app.js.
Next, access the variables from process.env and pass them to their respective connection properties:
const db = mysql.createConnection({
    host: process.env.DATABASE_HOST,
    user: process.env.DATABASE_USER,
    password: process.env.DATABASE_PASSWORD,
    database: process.env.DATABASE
})
Now that you have configured the connection with your database credentials, go ahead and connect the database:
db.connect((error) => {
    if(error) {
        console.log(error)
    } else {
        console.log("MySQL connected!")
    }
})
The connection will either succeed or fail. If it fails, we’ll see error in the callback and print it on the console. Otherwise, we output the "MySQL connected!" string.
Finally, start the server by running the following command on your terminal:
npm start
If everything goes well, you’ll see MySQL is connected. Let’s create the homepage.
Setting up the homepage and layout
Inside your project’s root folder, create the views folder. Then, in views, create index.hbs, register.hbs, and login.hbs. As you may have guessed, these are the Handlebars files for the home, login, and register pages.
Now, for each of them, include the base HTML markup:
<!DOCTYPE html>
<html lang="en">
<head>
    <link href="https://cdn.jsdelivr.net/npm/[email protected]/dist/css/bootstrap.min.css" rel="stylesheet" integrity="sha384-iYQeCzEYFbKjA/T2uDLTpkwGzCiq6soy8tYaI1GyVh/UjpbCx/TYkiZhlZB6+fzT" crossorigin="anonymous">
  </head>
</head>
<body>

{{!-- Navigation links --}}
    <nav>
        <h4>Node MySQL Login</h4>
        <ul>
            <li><a href="/">Home</a></li>
            <li><a href="/login">Login</a></li>
            <li><a href="/register">Register</a></li>
        </ul>
    </nav>

    {{!-- Body of each page will go here --}}
</body>
</html>
In the head section, we linked the two link elements to our custom style sheet and the Bootstrap CSS library. We also created a navigation menu that will be reused across all pages to include links to the login and register pages.
Styling the login form with CSS
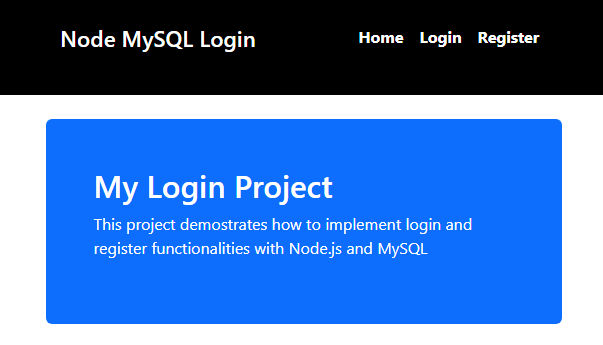
The frontend of this application will be styled using the Bootstrap CSS library, which we linked in the head section of our markup. Styling will be applied to all elements via Bootstrap classes, such as m-5, p-5, text-white, and so on. Next, inside index.hbs, use the following markup within the <body> tags to add a jumbotron to your website’s homepage:
    {{!-- Body --}}
    <div class="container mt-4">
        <div class="mt-4 p-5 bg-primary text-white rounded">
            <h1>My Login Project</h1>
            <p>This project demonstrates how to implement login and register functionalities with Node.js and MySQL </p>
        </div>
    </div>
Then, specify the view engine as Handlebars in app.js:
app.set('view engine', 'hbs')
From there, import path to specify the static assets used in your Handlebars templates:
// other imports
const path = require("path")

const publicDir = path.join(__dirname, './public')

app.use(express.static(publicDir))
Next, register a route for rendering index.hbs on the homepage:
app.get("/", (req, res) => {
    res.render("index")
})
At the file bottom, add the following code to configure the port for the app in app.listen():
app.listen(5000, ()=> {
    console.log("server started on port 5000")
})
Start your server by running npm start, then navigate to localhost:5000 to view the homepage:
Next, we’ll create the register and login forms.
Creating the login and register forms in Node.js
Open register.hbs in views and include the following markup within <body> and after <nav>:
<div class="container mt-4">
        <div class="card" style="width: 18rem;">
            <div class="card-header">Register Form</div>
            <div class="card-body">
                <form action="/auth/register" method="POST">
                    <div class="mb-3">
                        <label for="name-reg" class="form-label">Name</label>
                        <input type="text" class="form-control" id="name-reg" name="name">
                    </div>
                    <div class="mb-3">
                        <label for="email-reg" class="form-label">Email</label>
                        <input type="text" class="form-control" id="email-reg" name="email">
                    </div>
                    <div class="mb-3">
                        <label for="password-reg" class="form-label">Password</label>
                        <input type="password" class="form-control" id="password-reg" name="password">
                    </div>
                    <div class="mb-3">
                        <label for="password-conf-reg" class="form-label">Confirm Password</label>
                        <input type="password" class="form-control" id="password-conf-reg" name="password-confirm">
                    </div>

                    <button type="submit" class="btn btn-primary">Submit</button>
                </form>
            </div>
        </div>
    </div>
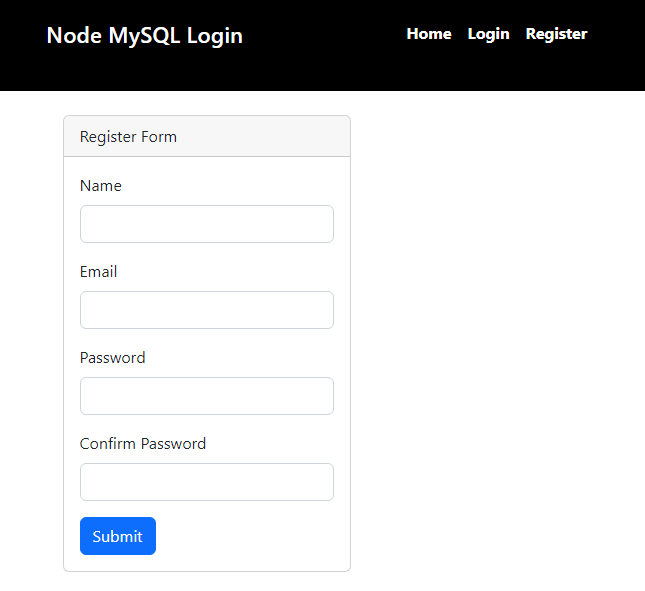
This creates an HTML form with inputs for the user’s name, email, password, and password confirmation. The form will post the data to the route we specified in the action attribute.
Next, in app.js, register the route to the register page and save the file:
app.get("/register", (req, res) => {
    res.render("register")
})
After that, navigate to your browser and select Register in the navigation bar. You should see the registration form:
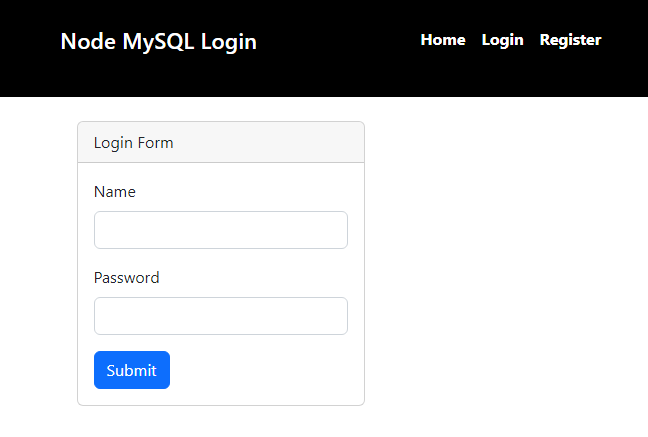
To create the login form, open login.hbs inside views and use the same form as above. Delete inputs and labels for the email and password confirmation. In addition, change id attributes and the card title from Register Form to Login Form.
Next, register the login route in app.js:
app.get("/login", (req, res) => {
    res.render("login")
})
Save the files and go to the browser. It should appear like this when you select Login on the navigation bar:
Now that we’ve finished the work on the frontend, let’s shift our focus to registering the user in the backend.
Registering the user
The form values will be sent to the /auth/register route when the registration form is submitted. Let’s build it!
In app.js, begin by importing bcrypt:
const bcrypt = require("bcryptjs")
Next, configure the Express.js server to receive the form values as JSON:
app.use(express.urlencoded({extended: 'false'}))
app.use(express.json())
Then, create auth/register and retrieve the user’s form values:
app.post("/auth/register", (req, res) => {
    const { name, email, password, password_confirm } = req.body

    // db.query() code goes here
})
Now that you have the values query the database to check if the email is on the server. That way, a user cannot register multiple times with the same email:
    db.query('SELECT email FROM users WHERE email = ?', [email], async (error, res) => {
       // remaining code goes here
    })
If there is an error while executing the query, we’ll access error and display it on the server’s terminal:
        if(error){
            console.log(error)
        }
        // other code
Next, check if there is a result and if the two passwords are a match. If any conditions are true, re-render the register page to notify the user the email is already in use or that the passwords don’t match:
        if( result.length > 0 ) {
            return res.render('register', {
                message: 'This email is already in use'
            })
        } else if(password !== password_confirm) {
            return res.render('register', {
                message: 'Passwords do not match!'
            })
        }
       // other code
If the conditions above are not true, the user will be added to the database. Encrypt the password and post it to the database along with the other values:
        let hashedPassword = await bcrypt.hash(password, 8)

        db.query('INSERT INTO users SET?', {name: name, email: email, password: hashedPassword}, (err, res) => {
            if(error) {
                console.log(error)
            } else {
                return res.render('register', {
                    message: 'User registered!'
                })
            }
        })
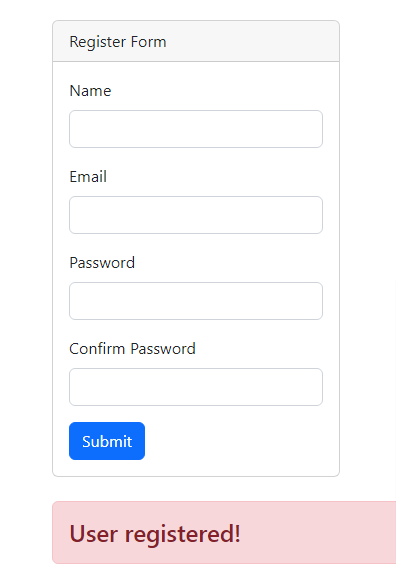
If there is an error, we’ll print it on the console. Otherwise, re-render the page and send a message to the user that they are registered. It’s important to note that to show the user messages, you’ll need to edit register.hbs and include the following template below <div>:
{{#if message }}
    <h4 class="alert alert-danger mt-4">{{message}}</h4>
{{/if}}
Finally, save all file changes and test the app on your browser:

Conclusion
I hope you had as much fun following this tutorial as I did creating it. Feel free to fork the from the GitHub repository and play with the code. After all, getting your hands dirty is the best way to learn. If you have questions, comment below!
200’s only  Monitor failed and slow network requests in production
Deploying a Node-based web app or website is the easy part. Making sure your Node instance continues to serve resources to your app is where things get tougher. If you’re interested in ensuring requests to the backend or third party services are successful,  https://logrocket.com/signup/
Deploying a Node-based web app or website is the easy part. Making sure your Node instance continues to serve resources to your app is where things get tougher. If you’re interested in ensuring requests to the backend or third party services are successful, try LogRocket
LogRocket is like a DVR for web and mobile apps, recording literally everything that happens while a user interacts with your app. Instead of guessing why problems happen, you can aggregate and report on problematic network requests to quickly understand the root cause.
LogRocket instruments your app to record baseline performance timings such as page load time, time to first byte, slow network requests, and also logs Redux, NgRx, and Vuex actions/state.
LogRocket instruments your app to record baseline performance timings such as page load time, time to first byte, slow network requests, and also logs Redux, NgRx, and Vuex actions/state. Start monitoring for free
Share this:


